Showing posts with label Chinese. Show all posts

Monday, May 21, 2012

Fried Shrimp in Salted Egg Yolk

I hope everyone's weekend was way better than mine.  I was in pain all weekend long as a result of yet another steroid shot to my injured elbow ...Ughhh, being the fourth shot within the last six months, I think they have outlived their usefulness.  As a result, there has been no significant effect on the pain anymore.  It is still at the same intensity as it was before the last one...they need to find a better treatment regimen for me... 


On the bright side, I cooked an excellent dish today.  Cooking is like my oasis in the desert that helps to keep me going when things are not going as they should.  It helped keep me sane when I went through a rough patch and still does help keep my brain occupied now since I do not use it as much as I did when I worked... another added advantage is that it helps exercise my elbow and hand to keep it moving....hehehe... okay, enough about my problem and moving on to the good part...


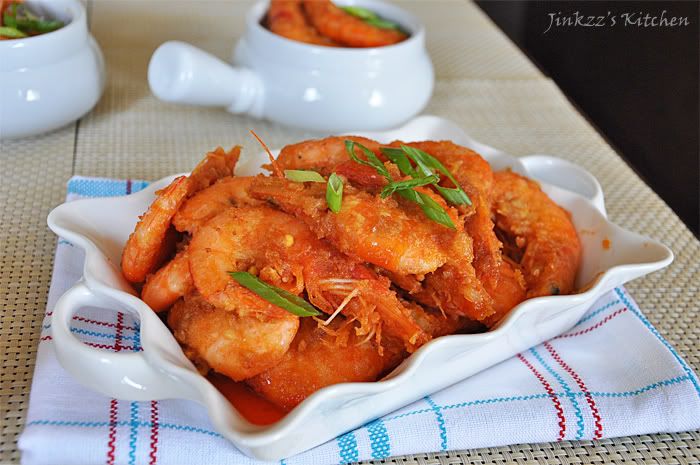
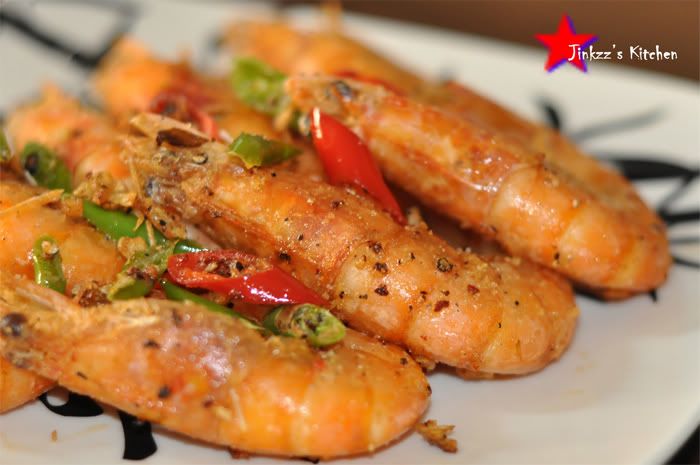
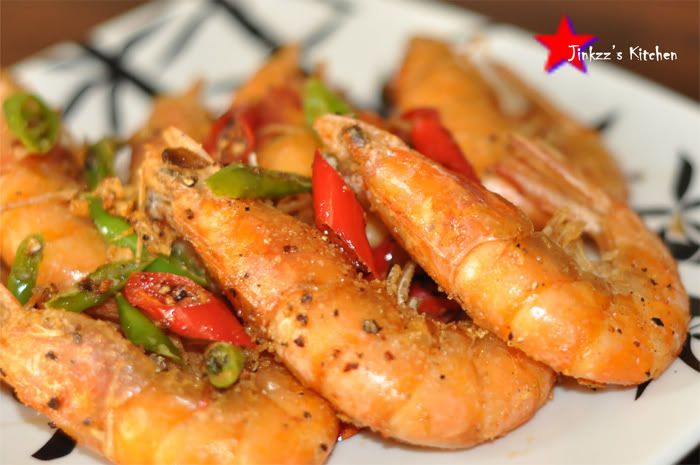
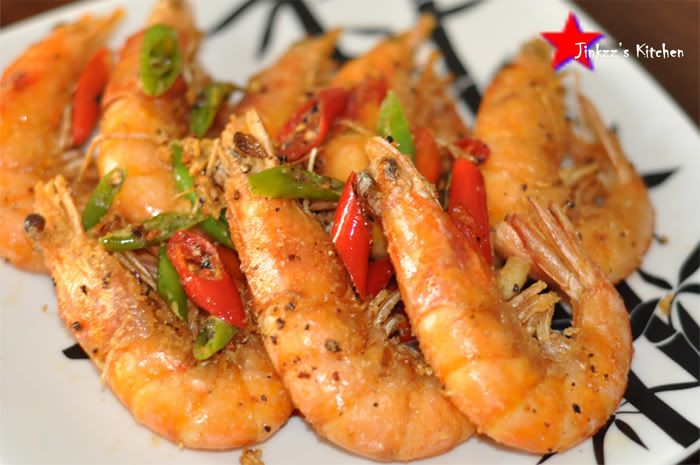
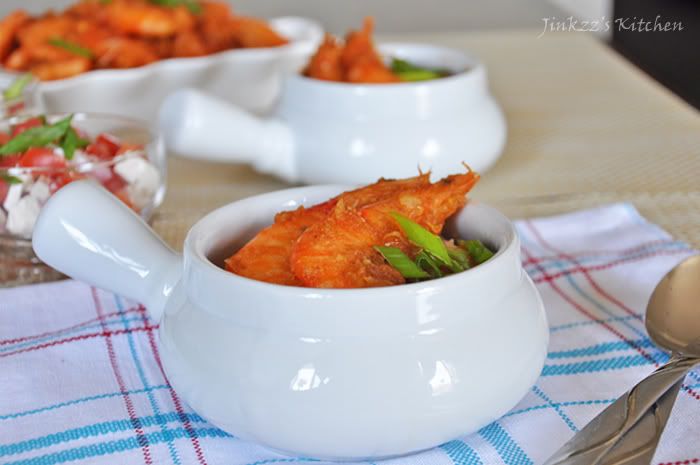
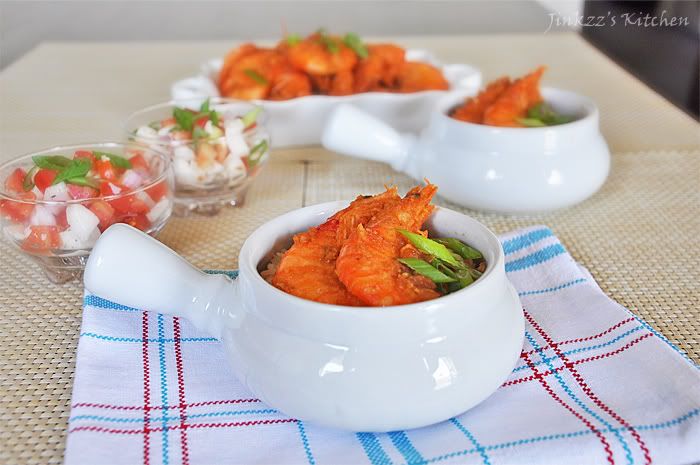
This dish is Chinese in origin but uses ingredients that are commonly used in Asian cooking.  One of the main ingredients which, in my opinion, takes this dish to an entirely different level is the addition of salted egg yolks into the sauce.  The salted egg yolks just makes the sauce creamy and tasty.  Although salted egg yolks were used in the dish, surprisingly, it is not salty at all so do not be afraid of seasoning your shrimp or adding salt to the cornstarch or all-purpose flour used in dredging the shrimp prior to frying.  


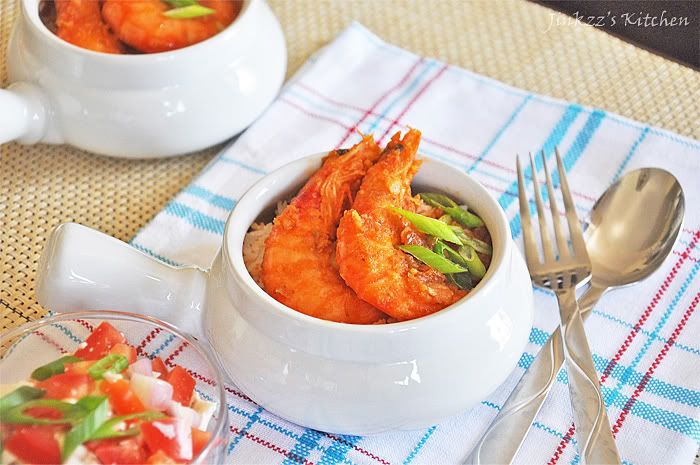
Serve this with a piping hot bowl of steamed rice and use your hands to dig in.  While that may sound barbaric or crude to a lot of people, I do think this is the best way to eat this dish...hehehe....that's just the Filipino way of enjoying a meal.  Of course, I have never been too good with using my hand to eat rice with but I definitely use my hands to peel the shells off the shrimps and dunk it in its sauce.  The shrimps are good but the sauce is divine... As the Kentucky Fried Chicken slogan goes, these babies are finger lickin' good

BTW, do not throw away the salted egg whites since that can be used in another dish which, in my opinion, is a great accompaniment to this dish.  Recipe will follow.


Ingredients:

1 1/2 lbs large shrimps

1/2 cup cornstarch

salt and pepper, to taste

1/4 cup oil

1/2 block butter

1 head garlic, peeled and finely chopped

6 hard-boiled egg yolks, mashed


1,  In a bowl, mix cornstarch, salt and pepper.

2. Lightly dredge the shrimp in cornstarch mixture, shake off excess.

3. Heat a non-stick wok over medium heat.  Add oil.

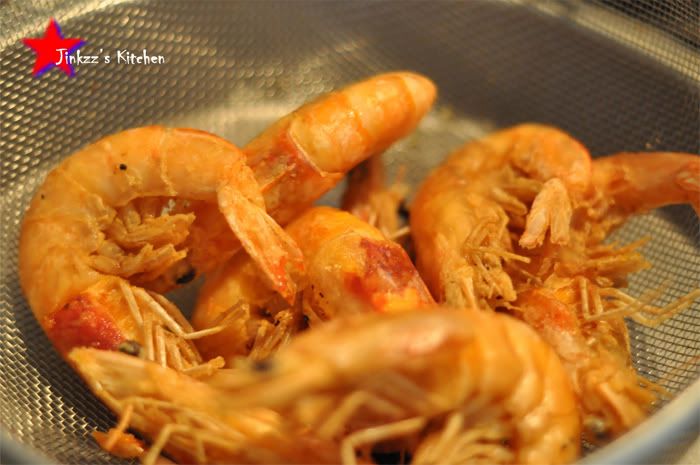
4, When oil is hot, add shrimp and lightly saute.  Cook until shrimp turns orange in color then immediately remove from heat.  Transfer shrimp to a paper towel lined plate to drain excess fat.

5. Add garlic to the oil and saute until fragrant and soft.

6. Add salted egg yolks and stir to dissolve.

7. Add shrimp back to the wok and stir to mix.

8. Remove from heat and serve.


Sunday, October 2, 2011

Chinese Tea Eggs


Ahhh...these babies are beautiful works of art which are easy to make...and best of all, they taste really good. These eggs are commonly sold by Chinese street vendors and are eaten as a snack. The eggs are first boiled until they reach a hard boil consistency then shells are gently cracked all over. The eggs, with the shells on, are stewed for several hours in a mixture of soy sauce, star anise, cinnamon sticks, salt, sugar, peppercorns, and black tea leaves. The cracking of the shells produces a unique marbling effect on the the eggs as well as lend a unique flavor to it.


When cracking the shells of the eggs, make sure that you are careful not to tear the shell completely otherise you will end up with an egg that is black all around instead of the beautiful marbling effect. The eggs should be eaten cold and the longer it is allowed to steep in the tea and spices mixture, the better tasting it will be.


Ingredients:

6 eggs (I used jumbo size for mine)4
2 Tbsp good quality black or pu-erh tea
2-3 star anise
2-3 cinnamon sticks
1 tsp whole peppercorns, cracked slightly
1 tsp sea salt
1 tsp sugar
1/2 cup soy sauce


1. Place eggs in a large pan and cover with water. Bring to a boil for about 2-3 minutes.
2. Remove eggs from water and let it cool. When cool enough to handle, gently crack the shells all over using the back of a spoon.
3. Place the eggs back into the boiling water and add the rest of the ingredients.
4. Allow mixture to boil and then lower heat to let the mixture simmer or about 1 hour. Add more water if needed.
5. After an hour, remove from heat and allow to cool on the counter.
6. When cool, transfer eggs and liquid to a container and place in the refrigerator to steep further for 12-24 hours or up to 2 days.
7. To serve, peel shells and serve.

Thursday, September 29, 2011

Char Siu (Chinese Pork BBQ)


I love char siu, also known as Chinese pork barbeque, but the problem is I can't seem to find good Chinese resto that sells a good one nearby. Most of the ones that are sold at the restaurants are either too dry or taste like cardboard, not good at all. Most of the time, I have to drive all the way to Chitown in order to get good ones but that is usally a major trip for me as I always get lost coming back from there so I try to avoid going to that place if I am driving by myself. Speaking of which, I once went there and had the hardest time trying to get out. It took me around 45 minutes or more to finally find my way out. Hahaha! I have been know to get confused with direction but 45 minutes is a little extreme even for me since LA Chitown isn't that big.


Anyways, I stumbled upon Bee's (of Rasa Malaysia) blog one day and found a char siu recipe. The recipe seem simple enough so I searched for similar recipes and was surprised that there was a bunch of them out there on the web. In one of those searches, I stumbled into another blog that has an interesting way of cooking char siu. The blog belongs to Jessica (of Su Good Eats). She hanged the meat inside the oven and cooked it that way. She called it ghetto Chinatown style which really cracked me up. I adapted my recipe from both Jaden's and Jessica's but adjusted it to my own liking. I have made this twice in two weeks already. This last one turned out better than the first one because I added less red food coloring. The first one, although it tasted really good, looked atrocious because of the all-too red appearance. Hahaha.


There are two ways which I was able to avoid meat from drying out, namely: Adding water "bath" at the bottom of the oven and basting half way through the roasting process. While it seems like an additional work but it will help keep your meat moist. If you have leftovers, you can wrap it in foil and place in the refrigerator. When you are ready to eat it, you can slice them and microwave for a minute or until warm. The meat stayed moist for me which was really great. You have to keep in mind though that the kind of meat that you use will also determine whether it will dry out once cooked. I try to buy meat that has a little bit of fat which is another great way to prevent the dish from drying out. If you choose a meat that's very lean, there is a great tendency that it will dry out while being roasted even if you baste and add the water "bath". One more thing, make sure that the end of the meat does not touch the water bath.

Ingredients:
2 Lbs pork butt (cut into 2 inch diameter X 4 inch length)

Marinade:
4 Tbsp honey
2 1/2 Tbsp hoisin sauce
2 1/2 Tbsp soy sauce
1 Tbsp sherry
1/4 tsp white pepper
few drops of red food coloring (optional)
1/2 tsp five spice
1/2 tsp sesame oil
3 cloves garlic, minced

To marinate:

1. Place pork in a non-metal container with lid.
2. Combine all ingredients for marinade and mix well to make sure that everything is incorporated.
3. Pour mixture over pork and make sure that all pieces are coated well.
4. Cover and place in the refrigerator to marinate for 5 or more hours turning meat half way through the marinating process.

To cook:

1. Place oven racks on the top most level.
2. Line bottom of the oven with aluminum foil. NOTE: this is such a lifesaver because it will catch any drippings that goes outside of the baking pan.
3. Line a large sheet pan with several layers of aluminum foil and place at the bottom of the oven. NOTE: lining it with several layers of aluminum foil will save you the hassle of having to scrub you sheet baking pans later.
4. Add about 2 to 3 cups of water to the sheet pan then preheat oven to 350F.
5. Meanwhile, make a hole on one end of each of the pork slices and attach either a drapery hook or meat hook to the end.
6. Once oven has reached the desired temperature, attach the hooks to the racks and roast meat by hanging it over the sheet pan. Reserve the marinade for basting. Roast for about 30 minutes.


7. Remove meat slices and baste with reserve marinade.
8. Return meat slices to oven and roast for another 30 minutes.
9. At the end of the second 30 minutes, remove from oven and brush each pieves with honey.
10. Return to oven and cook for another 5 minutes.
11. Remove from oven and let it cool a little bit before slicing and serving.


Tuesday, September 20, 2011

Deep Fried Shrimp with Spicy Salt

This is my version of the deep fried shrimp dish that we usually get from a Chinatown resto here in LA. Normally, this recipe calls for Szechuan peppercorns but I did not have any on hand so I opted to tweak the recipe instead of going out to buy some. Taste wise, this dish is really good. The shrimp is very crunchy and crispy on the outside while succently on the inside. This dish taste really good with piping hot rice. When Ieat this dish, I usually do not use utensils. Instead, I use my hand to eat...mmmm, yummy...

I refrain from adding seasoning to the shrimp prior to deep frying it because the spicy salt will be more than enough to season it. You can devn your shrimp by making a lit along the back using a sharp knife then removing the membrame but I just totally skipped that step because I was pressed for time. When frying it, make sure that your oil's temperature remains constant by not overcrowding the pan. This will result in a crispier outcome, in my opinion. Oh, be very careful when frying or removing your shrimps as the oil will be very hot and could burn your hands. I always use a screen splatter guard (I am not even sure if that is what its called) to prevent oil from splattering all over you, your stove, and the kitchen. Word of advice: when handling Thai chili and kochukaro, avoid touching your face or eyes as they can cause it to sting. To me, the dish is not too spicy but if you can to cut down on the spiciness, make sure that you remove the seed from the Thai chillies or eliminate kochukaru. Bon Appetit!


Ingredients:
1 lb jumbo shrimp
oil for frying
1/2 cup cornstarch or all-purpose flour
2 red Thai chillies, sliced thinly and diagonally
2 greem Thai chillies, sliced thinly and diagonally
1/4 tsp freshly and coarsely ground black pepper
a small pinch of Kochukaru (Korean red pepper powder)
2 cloves garlic, finely chopped
1 1/2 rsp sea salt, you can adjust depending on your taste

1. Heat oil in medium saucepan over medium high heat.
2. In a small bowl, mix sea salt, ground black pepper, and kochukaru. Set aside
3. Wash and dry shrimps thoroughly.
4. In a small bowl, place flour.
5. Dredge shrimp in flour them place in a strainer and shake off excess flour.
6. When oil is hot, add a few shrimps at a time and deep fry until it turns slightly orange. Remove from heat and drain excess oil using a strainer or colander. Repeat process untill all the shrimps has been deep fried.

7. Heat clean sauce pan over medium heat. Ad about 1 - 2 Tbsp of oil.
8. Add garlic and saute until fragrant.
9. Add Thai chili and saute for 30 secons to 1 minute.
10. Add the salt mixture and saute a little bit. Notice that the salt will absorb almost all of the all.
11. Add fried shrimp into the mix and dry sautee to coat it with the salt mixture.
12. Immediately remove from heat, transfer to a serving platter and serve. Serve with rice if you want.

Saturday, May 8, 2010

Crab Rangoon


Ingr:

1 pkg ( 14 oz) wonton wrapper
8 oz. cream cheese ( softened)
6 0z canned crabs, drained and flaked**
1/2 tsp garlic powder
1/4 tsp paprika
1 Tbsp chives, finely chopped***

1. Combine softened cream cheese, crabs, garlic powder, chives, and paprika. Mix well.
2. take about 1 tsp of the filling and place on wonton wrapper. Moisten the edges of the wrapper and seal well.

refer to the picture on how to wrap the Crab Rangoon:

Photobucket Photobucket

Photobucket Photobucket

Photobucket


3. Heat oil in a pan over medium low heat and fry a few crab rangoon until golden brown. Make sure you keep a close eye because it will only take a few minutes to fry them.

Alternative to frying:

You can bake these instead of frying them. To bake, preheat oven and set the temp to 350 degrees Fahrenheit . Arrange the crab rangoon in a baking sheet and bake for 18-20 minutes or until edges turn brown and crisp.

5. Serve with sweet and sour sauce.

** If you are allergic to crabs like me, you can use imitation crabs instead

*** you can substitute chives with sfinely chopped scallions.

Sweet and Sour Sauce:

Ingr:

1/4 cup white vinegar
1/4 cup water
3 Tbsp sugar
2 Tbsp catsup
1 inch ginger, juliened
1 jalapeno pepper, optional
1 tsp cornstarch mixed with 1 Tbsp cold water

1. Combine cornstarch with cold water and mix thoroughly. set aside.

2. In a separate saucepan, mix vinegar, water, sugar, catsup and ginger and let it boil on medium heat.

3. When it starts boiling, lower the heat to low and add cornstarch mixture 1 tsp at a time until the desired consistency ( about the consistency of a pancake batter) is achieved.

NOTE: If the sauce becomes too thick, you can add a little bit of water to thin it out.

4. Remove from heat and add jalapeno pepper if desired. The jalapeno gives it a nice kick

Wednesday, May 5, 2010

Steamed Tilapia


Ingr:

1 ( approx. 2 lbs) whole tilapia
***preferably fresh ( live), have the fishmonger clean it and remove the scales

1 scallion, julienned ( use only the green part)
1 - 2 inch ginger, julienned
salt to taste
handful of cilantro, stems removed
knorr liquid seasoning
2 Tbsp vegetable oil


Photobucket Photobucket Photobucket


1. rinse fish and then pat dry. Sprinkle salt on both sides.

2. Arrange fish in the steamer, lining it aluminum foil if you like.

3. Arrange half of the ginger and scallions on top and inside the cavity of the fish

4. Steam for about 20 minutes then remove from steamer and place on a platter.

5. Arrange the rest of the ginger, scallions and cilantro on top of the fish.

6. place oil in a pan and heat on high until it start to slightly smoke.

7. Spoon the oil over fish. Be careful not to burn yourself from splatters. The hot oil will welt the cilantro.

8. Add a few dash of knorr liquid seasoning and serve immediately.


***Note: this is a dish that my late husband used to cook for me all the time. Miss him so much when I made this dish on my own :(

*** this is a very simple but flavorful dish... the cilantro gives this dish a nice flavor and aroma.