Showing posts with label fried appetizer. Show all posts

Thursday, October 6, 2011

Spinach Pouch


I have been experiencing a publishing backlog lately because my ability to cook and take pictures is a lot faster than my ability to post and publish them. I really do love to cook and enjoy taking pictures just a little bit more than before. My problem is that sometimes I get too lazy to start typing. Other times, I just don't know what to say. Not a problem though as I am positive that I will be able to get them all posted in due time :)


Before I talk about the dish that I have created today, I have to say thank you to everyone who came and visited my blog. I have to say that tastespotting, foodbuzz, and foodgawker has done wonders to increasing the traffic in my blog. And please do leave me a comment as I always welcome and enjoy reading them.

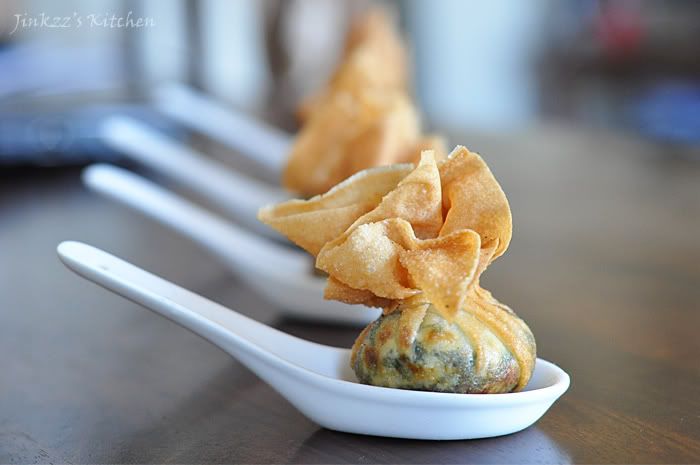
The dish that I created today is an appetizer that is so easy to make. I used four main ingredients plus pepper and salt to create this dish. The filling can be easily substituted with whatever is readily available. The filling can also be changed into a sweet filling to make it a dessert instead of an appetizer. I would say that the possibility is endless. Today though I used frozen spinach, cream cheese, and ricotta cheese as filling. Make sure that you thaw the frozen spinach well ahead of time to prevent any delay. I thawed mine in the refrigerator overnight and then used chesse cloth to squeeze it dry. Making sure that all the fluids has been removed is important because you do not want a soggy pouch when fried plus the water will also make frying difficult as it will cause oil to splatter.


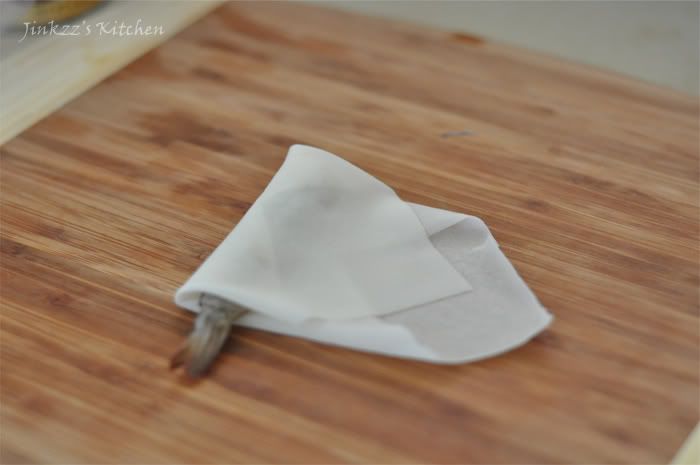
Another important thing to remember when using wonton or spring roll wrappers is that they dry out easily so make sure that you cover them in damp (not soaking wet) cloth to prevent them from drying out and turning brittle. To help the pouch retain its shape, I let it air dry a little bit after I wrapped the filling so that it becomes stiff thus helping it hold the shape better. These pouches can be kept in the freezer and then taken out when needed. I usually don't thaw them out before frying so they just go from the freezer to the hot oil. You need to be careful though as oil may splatter when it comes in contact with the frozen pouches. Also, use splatter guard to prevent oil from splattering all over you and your kitchen.

Ingredients:

1 box (10 oz) Frozen chopped spinach, thawed and squeezed dry
4 oz cream cheese, softened
1/2 cup ricotta cheese
Large size wonton wrappers
oil for frying
sea salt and freshly ground pepper, to taste


1. In a bowl, placed squeeze-dried spinach. Fluff them up to loosen.
2. Add cream cheese and ricotta cheese. Mix well.
3. Season with salt and pepper according to your taste.
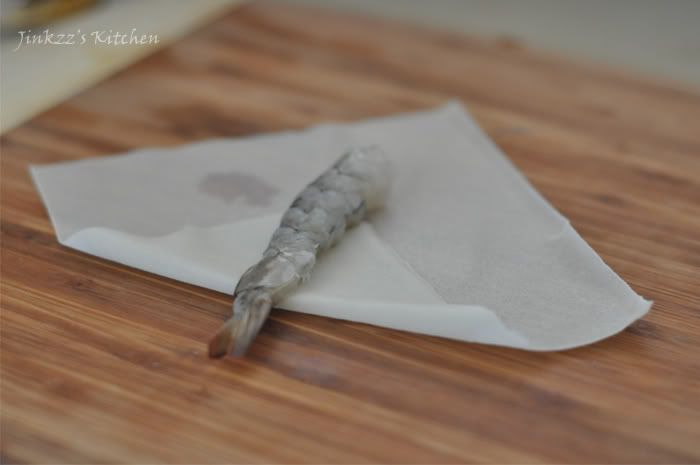
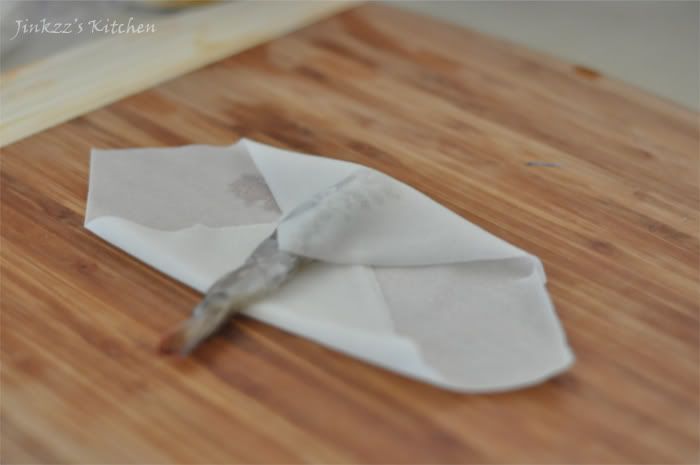
4. To wrap: Take a teaspoon full of the filling and place it in the middle of the wonton wrappers. Gather the corners to create a pouch. Take small stips of the cut wonton and use it to tie the corners together. Be careful not to break the tie.
5. Do this until all the filling has been used.
6. Heat oil in a pan. When oil is hot, place a few of the pouch and fry until golden in color. NOTE: Fry only a few at a time so as not to lower the oil temperature and not to overcrwod the pan.
7. Transfer to a paper towel lined plate to drain excess oil.
8. Transfer to a serving platter and serve warm.

Saturday, September 24, 2011

Firecracker Shrimp


I remember having these wonton wrapped shrimps years ago but cannot remember when and where exactly I had them. My memory seem to tell me that i saw someone cooked this in food channel and I tried to recreate it at home but that memory seem blurry that I am not even sure if I am remembering things correctly. Anyways, to make the long story short, I had some shrimps which I thawed in the refrigerator overnight and could not think of any dish to make. Then I saw some wonton wrappers which were leftover from when I cooked shrimp and squid mini lumpia rolls which gave me an idea on making some firecracker shrimps. For the life of me though, I cannot remember what the marinade for the shrimp was so I searched the net and landed in Jaden's (of steamy kitchen)blog with a recipe for firecracker shrimp. She has soe good pointers on how to make sure the shrimp doesn't curl up when fried which I used and viola! the shrimps stayed straight. I made made some revision on the marinade that I used though but the end result is still amazing. I also used sweet and sour mango sauce instead of sweet chili sauce.


Ingredients:

15 shrimps, deveined and shelled with tail part left in
15 wonton (0r 8 eggrol wrappers cut into two triangles) wrappers
2 cloves garlic, finely chopped
1 inch ginger, finely chopped
2 tsp lite soy sauce
1/4 to 1/2 tsp sugar
1/2 to 1 tsp freshly squeezed lemon juice
sea salt and freshly ground pepper, according to taste
2 Thai chili, seeded and finely chopped


1. Combine garlic, ginger, soy sauce, sugar, lemon juice, salt and pepper. Mix well and add shrimp. Make sure that shrimps are coated with marinade well. Marinate for about 30 minutes.
2. After 30 minutes, drain marinade and pat shrimps dry to absorb excess marinade.
3. Make a few small incisions along the inner section of the shrimp ( see jaden's illustrations here)
4. Wrap 1 shrimp using 1 wonton wrapper and wrap shrimp with tail sticking out. Wet the end of the wrapper to fasten (make it stick) in place. Do this until all of the shrimps has been wrapped.


5. Heat oil in a pan over medium heat and deep fry shrimps until golden brown. Make sure you do not overcrowd the pan as that will bring the oil's temperature down.
6. DRain excess oil by placing fried shrimp in paper towel lined plate.
7. Transfer to a serving platter and serve with sweet and sour mango sauce (recipe here)

Thursday, September 15, 2011

Fried Aubergine Topped with Hummus and Tomatoes

I had my sights set on some fried chicken livers for dinner but when I opened my refrigerator, I saw an eggplant which I originally bought with the intention of making baba ghanouj so I changed my plan butthen I remembered that I still have some hummus from the other day. It did not make any sense for me to make another middle eastern dip when I still have some albeit different. BY then, fried chicken livers has long been forgotten and my attention shift to using the eggplant instead. I wanted Sicilian fried eggplant but it takes took much work and longer wait time. what with the salting, waiting for about 30 minutes, then rinsing the eggplant piece by piece, then frying...Ahh too much work. Hmmm, some breaded fried eggplant perhaps? Ha! that's what I end up doing...breaded the eggplants, then fry and topped...the taste was delish. The hummus added a nice flavor to the fried eggplant and tomato topping plus the added bonus of keeping the moisture from the tomato away from the eggplant which kept it crispy.


Ingredients:

1 large eggplant (use the oblong ones like epic or rosa bianca instead of the elongated variety), sliced into 1/2 inch thick rounds
1 cup all purpose flour
1tsp garlic powder
1 tsp italian seasoning blend
sea salt and freshly ground pepper to taste
3/4 cup bread crumbs
3/4 cup panko or corn meal
2 eggs, slightly beaten
oil for frying

1. Place flour, italian seasoning blend, garlic powder, salt and pepper (to taste) in a plate or bowl. Mix well
2. In another bowl/ plate, mix corn meal and bread crumbs. Mix well.
3. In a third bowl, place eggs andbeat lightly
4. Take 1 slice of eggplant and dredge in flour, remove excess. Dunk this in the beaten egg and then coat with bread crumb mixture.
5. Do this until all of the sliced eggplants has been coated.
6. Heat pan over medium heat and add oil.
7. When oil is hot, fry breaded eggplant. Fry only 2-3 eggplants at a time to prevent overcrowding your pan. NOTE:Be careful not to burn yourself. Use splatter guard to prevent oil from splattering all over you and your stove.
8. Cook until all sides has turned golden brown in color.
9. When cooked, remove gried eggplant from pan and transfer to a paper-towel lined plate to absorb excess oil.


Topping:

1 cup hummus ( recipe here)
2-3 roma tomatoes, seeds removed and discarded then diced finely
handful of Italian parsley, hand-torn
1/4 pine nuts
2 Tbsp extra virgin olive oil

1. While you are waiting for your eggplant to finish cook, prepare the tomato topping.
2. Mix tomatoes, pine nuts, and parsley.
3. Season with sea salt and freshly ground pepper according to taste.
4. Mix well and set aside until you finish frying the eggplant.

To Assemble:

Take a piece fo fried eggplant, apply a layer of hummus then spoon tomato topping over it. Transfer to a serving platter and enjoy.


Squid and Shrimp Balls with Sweet and Sour Sauce

This is considered a street food in the Philippines and is commonly sold by a vendor who goes around pushing his cart trying to find a good location with which to park it. The cart is equipped with a stove that is powered by a portable gas tank. The sauce range from sweet to spicy and there is usually three different varieties of sauces to choose from. Squid balls isn't really very common compared to its cousin, fishball, in Bacolod or Silay where I came from.


I first tasted squid balls in Manila. I remember eating this from a food stall in one of the malls in Manila, the capital city of the Philippine Islands. I remember that there is always a long line in that stall with people who buys their product range from students to professionals. Ahhh, those were bittersweet days that I spent in a very crowded, traffic congested, and fast moving city which was, and still is, so far from the easy and laid back lifestyle which I was accustomed to in the province and city where I grew up.

This recipe is not the same recipe that they use for street food cart but it is loosely based on a squid ball recipe from CD Kitchen.


Ingredients:
2 lb squid, cleaned and skin removed
1 lb shrimp
1 small shallot chopped
3 cloves garlic, chopped finely
1 egg yolk
a pinch of paprika
sea salt and freshly ground black pepper, to taste
oil for frying

1. Clean and slice squid into rings.
2. Bring water to a boil in a saucepan.
3. Blanch squid in boiling water for about 30 seconds to 1 minute.
4. Place squids, shallot, shrimps, egg yolk, garlic, salt, and pepper in a food processor and process until smooth.
5. Add 1-2 Tbsp of oil and continue to process until it starts to form a ball.
6. Remove from the processor and shape into small balls. NOTE: To form mini-balls, take a little bit less than a teaspoon full of mixture and use two teaspoons to form it into a ball. Drop the formed balls into hot oil as you make them.
7. Heat oil in a pan and deeep fry squid balls until golden brown in color. NOTE: Be areful not to burn yourself. Use spaller screen to prevent oil from splattering all over you and the stove.
8. Remove from heat and place on a paper towel lined plate to drain oil. NOTE: Make sure that the squid ball is cooked through. Adjust the fire so that the outer surface does not get burned while the center cooks.
9. Transfer to a serving dish and place toothpick on each. Serve with Sweet and Sour Sauce ( Recipe here)