Showing posts with label sweets. Show all posts

Friday, September 23, 2011

Che Dau Xanh (Vietnamese Sweet Mung Bean Dessert)


Chuseok is one of the biggest Korean holiday. It is equivalent to American thanksgiving where people go home to their hometown and tend to cook and eat too much. Of course, as an avid South Korean enthusiast, it has become part of my yearly celebration. This year, I fully intended to conquer the art of songpyeon making. Songpyeon is a Korean rice cake which is commonly served during chuseok. The day before chuseok, I woke up really early. How early? 630 in the morning. That is really significant for me because I rarely sleep before midnight therefore my waking hours is usually later than 9 am. Anyways, I woke up really early and went to the Korean market to buy things I need for songpyeon. Of course knowing me, I went and bought way too much which included ingredients for three different fillings. One of those fillings happen to be split mung beans. Well, I made several attempt at making songpyeon, all of which were deemed a failure. So here I am eleven days later with tons of leftover ingredients and don't really know what to do with them...hehehe


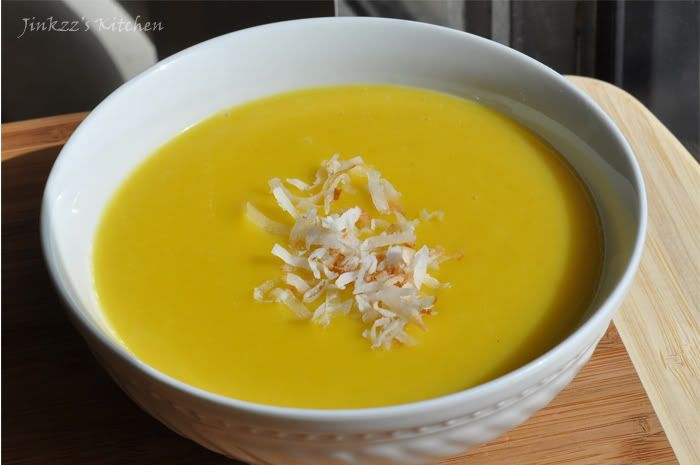
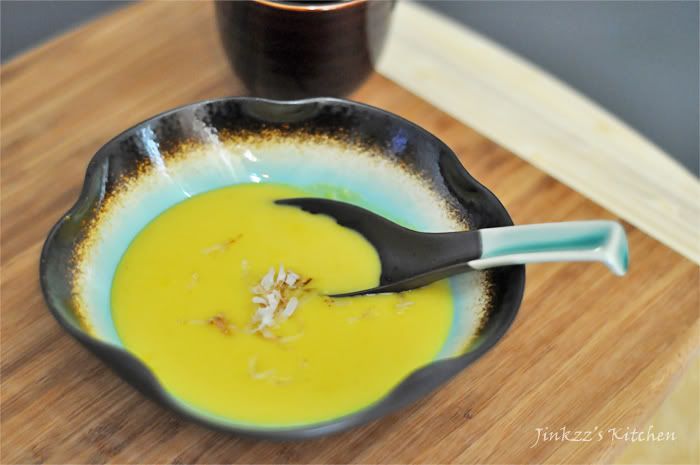
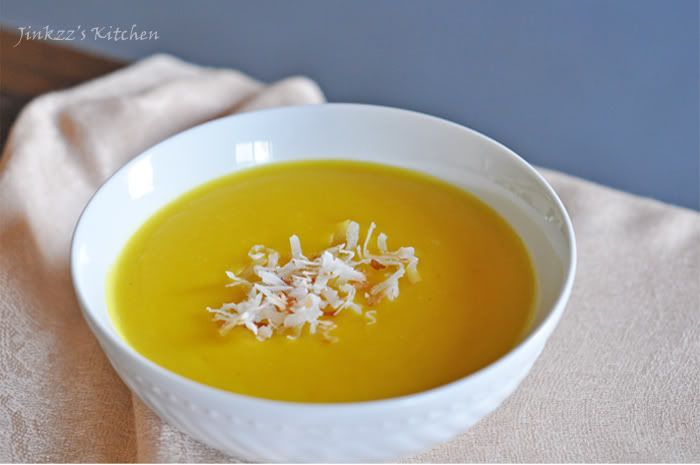
I began searching the internet last night and found a split mung bean desert recipe that looked easy enough. The recipe is a sweet Vietnamese street food which uses coconut milk, sugar, and split mung bean soup. I have all of those ingredients in my cupboard so it was convenient. The recipe calls for soaking the mung beans for three (3) hours and then boiling it in water until almost all of the fluid is absorbed then in a separate pan, you bring coconut milk and sugar to a slow simmer until sugar is dissolved then add the mung bean mixture. I topped the dessert with lightly toasted sweetened coconut which gives it another flavor dimention plus the aroma of the toasted coconut is just heavenly. The recipe is easy enough but takes a few steps to finish the dish. The outcome? it was awesome...Sweet, creamy, tasty. Perfect for an autumn afternoon snack or dessert. It reminds me of a Filipino sweetened mung bean snack only this one is creamy and rich. This is a keeper for me.


adapted from here

Ingredients:

1 cup split mung beans
2 cups coconut milk
1/4 cup sugar, adjust according to taste
1/4 cup sweetened coconut flakes.

1. Place mung beans in a strainer and rinse then place in a container. Add water to slightly above the level of the mung beans and let it soak for at least 3 hours.
2. After 3 hours, drain water, rinse mung beans and place in a sauce pan. Add about 500 ml of water and let it simmer until almost all of the fluid has been absorbed. NOTE: Make sure you keep an eye on it and stir occassionally to prevent burning mung beans especially at the bottom of the pan.
3. Place coconut flakes in a pan and lightly toast over medium low heat. Remove form fire and set aside to let it cool.
4. Remove from heat and let it cool before placing it in a food processor to puree.
5. Heat a clean pan over medium heat. Add coconut milk and sugar and stir until sugar dissolves. Let it simmer for 3-4 minutes.
6. Add mung bean mixture and mix well. Cook until heated through.
7. Remove form heat and transfer to warm containers. Top with toasted coconut flakes and serve immediately.

Saturday, September 3, 2011

Baklava

Baklava is a rich and sweet Greek dessert made of buttery sheets of phyllo dough and nuts drizzled with syrup or honey. It is sometimes flavored with cinnamon and cloves. Its origin is unknown but some think that it originated from Turkey.

For those who has never worked with phyllo dough, this can be a little daunting since they easily dry out and tear. The key is to make sure you cover the dough in damp (not soaking wet) towel while you assemble. If the dough is frozen, make sure to thaw it completely. I usually thaw mine in the refrigerator for a day before I use them. It just makes it easier to handle since they easily separate from one another. When you brush the butter, just apply a light coating instead of drowning the sheet.


Ingredients:

16 oz. package of phyllo dough
3/4 cup melted butter

Filling:

1 cup pecans, coarsely chopped
1 cup walnuts, coarsely chopped

Syrup:

1 cinnamon stick, broken into half
1 cup water
1 cup sugar
1 tsp vanilla extract
1/2 cup honey
3 strips of lemon rind (about 2-3 inches long each)

To make the syrup:

1. Using a begetable peeler, peel the outer skin of the lemon. Make sure you are only taking the yellow portion and not the pith (white part)

2. Heat sauce pan over medium. Add water and sugar. Heat while stirring occassionally until sugar is dissolved.
3. Add cinnamon stick, lemon peel, vanilla, and honey
4. Continue to simmer for about 10-20 minutes.
5. Remove from heat and strain to remove cinnamon stick and lemon peel.
6. Let it cool completely before using.

To assemble Baklave:

1. Mix pecans and walnuts in a bowl and set aside.
2. Preheat oven to 350F.
3. Butter the bottom and side of a 9X13 baking dish.
4. Place a layer of phyllo dough at the bottom of the baking dish then lightly butter. Add another layer and butter the top again. Continue to do this until you have around 6-8 layers of buttered phyllo dough.


5. Sprinkle mixture of walnut and pecans over the top of the phyllo dough stack and pour about 2-3 Tbsp of cooled syrup.

6. Place another later of phyllo dough over the nuts layer and brush with butter. Repeat this 3 times then add a layer of mixed nuts and syrup.
7. Stack another 3 layers of buttered phyllo dough then a layer of nut mixture and syrup. By now you have 3 nut layers.
8. For the top layer, stack 6-8 layers of buttered phyllo dough.
9. Cover with plastic wrap and refrigerate for about 10-15 minutes. NOTE: This solidifies butter thus making it easier to cut.
10. Cut the uncooked Baklava into 2X2 inch squares (or, diamond if you prefer).

11. Bake for about 30-40 minutes or until the top turned golden brown.
12. Remove from the oven and drizzle syrup all over the hot baklava. NOTE:You don't have to use all of the syrup is you don't want it to be too sweet.


13. Let it cool for about 1-2 hours(preferrably longer to allow the baklava to soak up all of the syrup) before removing from tray and serving. Do not cover while you are letting it cool.


Mango Panna Cotta with Honey Mango Sauce


What can I say? I rediscovered panna cotta and fell in love with it. This recipe is different from the mango jelly panna cotta which I posted here. This one is just as delish as the other one. Again, I used the nestle table cream which I got from the Filipino store but I had to cut it down to 1/2 cup instead of the usual 1 cup because it was too creamy and used more milk instead. The result is still very creamy, light, and very flavorful. The mango lends a nice refreshing taste to the dish. I also drizzled it with honey mango sauce which made it taste so divine. You can totally skip the honey mango sauce though if you prefer. The mango panna cotta is able to hold its own without any accompaniment. I also strained the mixture three time: after I pureed the ingredients, after I took it off the stove, and when I poured in the molds.


Ingredients:

Mango Panna Cotta

1/2 cup mango puree
1/4 nestle cream
1 1/2 cup milk
2 tsp unflavored gelatin
1 Tbsp water
1/4 cup sugar (you can adjust according to taste and how sweet your mango is)


1. In a small bowl, sprinkle gelatin over water to soften
2. Peel and dice mango, place in a blender with sugar and blend until smooth.
3. Add milk and blend some more. Transfer into the sauce pan, add cream and stir to incorporate well. NOTE: I accidentally added my cream to the mixture in the blender which whipped it up a little bit and explained why there was a lot of bubbles on top when I transferred the finish product to the mold :)
4. Simmer, but do not let it boil,for a few minutes until hot.
5. Scoop a ladle or two of the hot cream mixture and add it to the gelatin mixture, mix until gelatin is dissolved.
6. Add gelatin mixture into the cream mixture and simmer for a minute or two.
7. Remove from heat and strain into a container with spout ( for easy pouring into the molds) and let it cool a little bit.
8. Using a small strainer, strain mixture while pouring into the mold. Make sure that it has cooled down before you cover it and refrigerate for 4 or more hours.
9. When ready to unmold, place the mold in warm water to loosen the edges. When loose, invert the mold into the serving dish and serve with honey mango sauce.


Honey Mango Sauce:

1/2 cup mango puree
1/3 cup honey
1/3 cup water

1. Peel and dice mango and place in blender
2. Add honey and water and then blend until smooth
3. Serve with mango panna cotta


Tuesday, August 23, 2011

Pecan-Cinnamon Roll

Ahhh...this is my favorite but have not made it since I had my injury and surgery because the residual pain can't handle the repetitive motion of kneading. Thanks to the no-knead dough recipes, I am able to bake goodies that I love again. The recipe for the No-Knead Dough is from Artisan Bread in Five Minutes a Day by Jeff and Zoe. The recipe for the No-Knead Dough is found here.


Ingredients:

1 cantaloupe-sized No-Knead Dough
flour for dusting

Filling:

1/4 cup butter, melted
1 cup sugar
1 1/2 Tbsp cinnamon
1/2 cup chopped pecans

Topping:
1 cup packed brown sugar
2 Tbsp corn syrup
1/2 cup chopped pecans

1. Take out the dough and place on a floured surface. shape into a ball and wrap in plastic wrap. Leave it out for about 20 minutes


2. Filling: In a separate bowl, mix together the first three ingredients for filling then set aside.


3. Topping: Over low heat, melt butter and brown sugar. Cook until it is melted then remove from heat. Add corn syrup and mix well. Place this caramel topping at the bottom of your baking dish. Add Pecans on top.


4. On a floured surface, roll out your dough into about 1/8 inch thick. Spread your filling evenly and then sprinkle pecans on top. Roll into a log. Using a floured serrated knife cut roll into 8-12 equal pieces. Arrange on top of the topping. cover loosely with plastic wrap and let it rest for about 1 hour. It will rise into almost double its original size.

NOTE: In my excitement, I forgot to take picture when I rolled the dough out, put toppings and rolled it into a log :)


5. Baking: Preheat your oven to 350 degreesfor about 10-20 minutes. Bake your roll for about 30-35 minutes or until it turns golden brown. After it has finished cooking,remove from the oven and invert it into a serving dish immediately.


NOTE: If you wait until after it cools down to invert, your caramel topping would have hardened by then and it will be impossible to remove your roll from the pan.

Saturday, August 13, 2011

Banana-que and Kamote-que

I have been wanting some banana-que for quite some time now but everytime I go home to the Philippines, I always chicken out from buying street food in fear that I might get sick...hahaha...I think the older I get, the more sensitive my stomach becomes. Anyways, my friends got some banana-que when we went to the public market but I didn't eat any. Instead, I opted to eat some santol which, to my dismay, gave me a belly ache early the following morning. Well, to appease the cravings, I made some banana- and kamote-que today. I bought some sab-a banana from the Filipino store yesterday and kamote from the korean market the other day.


Ingredients:

Sab-a banana (plantain), peeled and cut in half
kamote, peeled and sliced thickly and diagonally
brown sugar (i used dark brown sugar)
vegetable oil


1. Heat oil in a pan over medium heat. cook banana and kamote separately. WARNING: Be careful not to burn yourself.


2. Cook until light golden brown. Remove from heat and transfer to a platter.


3. Remove some of the oil from the pan, leaving just enough to caramelize the brown sugar. Be careful not to burn the caramelized sugar otherwise it will taste bitter.


4. Add the fried banana or kamote a little at a time. Coat all sides and skewer.

NOTE: I find that the easiest way to skewer the banana or kamote que is using two bamboo skewers. One will hold it steady and the other will be used to pierce through and skewer.