Saturday, November 26, 2011

Bacolod -Style Chicken Inasal


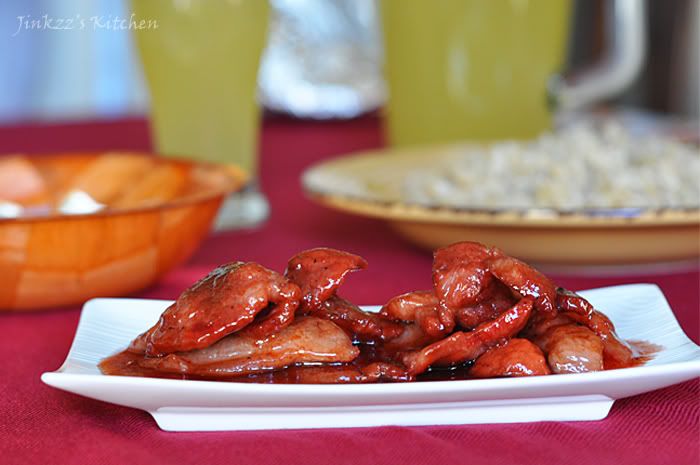
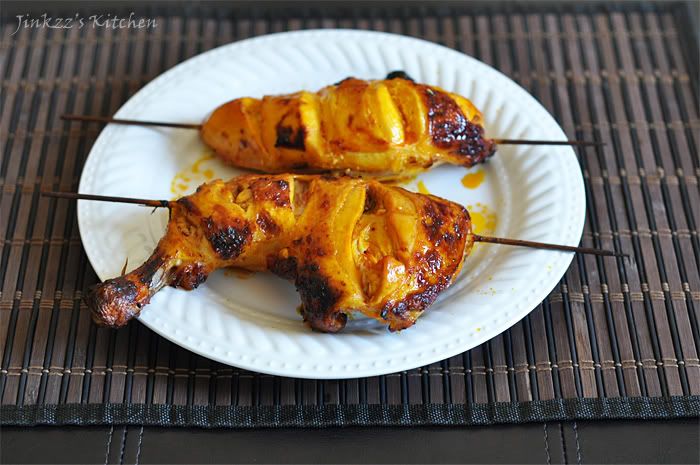
Chicken inasal is the quintessential Bacolod food that I can probably eat every single day when I am in Bacolod. There is just something about it that brings back tons of memories. The best chicken inasal,in my opinion, are those that are served at Manokan Country in reclamation area which is now fronting SM Mall. Ahhh...chicken inasal with kalamansi and soy sauce as sawsawan and eaten with rice that has been sprinkled with annatto oil and a little salt....yummy... especially if you eat it with your bare hands.

Bacolod-style chicken inasal is slightly unique from chicken barbeque found in other parts of the Philippines in the sense that it does not have any soy sauce in its marinade. Instead, the marinade is usually made up of 7-up, vinegar, salt, pepper, garlic, and lemon grass. The basting liquid is also unique as it uses annatto seeds, butter, and oil. The annatto seeds lends the dish its characteristic yellowish hue or coloring. One thing though that makes chicken inasal that are found in Bacolod better and cannot be replicated here in the States is the fact that they use native chickens. Native chicken are a lot less leaner than those that are sold in the regular US supermarket but despite its lean flesh, the taste is unparalled in the sense that it is a lot tastier than its plumpier American counterpart. Having said that, this recipe is as close as I can get to a Bacolod-Style chicken inasal without having to jump on the plane and spend caboodles of money everytime the craving for chicken inasal hits me :)

Ingredients:

2 chicken leg quarters
1 whole chicken breast, cut into half
4 bamboo skewers.

Marinade:

1 cup sugarcane vinegar
1 1/2 cups 7-up (or sprite, if you prefer)
2 inch sized ginger, peeled and sliced thinly
3-4 stalks of lemongrass (leaves and stalks), cut into 5-6 inches length then bruised using the back of a knife
3-4 cloves garlic, peeled and chopped finely
1/2 cup freshly squeezed Kalamansi (Philippine lime)juice
sea salt and ground white pepper, according to taste

1. Make several deep cuts into the chicken meat to ensure even marination.
2. Combine all the ingredients for marinade in a non-reactive container then add chicken.
3. Marinate for a minimum of an hour or overnight. Turn the meat over several times during the marination process.
4. When ready to cook, turn on the grill or preheat the broiler to high.
5. Soak the bamboo skewers in a pan of water for at least 15 minutes or more.
6. Skewer the chicken meat and baste with annatto oil basting liquid.
7. Place skewered chicken in the grill or broiler. Make sure you keep an eye on it to prevent meat from burning. Baste with basting liquid several times during the cooking process to prevent meat from drying out.
8. When one side is done, turn the other side over and cook until slightly golden in color, or until the internal temperature of the thickest part of the chicken meat reaches about 165F.
9. Remove from heat, let it cool slightly before serving. Place in a serving plate and serve with kalamansi-soy sauce dipping sauce


Basting liquid:

1/2 cups cooking oil
3 Tbsp butter (or less if you prefer)
salt, according to taste
2 Tbsp annatto seeds

1. Heat oil in asauce pan over medium heat.
2. Add butter until melted.
3. Add annatto seeds and stir until color is extracted (about 5 minutes).
4. Add salt according to taste and then remove from heat. Let it cool and transfer to a covered container and store until ready to use.
5. Use this to baste chicken inasal while cooking.
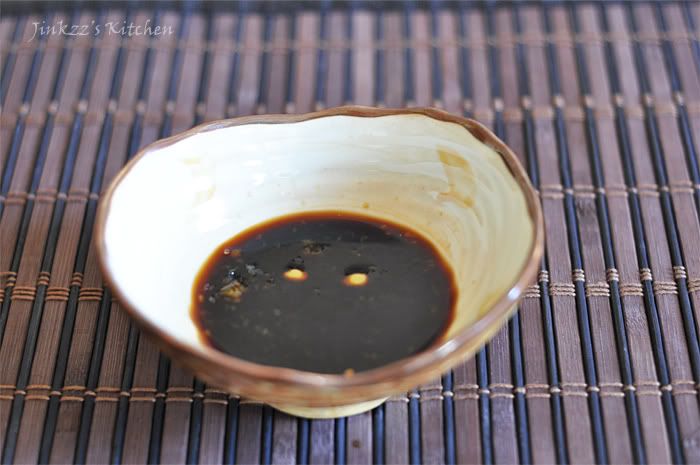
Dipping Sauce:

1 Tbsp Kalamansi juice
3-4 Tbsp soy sauce
1/2 Tsp spiced vinegar, optional

1. Combine all ingredients. Set aside until ready to use.
*** you may adjust the proportion according to your preference.

Apologies...

I know it has been a while since I last posted. I have been super busy lately and have not had the time to post. That does mean that I have not been cooking though. It is just that my ability to post is somehow slower than my ability to cook and take pictures. I will probably have to back date some of my entries when I post them :)and when I have found time in my rather hectic schedule right now.

Thursday, November 24, 2011

Pesto and Breadcrumbs Stuffed Baby Portabello Mushrooms


I love portabello mushroom and I love pesto which makes this dish a perfect combination of the ingredients that I really like. This is part of the Thanksgiving meal which I cooked this year. The recipe is quite simple, fast and easy to make especially since I have ready made pesto which I made earlier this week so basically all I did was mix, stuff, and bake these babies. The pesto that I used is the arugula-walnut pesto (recipe here).

To stuff the portabello mushroom, just remove the stems from the caps and then using a teaspoon, scrape some of the mushroom cap off to create a bigger surface area for the stuffing. By the way, save those portabello stems for another recipe such as soup. Combine all the ingredients for stuffing in a small bowl and spoon on the mushroom caps. Bake for about 5-10 minutes and viola! you're are done.

Ingredients:

10-12 baby portabello mushrooms

Stuffing:

1/2 cup prepared arugula pesto sauce (recipe here)
1//4 cup (+ extra for topping) breadcrumbs
3 Tbsp freshly grated parmigiano reggiano
2 cloves garlic, finely chopped
non-stick spray

1. Preheat oven to 350F.
2. Spray some non-stick spray to your baking pan or lightly grease the pan using olive oil or just plain vegetable oil
3. Remove stems from portabello caps then using a teaspoon, scrape some of the mushroom cap off to make the opening bigger. Set Aside.
4. In a small bowl, combine pesto, breadcrumbs, and garlic. Mix well.
5. Spoon the stuffing into the mushroom caps, top with parmesan cheese and a little breadcrumbs.
6. Bake for 5-10 minutes or until heated through. Transfer to a serving platter and serve warm.

Friday, November 11, 2011

Pineapple Cured Pork (Pork Tocino)


Pork Tocino is one of the typical dishes that is served for breakfast. It is part of the breakfast combo Tosilog or tocino, sinangag, itlog (tocino, fried rice, eggs). Again this is an easy dish to make and the ingredients can be doubled easily to make a big batch. They can be kept in the freezer until ready to cook.

For this pork recipe, I used thinly sliced pork which I has the butcher sliced at the time I purchased it. I marinated it in a mixture of pineapple juice, 7-up, soy sauce, brown sugar, finely chopped garlic, salt, and pepper. I also added a few drops of red food coloring to give it that nice reddish color which is typical of tocino. I marinated the pork slices for about 12 hours before cooking it in a little bit of water and oil. The 7-up, pineapple juice and sugar gives it a nice sweet flavor as well as gives it a nice caramelized sauce. I only made a small batch using 1 pound of pork but I think I will have to triple the recipe next time since 1 pound didn't really last me very long.

Ingredients:

1 lb. thinly sliced pork shoulder or butt (I chose a portion that has a little bit of fat because it just taste better :)
1 cup pineapple juice
1/4 cup soy sauce, less if you prefer
1/2 cup 7-up or sprite
3/4 cup packed brown sugar
sea salt and pepper, to taste
3 cloves garlic, finely chopped
red food coloring, optional.

1. In a container with tight fitting lid, combine pineapple juice, soy sauce, 7-up, sugar, and garlic. Season with salt and pepper according to taste. Add food coloring, if desired.
2. Stir to mix well and dissolve sugar.
3. Add slices of pork and marinate in the refrigerator for 12 hours.
4. When ready to cook, heat pan over medium heat. Add about 1/2 cup water then add the pork sliced with some of the marinade and simmer until pork is tender.
5. When pork is tender and almost all of the liquid has evaporated, add about 1 Tbsp of oil and cook until it caramelizes nicely.
6. Remove from heat, transfer to a serving platter and serve warm.

Itlog na Maalat (Salted Eggs)


In a typical Filipino breakfast, you can also find a meat dish (tocino, chorizo, tapa, or hotdog) as well as fish or dried fish to go with the rice. Accompaniments include papaya relish (atchara) and/or sliced tomato. The other typical component of a Filipino breakfast is eggs which can be scrambled, fried, or boiled. Aside from these three, salted eggs or itlog na maalat is also very popular. I like mine sliced and combined with sliced tomatoes and shallots with a little vinegar...delish.

Salted eggs are actually easy to make. You just need eggs, water, and salt. Soak the eggs in the brine solution for a few weeks and then hard-boiled. Viola! salted eggs. Duck eggs are typically used for this recipe but you can use chicken eggs instead. These salted eggs are actually readily available at the Asian markets but I like to make my own. why? just because...hehehe. I kept mine in the corner of the cupboard where it is dark for about 4 weeks before I boiled them. Hard-boiled salted eggs can be kept in the refrigerator.

Salted eggs recipe:

1 dozen extra large chicken eggs
1 1/2 cups sea salt
4 cups water

1. Inspect eggs to make sure that none of them have any cracks.
2. In a non-reactive container, mix sea salt and water. Stir to dissolve.
3. Place eggs carefully making sure that they do not crack. Also ensure that they are submerged in the brine mixture.
4. Cover the container and store in a cool, dark spot for 4 weeks.
5. When ready, hard boil them. Cool and store in the refrigerator.
Combine all ingredients in a bowl and serve with rice and meat or fish


Salted Eggs with Tomatoes and Shallots.

2-3 hard-boiled salted eggs, chopped or sliced coarsely
2 medium sized Roma tomato, diced
2 small shallots, sliced into rings
1 Tbsp vinegar

Pineapple--Kalamansi Juice


Arghhh...too much stuff to do...have to finish my school assignment tonight, work on my paper for the week and go to work on top of all that...how I wish that I have around 48 hours in a day which would probably still not enough to accomplish everything that I have to accomplish. Now I am starting to rethink my decision of going back to school. I like the idea of learning new concepts which are being taught in MSN but I hate that we have a paper that needs to be turned in every single week. I cannot wait though when I start taking the core courses for nursing informatics which is the specialization that I chose. The good news is, I only have 6 more months to go before I finish MSN-informarics then another 6 months to complete the core courses for nursing education which would give me another specialization and option to teach. Hopefully by the end of 2012 I should be done. Aigoo, just thinking about another year of being in school makes me shudder. Doctoral studies? maybe, maybe not. lol... on good days, I want to proceed with further education post masters but on bad days, my brain tells me NO! hehehe


This juice is part of the power breakfast that I cooked this morning to give me the energy to tackle all that I need to accomplish today. Aside from this juice, I cooked homemade pork tocino, sliced a couple of homemade salted eggs with onion/tomato, and garlic fried rice. The recipes for salted eggs and tocino will be posted in a separate post.

Kalamansi is a citrus fruit that is found in the Philippines. It is a close relative of lemon and lime only it taste a little better (at least to me it does). Because of the moderate climate here in California, kalamansi plants thrive when planted outdoors. There aren't that many kalamansi fruits that are sold in Asian or Filipino markets though. Lucky for me, my brother in law has a huge kalamansi tree which bears a lot of fruits. He brought some when he returned the Korean drama dvds last week.

Ingredients:

1 1/2 cups canned pineapple juice
1/2 cup freshly squeezed Kalamansi juice
sugar to taste
4 cups water
ice cubes
sliced kalamansi for garnish

1. Combine pineapple juice, kalamansi juice, sugar, an water. Mix until sugar is dissolved.
2. Chill until ready to serve.
3. In a tall glass, add two or three ice cubes, pour some juice mixture and garnish with sliced kalamansi.

Wednesday, November 9, 2011

Morisqueta Tostada con Chorizo (Fried Rice with Chinese Sausage)


Ahhh...it has been a while since I last posted anything on this blog. I have been cooking and taking pictures though but have been really busy that I have not had found the time to post. I went back to work and school in the same week so my schedule has really been crazy but I promise to try to find balance and time to post all the dishes that I have cooked and recipes that I am working on.

Morisqueta tostada con chorizo is nothing more than fried rice with Chinese sausage...simple and easy to make but really taste great. A complete meal by itself. I just used some leftover rice that I cooked the night before then added Chinese sausage. The sausage not only gives it a nice flavor but also makes it smell really good. Chinese sausage are sold in plastic packages and are readily available at most Asian supermarket. It is firm and looks dehydrated so I usually boil it in a little water to rehydrate it and make it fork-tender. The rest of the ingredients that I used are pretty much standard ingredients for Filipino-style fried rice- salt, soy sauce, onions, and garlic. I served this with pickled mangoes (burong mangga) to go with it...yummy!


Ingredients:

4 cups day-old steamed rice
3-4 Chinese sausage
1 shallot, chopped
3 cloves garlic, chopped
1 Tbsp soy sauce
salt and pepper to taste
2 Tbsp oil
2 tsp fried garlic as garnish

1. Slice Chinese sausage thinly and diagonally.
2. Heat pan over medium heat. Add oil then saute shallot and garlic until translucent.
3. Add Chinese sausage and saute for about 1-2 minutes then add about 1/2 a cup of water. Simmer until Chinese sausage is tender and all the fluids has been absorbed. Saute sausage for another 2-3 minutes.
4. Add rice and cook until slightly toasted. Make sure to stir frequently to prevent bottom from burning.
5. Add soy sauce and season with salt and pepper according to taste. Cook for another 1-2 minutes then remove from heat.
6. Transfer to a serving dish and top with fried garlic. Serve warm.


Wednesday, November 2, 2011

Mango Jam


I miss mango jam but unfortunately I cannot find any that is sold in the supermarket. Solution? Make my own mango jam from scratch. Jam making is actually easier than it looks and requires just a few basic ingredients. You really do not need some fancy schmancy equipment to make a decent jam. You have to make sure though that you sterilize the bottles to prevent early spoilage. Be very careful when moving handling hot containers as it may burn your fingers and hand. I used a large and heavy pan with lid to sterilize my mason jars as well as boiling filled jars afterwards.

Mango jam is really good with bread or crackers. I remember this particular brand that they sell in the Philippines called Clara Ole' that makes really good mango and pineapple jams. I wish they sell this brand here but even Filipino stores do not seem to carry them :(

Mango jam was easy enough for me to make. I used firm but ripe mangoes, peeled the skin and then slice as much of the flesh off the bone or seed as possible. Using a food processor, I processed the mango slices until they become chunky consistency. Next is to bring a cup of water to a boil then add pureed mango, lemon juice, sugar, pectin, and lemon zest. Bring to a boil until sugar is dissolved then lower the heat to simmer it until it thickens to gel consistency. Transfer them to sterilized bottles and seal then boil the whole thing for about 10 minutes. Remove from heat and let it cool. From 4 mangoes, I was able to make 2 (8 oz) bottles of mango jam. I did taste test by spreading it on crackers...yummy...taste like I remembered a mango jam should taste. Next project will have to be the persimmon jam then maybe, just maybe, I will try to make guava jelly... another favorite of mine which unfortunately I am unable to find here in the States.

Ingredients:

4 ripe (but firm) mangoes, peeled and flesh removed
2 cups sugar
1 cup water
juice of 1 lemon
zest of 1 lemon
1 Tbsp pectin

1. Sterilize mason jars according to direction.
2 Peel and chop mangoes then process in a food processor until it reaches a chunky consistency.
3. Place sauce pan over medium heat and add water. Bring to a boil.
4. Add mango, sugar, water, lemon juice, lemon zest, and pectin. Bring to a boil until sugar and pectin is dissolved.
5. Lower the heat to let the mango mixture simmer until it reaches the desired consistency. Make sure you stir frequently to prevent burning.
6. Test for gelling by using a cold spoon: take a spoonful of mixture and let it drop from spoon. If it drops in globs instead of being runny, it should be done.
7. Transfer to sterilized hot mason jars and seal using a two-piece lid.
8. Process filled and sealed mason jars according to manufacturer's instruction. Remove from heat and let it cool then store.

Tuesday, November 1, 2011

Burong Mangga (Pickled Mango)


Pickled mango...yummy! This is a Filipino appetizer recipe that is sure to whet your appetite and make you eat a lot. This dish is made by slicing unripe or slightly under-ripe mango and then pickling it in a vinegar, sugar, and salt mixture. This is a good accompaniment to any Filipino meal of pork, chicken, beef, or seafood.

I remember having mango in vinegar while I was growing up in the the province in the Philippines during summertime when ripe and green mango are in season and abundantly available. We have a variety of mango in the Philippines known as Indian mango which is perfect for this recipe but since that is not readily available, I just used the ones that are sold in the regular supermarket. One thing to remember though is that you need to use mangoes that are firm and slightly under-ripe to ensure that it is crisp and won't disintegrate when pickled. You need to peel the skin off and then slice the mango any way you want. I like slicing them in strips and thinly. Make sure you remove as much of the flesh from the stone as possible. If you choose to pickle whole mangoes, it is perfectly okay to do so as well. They can be refrigerated for about a week or so...that is, if they last that long. For me, it would be a miracle if they last more than 3-4 days as I can eat it with every single meal.

Ingredients:

3-4 unripe mangoes, peeled and sliced
1 cup white vinegar (I use cane vinegar)
1 1/2 cups sugar
1/8 cup salt

1. Heat pan over medium heat.
2. Add vinegar, sugar, and salt. Bring to a boil until everything is dissolved then remove from heat and let it cool.
3. Peel and slice mangoes then pack the sliced in a sterilized container.
4. Ladle the cooled vinegar mixture over mango and cover with top tightly.
5. Keep refrigerated.

Monday, October 31, 2011

Quince Jam


Quince is a lesser known fall fruit that looks like a cross between a green apple and a pear...only uglier. It is goof for making jam, jelly, and marmalade but can also be used in baking and cooking. It can also be made into wine because of it acidic nature. It can be found and cultivated in almost all parts of the world particularly in the Middle East and South America. Unripe, it is hard and cannot be eaten raw but when allowed to ripen in the vine, it turns slightly yellow and soft which can be eaten raw. This is one fruit that I have only discovered recently when I saw them at the grocery store. I bought some and made it into a jam. I really liked the result and taste that I made it again and again. I like spread it on top of a lightly toasted bread and enjoy with my morning tea.

This recipe is a very small batch which yields barely a couple of jars (8 ounces) of jam but its okay because I can always make more before quince season is over. The only problem sometimes is finding quince as they are not always readily available , even when it is in season, at the supermarket and it can be a little pricey at times too. I used shortcut in making this jam by using the food processor to puree the chopped quince. Be warned though that, like apple and pears, the color can turn brown if you don't work quickly. Make sure that you keep it submerge chopped quince in water to prevent discoloration. I think next time, I will make a chunkier version by using just chopped quince instead of pureed.


Ingredients:

2 Quince, seeded then chopped
1 1/2 Tbsp freshly squeezed lemon juice
1 tsp lemon zest
1 1/2 cups sugar
1 cup water

1. Heat sauce pan over medium heat and add water. Bring water to a boil
2. Wash and core quince then chop coarsely
3. Place in food processor along with lemon zest and puree then add to the boiling water along with lemon zest. Lower the heat and simmer for 10-15 minutes.
4. Add sugar and stir to dissolve.
5. Continue to simmer until it thickens to desired consistency.
6. Transfer to sterilized container and seal according to direction.

Sunday, October 30, 2011

Persimmon Smoothie


My brother-in-law returned my Korean drama DVDs yesterday and brought a box full of persimmons, kalamansi (Philippine lime), and a couple of guavas. The persimmon and kalamansi was from the fruit trees in their backyard while the guavas was from his office mate. My brain was working double time churning possible dishes that I could create from the goodies that I got. Will post update of them when I get a chance to make the dishes that I planned. The fruits of their persimmon tree is really great because it is sweet and crispy. I love eating them raw but I think I will use some of them to make persimmon jam and bread.

Kalamansi is the Philippine version of lime which is a citrus fruit. Like its American counterpart, it is slightly sour but the taste is slightly different. I can't really explain the difference but it has a distinct flavor that sets it apart. The juice is often mixed with water, ice, and sugar to serve as a juice/ beverage. The juice, like lemons and limes, can also be used in dishes such as part of a marinade for beef, pork, and chicken. It can also be combined with soy sauce and served as a dipping sauce. Normally, kalamansi do not grow very tall but my brother-in-law's kalamansi tree is almost as tall as their persimmon tree which bears so many fruits. Fresh kalamansi fruits are hard to come by even at the Filipino store but you can purchase it frozen and comes in small sachet which cost a fortune :(

Ingredients:

1 ripe persimmon, peeled and chopped
1 frozen banana
1 cup milk
sugar, according to desired sweetness
3-4 ice cubes

1. In a blender, combine persimmon, frozen banana, milk, and sugar.
2. Blend until smooth then add ice cubes.
3. Blend some more until smooth.
4. Transfer to a tall glass and serve immediately

Saturday, October 29, 2011

Balsamic Vinegar and White Truffle Oil Bruschetta


This is a nice starter to any meal because it is easy to make and packs great flavors. I think it only took me 15 minutes to chop, season, and assemble the entire dish. The secret to this bruschetta is the use of white truffle oil and balsamic vinegar combination which gives it an unusual earthy flavor.

Making bruschetta is very easy and takes just a few fresh ingredients such as tomatoes, basil, balsamic vinegar, olive oil, garlic, salt, and pepper. The bread is lightly toasted so that it is able to soak the liquid from the topping a little better plus it makes it taste better too. I use french baguette but you can use any bread of choice just make sure you slice it at an angle for a bigger surface area to hold the topping.

Ingredients:

1 loaf of french baguette, sliced into 1 1/2 inch thickness and then lightly toasted
5-6 Roma tomatoes, diced
2 cloves garlic, finely chopped
a small bunch of basil, roughly chopped
1 1/2 Tbsp balsamic vinegar
1 tsp white truffle oil
salt and pepper to taste

1. Lightly toast your bread in a toaster or oven.
2. In a bowl combine the rest of the ingredients and mix thoroughly.
3. Scoop the tomato mixture using a spoon and top it on you toasted bread.
4. Place on platter and serve.

Friday, October 28, 2011

Fried Garlic


Fried garlic is one of the toppings that is frequently used in Filipino dishes...at least from the place that my family was from. We use it as topping for fried rice as well as soups and porridge. The smell is heavenly and permeates the whole house. It gives an impression of a lived-in, warm house. It also conjures up an image of a loving family gather together to share a meal prepared by a loving mom :) Ah, it makes me miss my mom and wish she is here with me right now but I am sure that she is happily looking down from up above.

This is a simple addition to any dish which gives it a nice extra flavor and dimension. It only takes a couple of ingredients and few minutes cooking time. You have to be careful though not to burn them as they will taste bitter and not fit to eat. I find that gently frying them works in making sure that they don't burn and stay crispy longer. They are actually readily available in the Filipino store but I like frying my own since they do not really take that much time and effort. I usually use a few bulbs of garlic at a time and them place them in airtight container to keep them crispy and ready for use anytime I need them. To save time, you can use a food processor to chop the garlic but make sure that they are chunky instead of finely chopped. I prefer to chop them by hand though.

Ingredients:

4 or more bulbs of garlic, peeled and chopped
1/2 cup oil

1. Heat saucepan over medium heat. Add oil and heat it gently.
2. When oil is moderately hot, add garlic and fry them until they turn golden in color. Make sure you stir them frequently while frying to prevent burning.
3. Remove from heat and place on a paper towel lined plate to absorb excess oil.
4. When they have cool down, transfer to an airtight container to store.