Friday, June 29, 2012

Apple, Baby Brie, and Turkey Panini


Here's another sandwich offering for y'all....

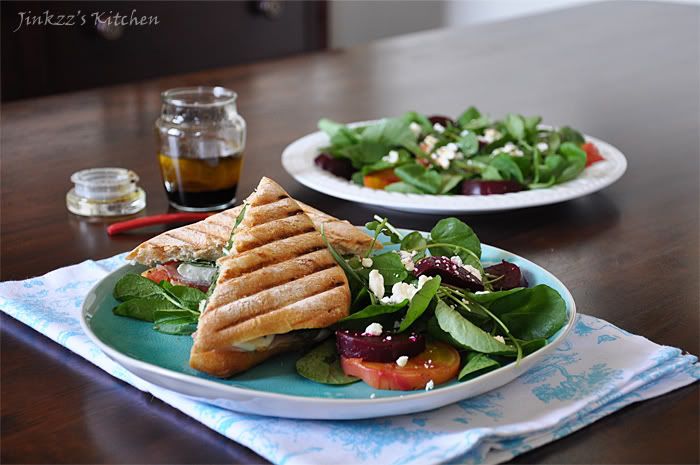
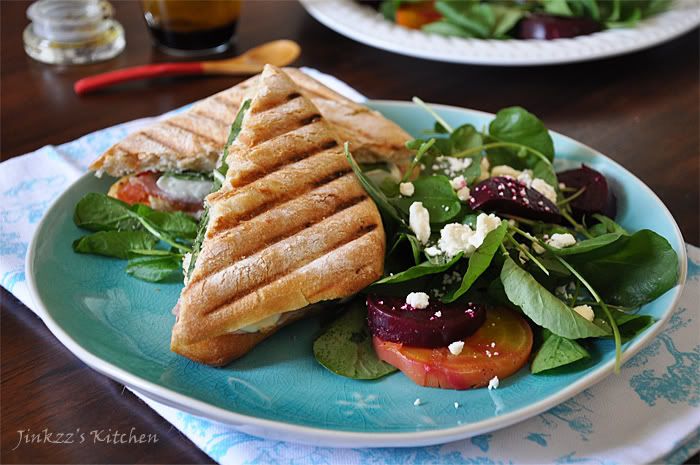
Actually the plan was just to make a grilled sandwich but when I finished assembling it was a little thick and kinda hard to handle without the filling falling out from the bread so I decided to make a panini instead.


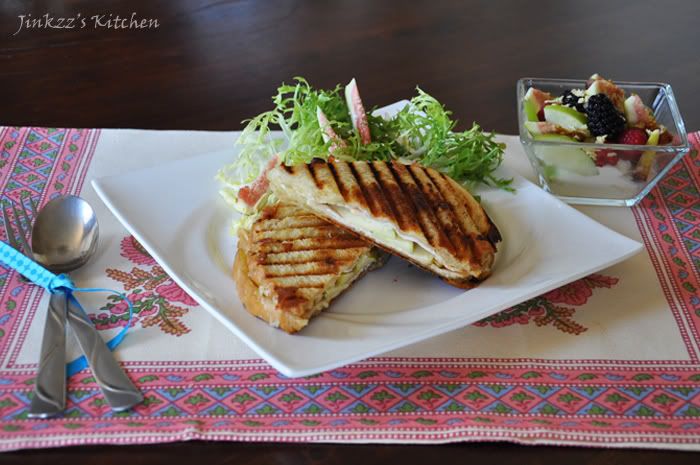
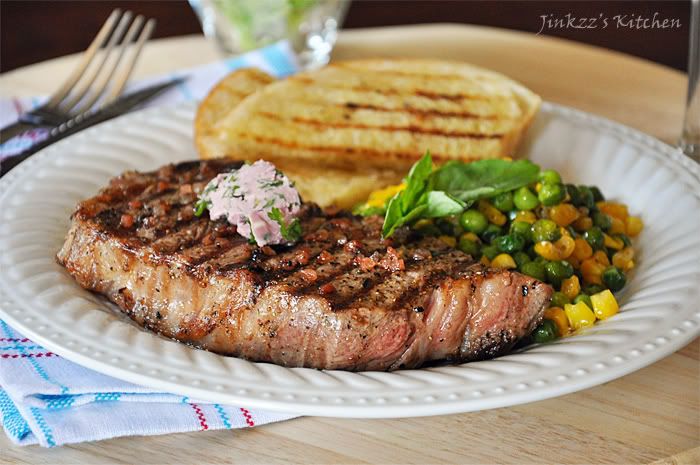
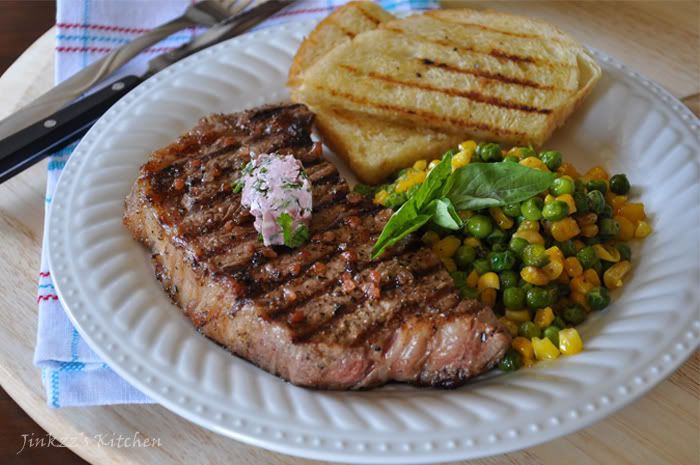
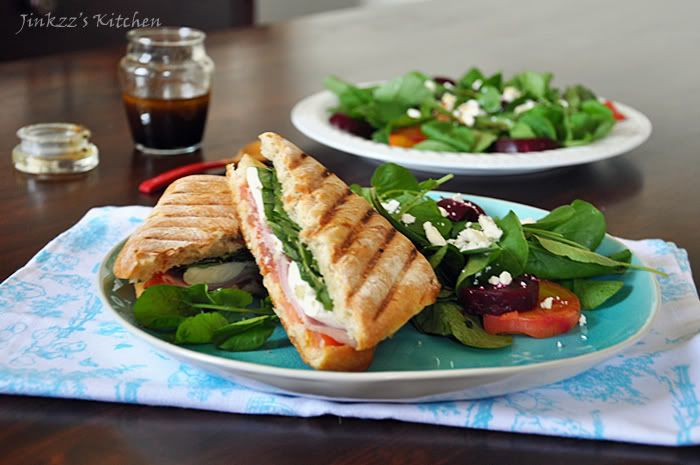
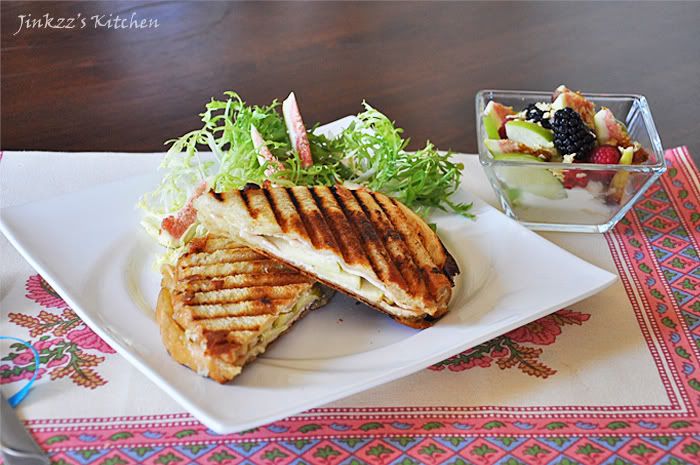
The inspiration for this panini came from a panini that I had from The French Crepe Company in Third and Fairfax.  The combination of creamy brie, tangy-sweet apple, and savory smoked turkey really works well together.  The result is a nice combination of flavor in one tasty panini...yum...yum...yum


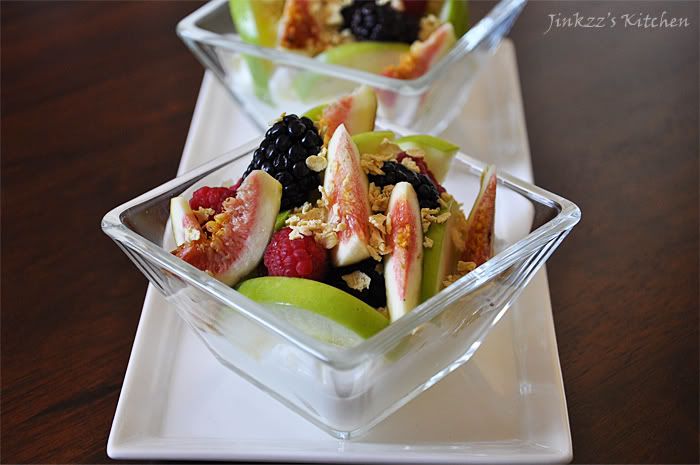
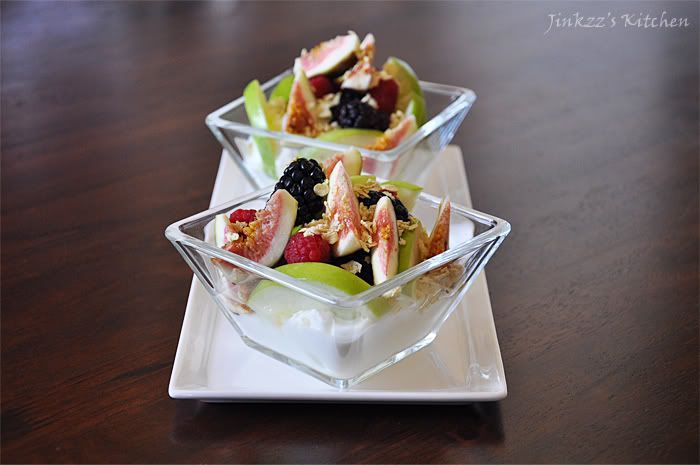
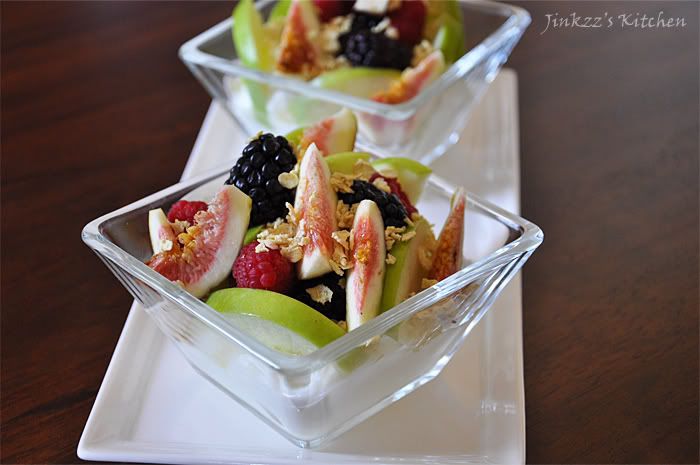
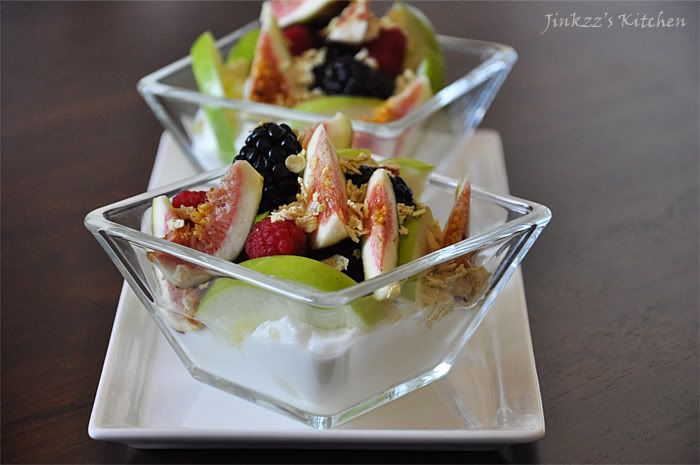
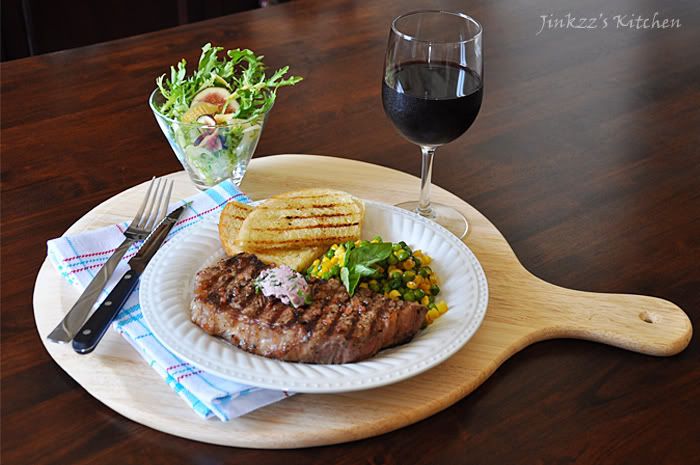
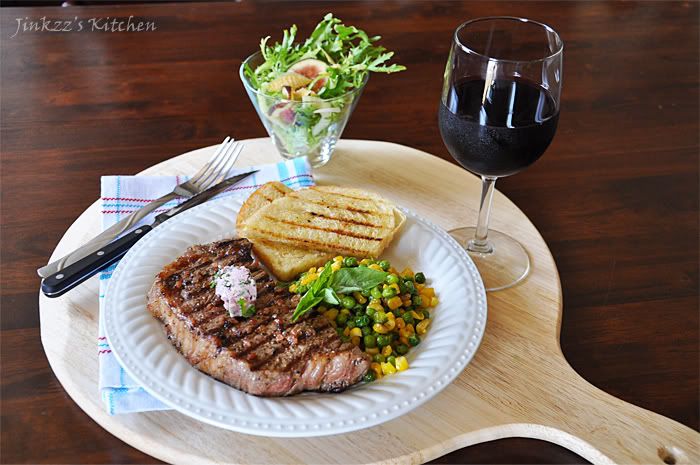
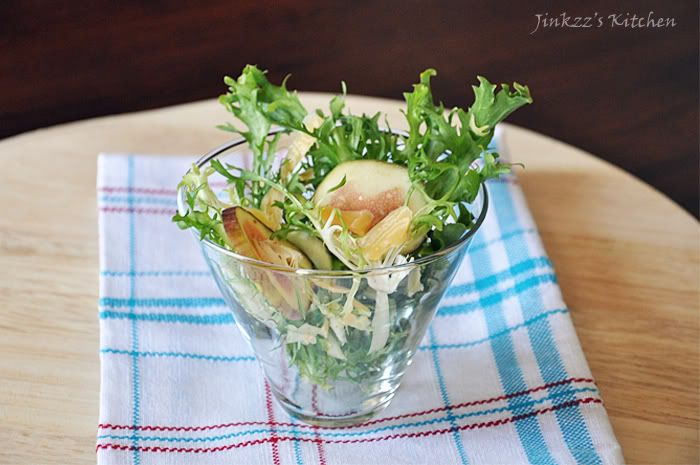
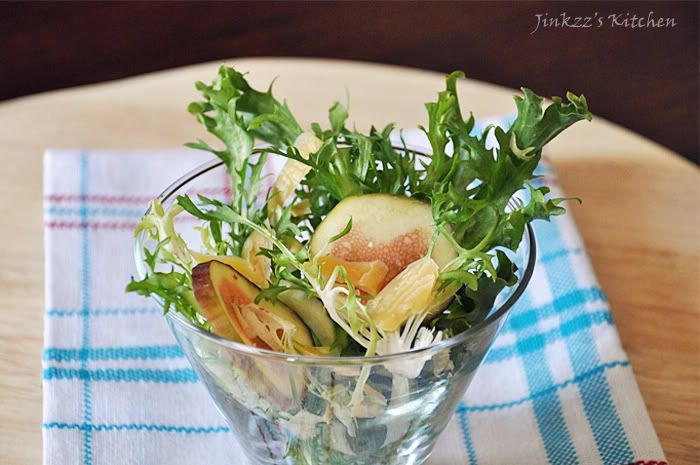
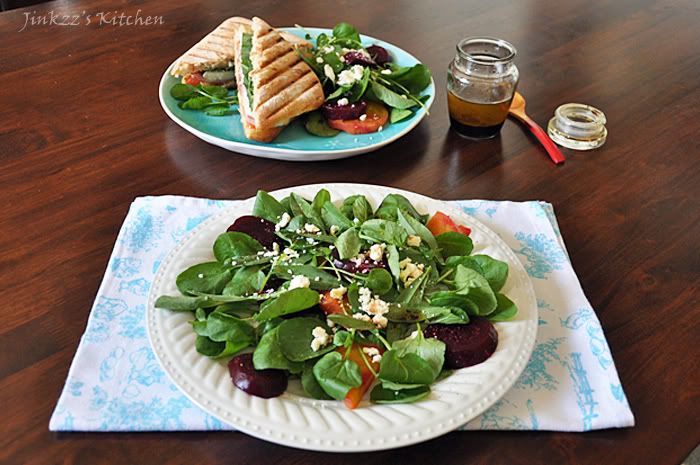
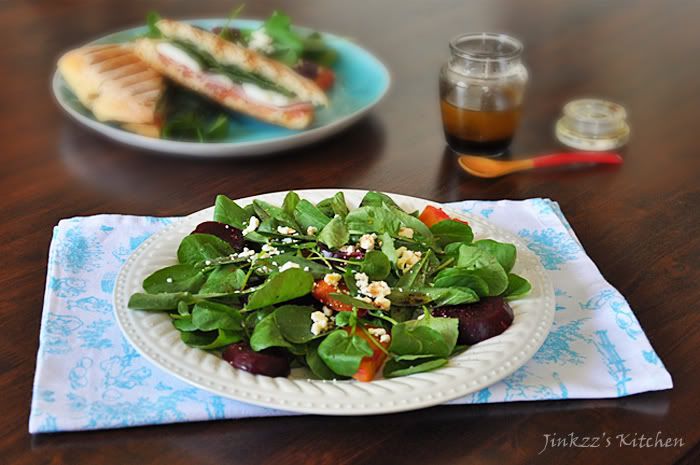
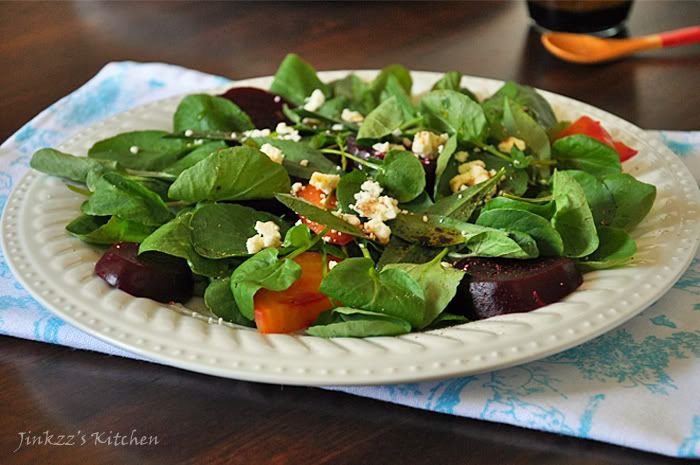
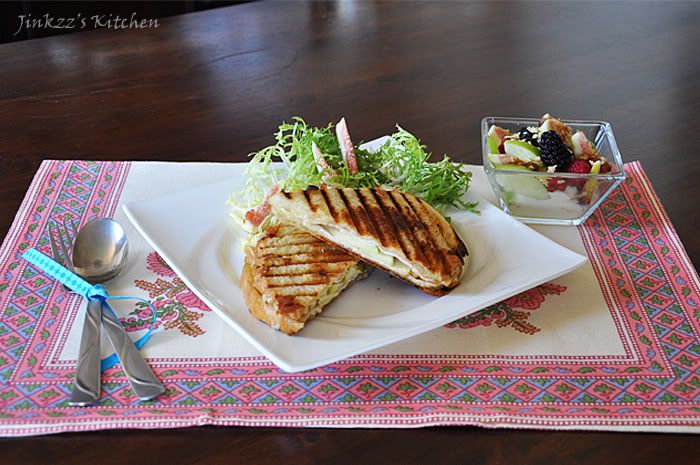
I served the sandwich with a side of frisee, figs, and pine nut salad as well as a fresh mixed fruits and greek yogurt parfait. The combination makes it a full meal which is not only easy to make and assemble but also requires minimal cooking.  That last bit of information is important especially during the summer months when  the heat is unbearable and any cooking can turn up the heat inside the house...hehehe. 

This meal can be served as a quick lunch or merienda (snack) for Filipinos. I say merienda for Filipinos because most (especially those who were born, raised, and living in the Philippines) do not consider anything that's served without rice a meal...everything else falls under the category of a snack if it does not come with rice :) 


Speaking of Filipino diet, here's an interesting fact:  Filipinos typically eat three full meals a day (breakfast, lunch, dinner) that is composed of rice and meat or seafood dish.  Aside from the three full meals, some Filipinos also eat snack in between those meals.  Snacks are typically served midway between the meals - in between breakfast and lunch, in between lunch and dinner, and a few hours after dinner and before going to bed (midnight snack).  So it  is not uncommon to see Filipinos eat at least 5 to 6 times a day (counting all the regular meals and snacks) :)  That's a lot of meals to prepare for a typical Filipino wife, don't you think? Of course most (even those who are not considered rich) have household help...


2 slices of sourdough bread (or your preference of bread)
2 slices of smoked turkey breast (from the deli)
1/2 an apple (granny smith or your preference), sliced thinly
thin slices of baby brie
1 Tbsp extra virgin olive oil
freshly ground black pepper, to taste

1. Using a pastry brush, lightly brush both bread slices with olive oil
2. Arrange a thin layer of baby brie on both sides of the bread then lightly brush with olive oil and sprinkle freshly ground black pepper according to taste
3. Place a slice of turkey breast on each of the bread slices
4. Arrange slices of apple on one side of the bread.
5. Use the other bread to cover the other slice then set aside.
6. Heat panini maker or stovetop grill then lightly brush with leftover olive oil
7. Place the sandwich on the grill.  If using stovetop grill, place a layer of aluminum wrap on top of the bread then place a heat proof weight over it to weigh it down.
8. When one side is done, turn the panini over and grill the other side until done.
9. Slice in half and serve warm.

Thursday, June 28, 2012

Mixed Fresh Fruits and Greek Yogurt Parfait

The weather's been too warm these past few days which makes me too lazy to cook.  Cooking means having to open all the windows and doors to let out the heat but it also means that I have to turn off the air conditioner.  Too much hassle so I tend to avoid cooking during the day when it tends to be the hottest and reserve cooking at night when the temperature is a little cooler.  Or, opt to make dishes that does not require any cooking and minimal preparation.  This dish is one such dish as it uses fresh fruits and yogurt so no cooking is needed.


I used several fruits and berries that are in season so they can be easily substituted when the season changes.  In this particular parfait, I used blackberries, raspberries, granny smith apple, and fresh turkey figs.  Instead of regular yogurt, I used Greek yogurt which is a lot thicker in consistency.  I also topped the parfait with dehydrated lentil flakes which I purchased from Dragunara at the farmer's market in Fairfax and Third.  The dehydrated lentils provided some crunch to the parfait but it can be easily substituted with granola, if you prefer. If you prefer the parfait to be sweet, you can add a little bit of honey or sugar.


The fresh turkey figs that I used in this dish came from Costco.  At $5.99 per tray of about 18 or more figs, it was a huge bargain compared to the one sold at WholeFoods.  Figs are are just plain ugly on the outside but the insides are so pretty when you slice it.  It has this pinkish and while color which is so attractive when you add to salads or as garnish. And don't even get me started on the taste as they are very tasty and delicious when they ripen. I usually do not peel it but I do wash it really well to remove the fuzzy exterior before slicing or eating it on its own.


Speaking of Dragunara, it is a gem of a spice store located within the farmer's market at Fairfax and Third in Los Angeles.  My friend and I found this little spice haven by accident when we took a different route than we normally take to get to La Surla Table.  Ahh...so happy that we found this place because they sell a lot of spices that are not normally found in regular stores or even WholeFoods, such as dried lavender flowers, dried hibiscus flowers, Szechuan peppercorns, all colors of lentils, different types of salts, etc.  I came out of the store bearing a huge shopping bag full of different spices...ahhh, the place is like an oasis for cooks and food fanatics...


Ingredients:

Brown turkey figs
blackberries
raspberries
granny smith apple or any apple you prefer
2 Tbsp of dehydrated lentil flakes or granola
Greek yogurt
honey, optional

1. Wash, dry and slice fruits.
2. Place a layer Greek yogurt in a container
3. Top with fresh fruit slices.
4. Sprinkle dehydrated lentil flakes or granola on top.
5. Sweeten with honey, if you prefer.

NOTE:  There is really no exact measurements in this dish so you can use as much or as little of each ingredient as you want.

Tuesday, June 26, 2012

Raspberry Lemonade

I really do not like summer...too warm in my opinion.  Thank goodness for air conditioners...

The good thing about summer though is that it brings a lot of fresh summer produce especially berries, such as blueberries, blackberries, and raspberries.  The prices are also lower than off season prices.  I was over at the Korean supermarket the other day when I spied some really nice raspberries at a dollar per container. Ha! that is a bargain especially since they cost five times at WholeFoods. Of course, WholeFood's raspberries are organic but still huge difference in price.  I do buy organic produce at times but for the most part I do not really care.  


Berries are pretty flexible since you can eat it raw or add it raw on dishes and salads as well as cook it as fillings for pies, jams, and jellies..  They also work well in juices, shakes, and lemonades. Speaking of lemonades, I cannot remember how many I've featured in this blog so far...who's counting anyway...hehehe 

Lemonades are handy to have especially during summer months as they are great as thirst-quenchers and for fluid replenishment to prevent dehydration due to excessive sweating as a result of sun exposure.  You can serve it in a tall glass with plenty of ice to keep it chilled or you can use frozen berries and fruits as substitute for ices to prevent it from becoming watered down when the ice melts. 

To make frozen fruit garnishes, you can cut large fruits, such as apple, mango, etc into small slices or wedges.  For berries, you do not have to slice then but instead freeze them whole.  Arrange the fruits/ sliced fruits in a parchment paper-lined freezer safe container and freeze for about 1 hour or until they harden.  After an hour, you can transfer them to a freezer ziplock bags and leave in freezer until ready for use.  Freezing them in a single layer will prevent the fruits and slices from sticking together thus making it easier to use.  Use these garnishes as a substitute for ice or in conjuction with ice.


Ingredients:

1 cup raspberries, washed and dried then lightly crushed

1 cup sugar or according to desired sweetness

4 + 2 cups of water

1 cup freshly squeezed lemon juice

1. Place raspberries, 2 cups water, and sugar in pan and let it boil.

2. Once the mixture boils, remove from heat and let it cool

3. Strain mixture and transfer to a container with tight-fitting lid.

4. Add the rest of the water and lemon juice.  Mix well then chill.

5. To serve: Pour lemonade on a glass of ice or frozen garnishes and serve immediately.


Sunday, June 24, 2012

Chicken Wings in Cocoa-Hot Sauce

I like spicy chicken wings... I usually order a serving every time I place an order for pizza.  There is just something about it that can get very addicting and yummy.  They can be very messy to eat but I guess that is part of the charm in eating hot wings especially if you use your hands instead of the utensils :)

This recipe for chicken wings is based on a Good Housekeeping cookbook that my sister-in-law gave me recently.  I used cocoa powder instead of grated dark chocolate since I didn't have any in the house.  The result is a decadent variation of the classic hot wings that I do like very much.


Cooking this takes a few steps and several cooking vessels so be prepared to wash a mountain of dirty dishes afterwards...hehehe. I used one cooking pot for frying the chicken wings and another for the sauce.  I also used several plates for the preparation which was my mistakes since I should have used a ziplock bag for dredging the wings in seasoned flour.  That would have saved me a little bit of time and fewer dirty dishes...

The recipe calls for a cup of butter but I cut it down to half and still got a good result.  I do not like my food too greasy anyway so it worked out well.  Instead of using a regular hot sauce to make the dish spicy, I used a combination of kochukaro (Korean powdered chili) and Sriracha (Vietnamese hot sauce).  The kochukaro don't dissolve well so the sauce can be a little gritty but I liked it anyway.  You can adjust the spices to suit your taste but the proportion that I used (1 Tbsp kochukaro and 2 Tbsp Sriracha) was good enough for me- not too spicy but with enough hint of spiciness. 


Dredging the chicken wings in seasoned flour before frying not only gives it a nice flavor but also makes it crunchy even after the sauce has been added.  I think that if you do not dredge the chicken wings in flour prior to frying, the wings will become soggy once the sauce is added.  The addition of cocoa powder in the sauce gives it a darker color and deeper flavor than normal hot wing sauce.  


Ingredients:

2 lbs chicken wings
3/4 All-purpose flour for dredging
sea salt and freshly ground pepper, according to taste.
1 Tbsp cocoa powder
2 Tbsp Sriracha hot sauce
1 Tbsp kochukaro (Korean chili powder)
1/2 cup butter, room temp
oil for frying

1. In a bowl, combine flour with salt and ground pepper.  Mix thoroughly

2. Dredge chicken wings in flour mixture, remove excess and set aside.

3. Heat oil in a deep pan.  Add a few chicken wings at a time and cook until done.  Remove from heat and place in a paper towel lined plate to absorb excess grease. Set aside.

4. Heat another pan over medium heat.  Add butter and cook until melted.

5. Add Sriracha and kochukaro. Cook for a minute or two then turn off the heat.

6. Stir in cocoa powder and mix until well incorporated.

7. Add wings to the hot sauce mixture and mix until every wing is coated with the sauce.

8. Transfer in a serving dish and serve with ranch dressing and slices of celery.

Friday, June 22, 2012

Grilled New York Steak with Red Wine Butter

New York steak was on sale at the regular supermarket so I bought a pack of three.  The good thing with buying then in larger packs is that there is the supermarket gives additional discount which really helps.  This NY steak pack was approximately 50% the regular price.  Yehey for me!  I used to get my steaks from Costco but the price comes up cheaper when I buy them at the regular store when they put them on sale.  I am usually on the lookout for their sale circulars to see what they have to offer.  Quality steaks can be a little bit pricey but as long as you have the basic information down pat then you are good to go.  Good steaks are those with a good amount of marbling, or fatty tissues interwoven into the meat, which makes them juicy as well as tasty.

Some people does too much to their steak that it sometimes loses its taste. Marinades are okay for cheaper and lower quality ones as they help to enhance the flavor of the meat.  For good quality steaks though I do think it does not need any marination but instead let its natural flavor shine through.  I am not saying you cannot add any seasoning but just add enough to enhance its flavor without changing the flavor profile.


The steaks that I got was good quality although there is not that much marbling but still good and fresh.  I do not normally go for boneless steaks but that's all they have on sale so I picked up a pack of boneless NY steak.  Since I had not planned on cooking steak today, I wasn't prepared ingredients to cook with it.  A quick search on the net yielded a good recipe from WholeFoods which used ingredients that I already have in my pantry and refrigerator.  The recipe calls for grilling the steak seasoned with pepper and salt and topped with red wine butter.... it is simple and easy enough to make. I did substitute some ingredients but other than that I pretty much stayed true to the recipe :)

I grilled the steak using the stovetop grill pan instead of the outdoor gas grill since the weather's a little too warm to be staying outside.  Besides, the stovetop grill pan is more convenient when you are only cooking one steak. No need to fire up the grill when it is much more convenient to use the alternative, right? hehehe.  I prefer my steak in the rare to medium rare range.  To do achieve this, I usually cook one side for a couple of minuted before turning it over to cook the other side for another two minutes.  The result is a juicy,moist, and tender steak.


The red wine butter is divine because it enhances the flavor of the steak without changing it.  The rule on using wine for cooking is to use the same wine that you drink.  This means that if the wine is not good enough to drink then it isn't good enough to cook food with either :) I am not much of a red wine drinker but I did taste this one before I used it for cooking. It was pretty good with a slight peppery kick at the end.  Some people are hesitant in cooking with wine especially those who has a low tolerance to alcohol but rest assured that the alcohol usually dissipates during the cooking process and just leaves a nice flavor to the dish.   


For this dish, I substituted regular salt with coarse Himalayan pink salt. Himalayan pink salt.  They are hand-mined in ancient sea salt deposits which formed as as early as the Jurassic era some 250 million years ago. The are believed to be the purest form of salt available today.  They are rich in a lot of elements and trace minerals.  Their color range from pinkish white to pinkish and are very pretty to look at especially the coarse crystals.  To me, they look like little gems :)


Ingredients:

New York steaks

1/2 tsp Himalyan pink salt, less if you prefer

Freshly ground tricolored pepper

olive oil

1. Brush steaks with olive oil.  Season with freshly ground pepper and Himalayan pink salt

2. Grill to desired doneness then remove from heat.

3. Let it rest for 10 to 15 minutes before slicing or serving to let the juice redistribute.

4. Top with red wine butter before serving.

Red Wine Butter


1 cup red wine

8-10 whole peppercorns

1 bay leaf

1/2 cup butter, room temperature

2-3 Tbsp finely chopped Italian parsley

1. In a pan, combine red wine, peppercorns, and bay leave.  Heat over medium heat.

2. Continue cooking until it has reduced to about 2 Tbsp in volume the strain and set aside to cool.

3. Beat butter using a mixer until soft and fluffy

4. Add wine reduction and beat until incorporated.

5. Stir in parley and mix using a spatula.

6. Place in container with lid.  Leftover can be stored in refrigerator.


Frisée, Brown Turkey Figs, and Aged Gouda Cheese Salad

I cannot believe that it has been a few days since the last time I posted. I have been cooking but experience a backlog when it comes to posting...been busy all week since I started a new class this past Tuesday. Another core nursing informatics class which brings me closer to finishing this course. After this class, I only have one more informatics class then on to my nursing education core classes. Surprisingly this school stuff is not so bad and I am really liking it.

 Moving on...
 

Here's another salad recipe for y'all.  This is a light salad that is perfect for the summer.  I got my ingredients from WholeFoods which, as always, sells produce that are always fresh.  I do like going to their branch in Fairfax and Third.  Although it can get crowded during the day, the hassle is all worth it.

Frisee is not really something that I use as the main salad greens.  I usually have it in mixed green salad, such as Mesclun but WholeFoods had fresh ones so I bought it as the salad green base.  They say it is slightly bitter in taste when eaten raw but I can hardly taste that bitterness.  Compared to salad greens, such as dandelion, arugula, and watercress, the taste of frisee is way milder. This salad green is available throughout the year.  It has greeninsh to yellow-greenish lacy leaves and is a good source of mineral, fibers, and vitamins.

One thing to remember when using frisee is to make sure and separate the fronds then wash it thoroughly.  I find some dirt deep within the fronds close to the end...hehehe...it will not be good to eat salad with some dirt still on it.  I also trimmed the hard parts of the fronds/stems.


I also used figs for this salad.  Although fig season has just started, I went ahead and bought some since I have been on the lookout for it for a couple of weeks now.  The figs that I got were nice and sweet. Give it another couple of weeks and the season will be in full swing so it will become widely available in the market. The figs lends a hint of sweetness to the salad which does not only make it taste lighter but also balances the flavor out. I had some leftover figs after I made the salad and I already have plans to make a fig sandwich out of it...hehehe


Another great addition to this salad is the aged Gouda.  The one that I bought is a five-year old Gouda which is firm to touch.  It is not as firm as Parmigiano Reggiano though but still pretty firm compared to regular Gouda.  It has a slightly pungent smell an strong taste but very creamy consistency.  It also has a lot of crystallines which are salt-like in consistency but they are actually calcium lactate crystals which forms as the cheese ages. This cheese is yummy.


Ingredients:

1 head frisee, trimmed and washed carefully

a spring of tarragon, remove leaves from stem

1 fennel bulb, slice thinly

4 brown turkey figs, sliced thinly

salt and pepper to taste

Gouda cheese, shaved thinly using a vegetable peeler

1. combine green in a salad bowl.  toss lightly to mix.

2. Serve with lemon-olive oil vinaigrette


Olive Oil-Red Wine Vinaigrette 

1/2 cup extra virgin olive oil

1/8 cup red wine vinegar

juice of 1/2 a lemon, seeds discarded

sea salt and freshly ground pepper, to taste.

1. In a bowl, mix the first three ingredients and whisk until well blended.

2. Season with sea salt and freshly ground black pepper according to taste

Sunday, June 17, 2012

Caprese Panini


Caprese salad is one of my all-time favorite salad- especially when the ingredients used are good quality. Truth be told, I didn't always like caprese salad.  The reason for this is that I hate the taste of raw tomato.  It just tasted weird to me- tangy, juicy, and has a lot of seeds.  Over the years, my taste has started to evolve until I got used to the raw tomato taste.  Now, I do not have a problem eating them-raw or otherwise.


As I mentioned, I do like caprese salad and can probably eat it everyday.  My love for caprese led me to experiment how to incorporate it in another dish besides serving it as an antipasto (starters).  The result is this wonderfully flavored and taste panini.

Caprese salad is nothing more than a combination of sliced tomatoes, sliced mozzarella cheese, fresh basil leaves, olive oil, salt, salt and pepper.  For this sandwich, I used the classic ingredients for a caprese salad then added a couple of slices of hambon de Paris (Ham of Paris) which I got from Monsieur Marcel's*** at Third and Fairfax, inside the Farmer's market.  For a nontraditional version,I guess you can add balsamic vinegar but I have not tried it so I am not sure how it would taste.

***Note: If you have been following my blog, you would notice that I often mention this store.  The reason for that is because it is a great place to get deli and imported ingredients.


I sliced the ciabatta in half and then brush both sides with EVOO using a pastry brush.  Then I layered thinly sliced tomatoes which I also lightly brushed with EVOO and seasoned with salt and pepper.  I topped that layer with 2 thinly-sliced hambon de Paris (If you cannot find this, you can substitute it with regular ham) then add a layer of mozzarella medallions*** before adding a layer of basil leaves and covering with the other slice of ciabatta.  After that, off to the grill pan or panini maker it goes.

*** I buy pre-sliced fresh mozzarella medallions from WholeFoods but you can just buy them whole and slice them yourself.


Ingredients:

1 Ciabatta, sliced into two

1 thin slices of Hambon de Paris or regular ham

1-2 Tbsp extra virgin olive oil (less if you prefer)

1 small ripe tomato, sliced thinly

a  few leaves of basil

4-5 fresca mozzarella medallions (fresh mozzarella cheese)

salt and pepper to taste.


1. Slice ciabatta into half.  Lightly brush with EVOO using pastry brush.

2. On one side, place one layer of thinly sliced tomatoes.  Lightly brush with EVOO then season with sea salt and pepper according to taste.

3. Add two slices of hambon de Paris and top with mozzarella cheese.

4. Add a layer of basil leaves then place the other half of the ciabatta. Set aside

5. Heat your cast iron grill pan over medium heat.

6. Add about 1/2 a tsp of olive oil.  Using a non-stick, heat-resistant basting brush, spread the oil all over the grill pan.

7. Position your panini in the middle of the pan.  Place a layer of foil on top of the panini before placing you weight.

***make sure that the weight is stable and provides even weight on the panini.  I used a cast iron pan and then topped that with a cast-iron wok to provide a a heavier weight on the sandwich.

8. Grill each side for about 3-4 minutes or until it is toasted according to your preference.  When one side is done, use a spatula to turn it over and cook the other side using the same procedure.

9. When done, remove from heat and slice into two equal portion. Serve with potato chips, fried, salad or your choice of sides.


Golden and Red Beetroots, Tarragon, and Watercress Salad


Today is not a good day since I have to finish a presentation that is due for submission.  School's good because I am learning a lot but I do not like the part where we have to submit paper/project/presentation almost every week.  The good news though is that this class is almost over- one more day...Then off to another six-week course.  I do like the flexibility of online education because I can do my assignments and post participation at a time that is convenient to me.  No set time, no driving to the physical classroom.  The draw back? so darn expensive...but I guess its the same everywhere-online or campus education.

Since I am busy with academics today, I do not have much time to spend cooking and preparing dishes.  The obvious answer (of course) is a salad and sandwich combo.  For the salad, I chose watercress as the base then added tarragon, beetroots, feta cheese, and drizzled with an olive oil-balsamic vinegar dressing.


This is very easy to make.  Okay, I admit that I always say that but that is the only word that I can describe the preparation of this dish...combine, drizzle, and dig in.  Well, maybe a little prep time is required but hey if I could make it while trying to crack my brain trying to write a report and presentation, I am sure it will be easy peasy for anyone...right?  hehehe

While writing my report and presentation, I boiled the beetroots until it is fork tender.  Oh, make sure you wash them very well to remove any dirt then place them in a pan and cover with water.  Cook over medium heat ...don't forget to leave a little opening when placing the cover on top to prevent the water from splashing and boiling over.  Clean-up would be a huge problem since water turns slightly reddish-orange.  After it becomes tender, remove from heat and hot water and let it cool down.  When it has cooled down, use food preparation gloves to peel the outer layer (skin) from the beetroots.  Unless you want to end up with reddish to reddish-orange tinged hands, I suggest you make use of the gloves...hehehe.  Once the beetroots has been boiled and sliced, the rest only required assembling the salad- mix and toss.


Watercress is not really something that I normally choose as my salad green because it has a strong peppery and tangy taste to it.  Don't get me wrong.  I do like anything bitter, peppery, or tangy but watercress, i believe, tops them all.  The good thing is that if you combine it with the sweet beetroot taste, licorice-like tarragon, and feta cheese, you can hardly taste the peppery-tangy flavor of the watercress.  The different taste and textures compliments each other.


Ingredients:

2 red bettroots
2 golden beetroots
1 bunch of watercress- roots trimmed, washed thoroughly, and dried using a salad spinner
1 spring of tarragon- stems removed and discarded
feta cheese, crumbled
sea salt and freshly ground pepper, to taste
1-2 Tbsp white wine vinegar

1. Place beetroots in a pan. Add white wine vinegar and a little salt.

2. Cover with water and heat over medium heat.

3. Cook beetroots until fork tender.  Remove from heat then set aside to cool.

4. Once beetroots has cooled, use food prep gloves to peel then slice into disks at approximately half an inch thickness.

5. In a large bowl, combine watercress, tarragon, beetroots, salt and pepper.  Toss lightly.

6. Top with crumbled feta cheese then drizzle dressing over it.

Dressing

3 Tbsp extra virgin olive oil
1 1/2 Tbsp balsamic vinegar
1 tsp lemon juice
sea salt and freshly ground black pepper, to taste

1. Combine all ingredients in a container with a tight-fitting cap.

2. Shake to combine and emulsify.

***this recipe can be multiplied accordingly if you are making a huge batch of salad.


Wednesday, June 13, 2012

Ginataang Langka with Dried Fish

Hmmm...is it the water? or, the air?  I really do not know the reason but somehow I have been on Filipino dish streak these past few days.  It is not just a desire to cook Filipino dishes but I have actually been craving for them.  That's a little strange since I normally crave for Korean fare instead of Filipino. Homesickness? maybe... it is almost a year since I went home to the Philippines ...

I really wish I can go home before this year is over but I guess the chances of that happening is almost nonexistent especially since I am not sure when I will be able to go back to work.  October will be here soon which means alumni homecoming...i guess I will have to pass on that one...ughhh... I want to go home... I really do...huhuhu


Okay, enough whining and back to regular programming...hehehe

This dish is reminiscent of my homeland, the Philippines, and of Negros Occidental, the province where I am originally from.  We call this dish ensalada nga langka (Jackfruit salad) though it is actually a misnomer since this dish is hardly a salad but more like a stew. This dish is served as an accompaniment to main dishes such as pork and fish which, i guess, is the reason why it got its name.


This way I make this dish is very rich since I use coconut cream (kakang gata) instead of coconut milk.  It is slightly different from what we were used to in the Philippines which is less richer than this one.  The dried fish that I am using is also not the same as the one that we use in the Philippines.  I used Jeprox which is more bony and  paper thin instead of pinakas (the one that we used in the Philippines) which is fleshier and bigger in size.  To give the dish an extra kick, I added a few hot chili.  If you do not want it to be too spicy, you can discard the seeds once you slice the peppers.

CAUTION:

Do not touch your face or eyes when slicing peppers as it may cause burning.

Also be careful when cooking and eating dried fish especially Jeprox as it has a lot of bones.


The picture above this post features fried Jeprox (dried fish)


Ingredients:

3 cans of young, unripe jackfruit, sliced into half an inch thickness

2 cans coconut cream (coconut milk, if you prefer)

4 jalapeno pepper, sliced thinly (remove seeds if you do not want it too spicy)

5-6 Jeprox (dried fish) or any dried fish that you prefer

salt and pepper, according to taste

onion, sliced thinly

oil for sauteing

1. Heat pan over medium heat. Add oil.

2. Saute onion until translucent.

3. Add jackfruit and dried fish then saute for a couple of minutes.

4. Add coconut milk/cream and simmer until jackfruit is soft.  Stir occasionally to prevent coconut milk from curdling and burning..

5. Cook until almost all of the liquid has evaporated.

6. Season with salt and pepper according to taste.  Add sliced pepper, mix and remove from heat.

7.  Serve warm.

Monday, June 11, 2012

Sauteed Mongo Beans with Shrimp

Good day y'all.  Went to the Farmer's market at Third and Fairfax today.  Ate an early lunch of panini and salad from The French Crepe Factory.  The panini had sliced mozzarella, prosciutto, sliced tomatoes, and basil in it.  It was surprisingly good.  The meal came with a garden salad that had a mustard dressing.  The salad was okay but nothing spectacular.

The Farmer's market, being an LA landmark is always crowded with tourists and can get pretty noisy around lunch time.  The alleys and passageways are narrow and  usually congested with foot traffic.  Despite all that, I still like to go there because of Monsieur Marcel as well as La Surla Table and World Market.  I try to go early in the morning though before the lunch and tourist crowds arrive since trying to find parking can be a huge pain in the butt.


As  usual, my trip to the farmer's market isn't complete if I do not go to the usual stops.  Today, I stopped at Monsieur Marcel and picked-up some cold cuts and cheese (Havarti with dill, french ham, and oven-roasted turkey breast).  Although I can find these at the regular store, I prefer getting them from Marcel because the quality is better.  I also stopped by at La Surla and World market but didn't find anything that I liked.

From the farmer's market, I made a quick stop at home to drop off the cold cuts and the made my way to Glendale where I met with my friend.  We went to Glendale galleria and shopped a bit.  Finally, I was able to buy the bamboo matcha scoop/spoon that I wanted.  Hooray for that!!!


By the time I got home, I was starving again.  A quick inventory for ingredients yielded a bag of mung beans, shrimps, a bag of fresh spinach, tomatoes, and onions - things I needed to make sauteed munggo beans.  This dish is a childhood favorite which my mom used to cook for us.  I think I learned making this dish while watching/observing her cook the dish.

This is a simple, no-frill dish which can be prepared easily.  This is a dish which can probably be found in almost every places in the Philippines though there might be slight variation in the ingredients used or preparation.  Some people add sinigang mix to make it sour.  We usually use a different green vegetable but since it is not readily available here in the States, spinach is acceptable.


Cooking mung beans may take a long time so prepare the dish well in advance so that it will be ready when meal time  comes.  You boil the beans until it becomes soft, mushy, and liquid thickens.  If the water has evaporated before the beans softens, you can add more.  Also make sure that you stir it every few minutes as the bean could stick to the bottom of the pan and burn.  Aside from the fact that burnt mung beans do not taste good, it is also hard to clean a pan with burnt mung beans.


Ingredients:

1  cups of mung beans

1/2 lb shrimp (more if  you prefer), trimmed and deveined but leave the shells on

2 cups fresh spinach

1 onion, sliced

1 tomato, sliced

salt and pepper according to taste

oil

1 Place mung beans and water in a pan and simmer until soft and mushy. Set aside.

2. In another pan, add oil then sauteed onion and tomato until onion is translucent and fragrant

3. Add shrimp and lightly saute until it turns slightly orange.

4. add softened mung beans to the pot and cook until it boils and slightly thickens.  NOTE: add more water as needed

5. When soup thickens slightly, add spinach and cook for a minute or two.

6. Season with salt and pepper then remove from heat.

7. Serve warm.