Showing posts with label pork. Show all posts

Sunday, June 10, 2012

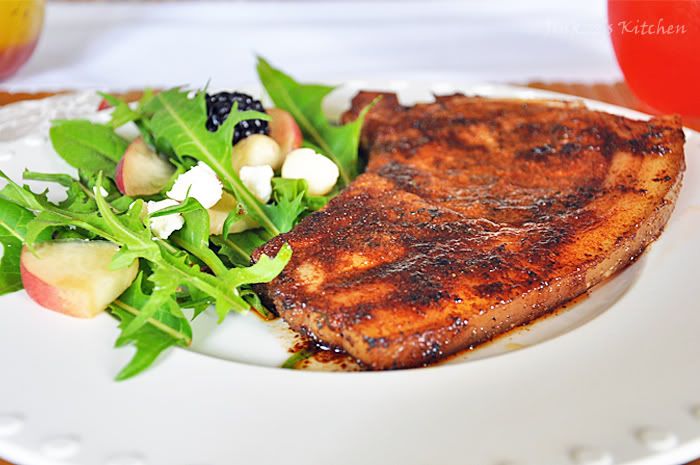
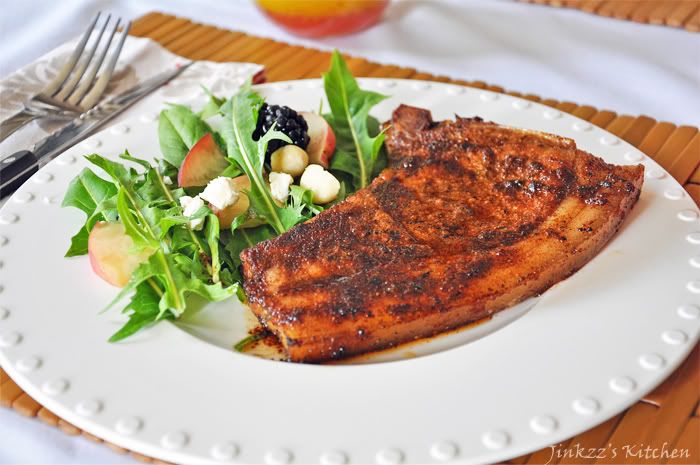
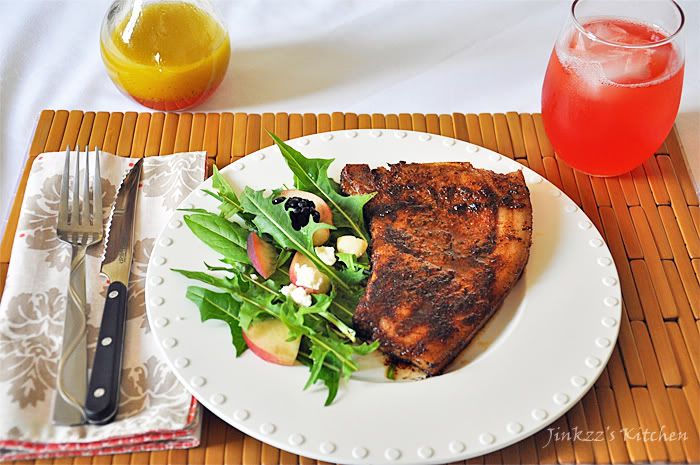
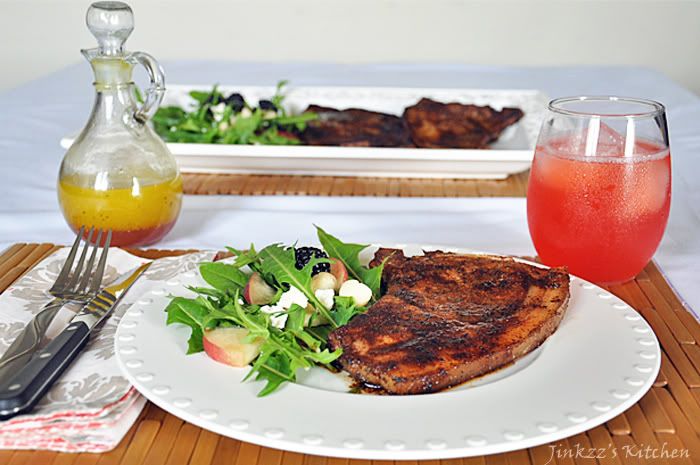
Pork Chops with Spices and Cocoa Powder


Ughhh...woke up tired and sleepy this morning after only 4 hours of sleep . I came home a little past eleven last night after going to the valley to watch Pacquiao-Bradley fight...Bradley won which was a little mind-boggling considering that Pacquiao, to many, dominated the fight...but, Oh well...doesn't really affect me much since I am neither a boxing fan nor watch Pacquiao fights on a regular basis. I took a little detour last night coming home since I missed my freeway exit (I-170) and continued on to I-5. Ha! I guess my sense of direction isn't all that bad since I was able to get home without the aid of a GPS...iPhone GPS is good but only if you have a passenger who is navigating but when you're driving alone, it is not a nifty device since it is way too small to read while driving (especially at night). Nonetheless, I made it home without any problem....hehehe...After I got home, I spent the next five hours proofreading and revising s group paper for school. Aigoo, that wasn't fun especially when all I really wanted was to go to sleep. At least that is out of the way and submitted to the professor.
 
Okay, enough rambling and on to the business at hand...hehehe.

This recipe is from a Good Housekeeping cookbook from the Philippines that my sister-in-law gave me on their recent visit.  I have to say that this cookbook has a lot of great recipes which I cannot wait to try.  When I quickly browsed through the cookbook, it looks like some were adapted to the Filipino palate but maybe I was reading it all wrong...will have to go back and read it in detail when I have a chance.

This particular dish is a delight.  Due to the addition of a lot of spices, the resulting dish tasted like a flavor explosion in my mouth.  It is spicy, sweet, savory, and smoky all at the same time.  Don't the not-so-pretty appearance fool you because it taste better than it looks.  The preparation is a breeze as well.  It is a combination of quick-frying and baking.  assembling and mixing the spices and rubbing will probably take you less than 10 minutes (only because there is so much measurement involved) them quick fry for 2-3 minutes each side and then bake for 10 minutes.  All-in-all, it might take you less than 30 minutes from start to finish.
 

Ingredients:

4 pieces pork chops (bone in)
cooking oil

Spice rub:

2 Tbsp brown sugar
1 Tbsp Italian seasoning
2 tsp onion powder
1 1/2 tsp cocoa powder (unsweetened)
1 1/2 tsp garlic powder
1 tsp paprika
1/2 tsp chili powder
1/2 ground cumin
1/2 tsp sea salt
1/2 freshly ground black pepper

1. Preheat oven to 305F

2. Combine spice rub mixture in a bowl.  Mix well

3. Coat the pork chops (on both sides) with the spice rub mixture.

4. Heat non-stick pan over medium heat.  Add oil and pan-fry pork chops for 3-5 minutes on each side.

5. Transfer pork chops to a baking dish and bake for 10 minutes or until cooked through.

6. Serve immediately.

Tuesday, May 8, 2012

Apology and a New Recipe (Lechon Kawali)

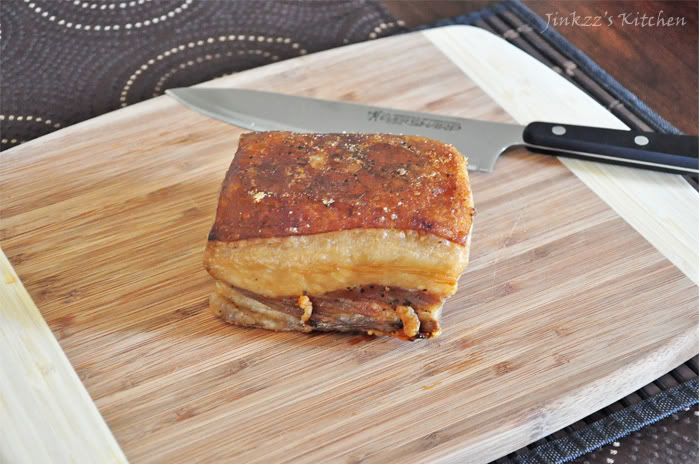
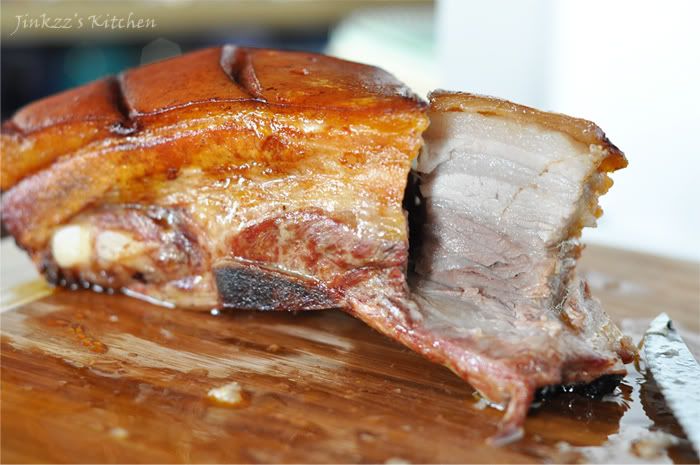
My apologies for not being able to update my blog for several months. I underwent surgery for a work-related injury and the subsequent therapies (which I am still undergoing) and doctor's appointments kept me away from the kitchen for a while. The surgery also took me off school for several months which I am not too thrilled about since it means that graduation will have to wait a bit longer. Nevertheless, I am at a point where I am able to some of the things I used to do with some limitations as the surgical site is still tender and painful but it is getting better and better with each passing day. As my first entry after my long hiatus, I am posting a recipe for lechon kawali. This dish may not be for faint of heart and the fatty nature of the dish may make the cardiologists cringe in horror but I assure you that it is very tasty and delicious. Lechon sauce (or catsup, if you prefer) and a steaming hot bowl of rice are all you need with this dish.
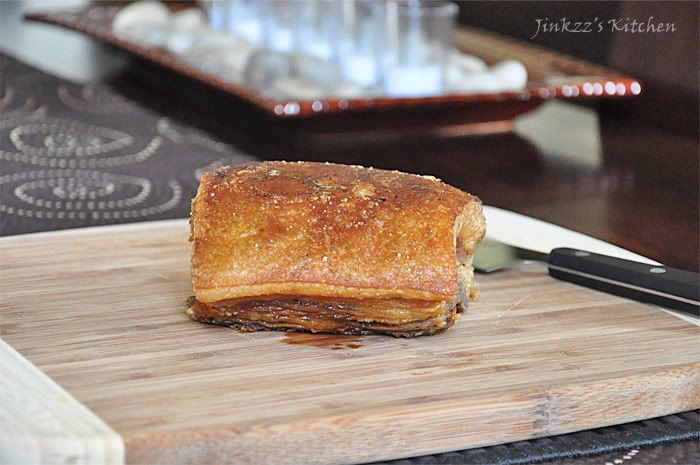
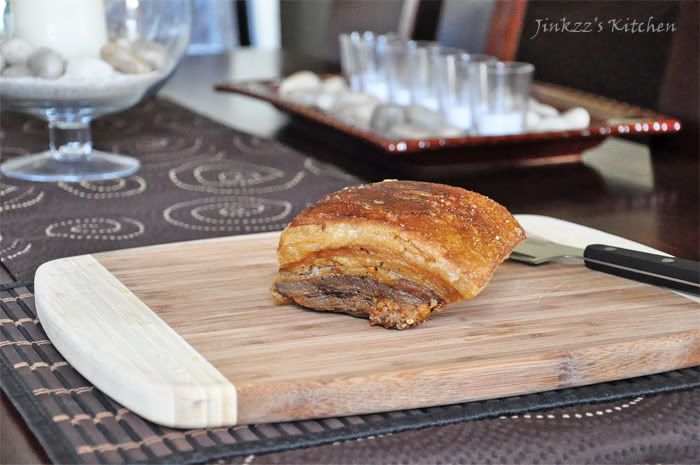
Lechon is a very well-known Filipino dish. It is usually a whole hog that is skewered in a whole bamboo and roasted in an open charcoal pit for several hours until the skin turns golden and crispy. It is a staple in almost every Filipino gathering. Crispy skin with the moist and tender meat makes this dish very tasty. I have previously posted a recipe for a variation of this dish known as Lechon sa Horno or oven-roasted pork. Lechon kawali, on the other hand, is cooked differently although the taste is similar to that of the traditional lechon. Instead of roasting the pork belly in the oven, it is boiled until tender then fried until the outer surface is brown and crispy. Although the outer surface is crispy, the insides are moist, tender and juicy. This is due to the fact that the meat is first boiled before frying. Like the original lechon, lechon kawali is best enjoyed with lechon sauce (or catsup) on the side and steamed rice.
Recipe: 2 lb slab of pork belly with ribs(available at most Filipino stores) salt to taste 1 tsp whole pepper corns 3-4 dried bay leaves water cooking oil lechon sauce (scroll down for recipe here) 1. Rinse pork belly and place in a large pot. 2. Add salt(according to your taste), whole pepper corns and bay leaves. 3. Add enough water to cover the pork and turn the heat to medium or medium high 4. Boil until tender then remove from heat and drain liquids. 5. You can blot the pork with paper towel to remove excess moisture. Cool and refrigerate overnight. (If you wish, you can skip refrigeration and just fry directly) 6. Heat a couple of inches of cooking oil in a pot large enough to hold the pork belly. 7. When oil is hot, add the whole pork belly and fry until golden brown. You may turn the pork belly over to fry and brown the other side. Cook until skin is crispy. WARNING: Oil is extremely hot and oil can splatter while you're frying so be very careful not to burn yourself. Use heavy lids or splatter guard. 8. Remove from heat and let it cool down a little bit before chopping into serving pieces. Serve with lechon sauce or catsup.

Friday, November 11, 2011

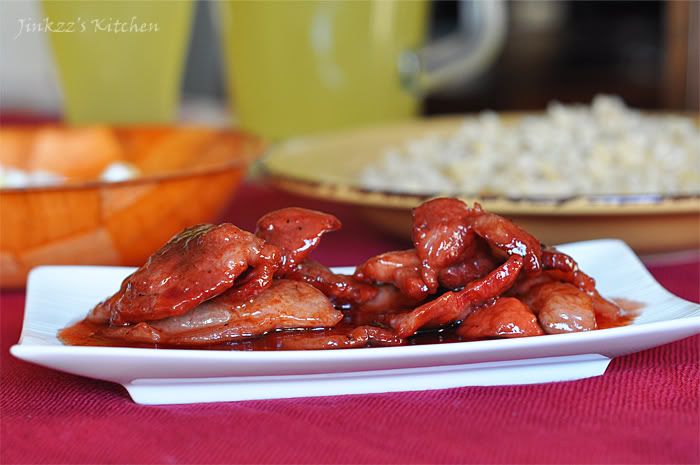
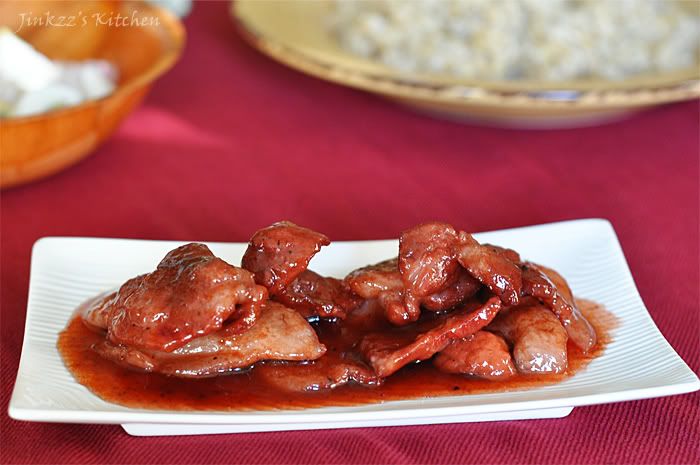
Pineapple Cured Pork (Pork Tocino)


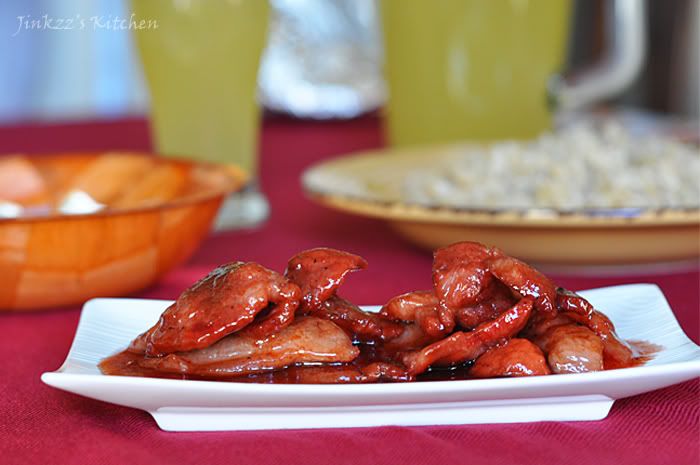
Pork Tocino is one of the typical dishes that is served for breakfast. It is part of the breakfast combo Tosilog or tocino, sinangag, itlog (tocino, fried rice, eggs). Again this is an easy dish to make and the ingredients can be doubled easily to make a big batch. They can be kept in the freezer until ready to cook.

For this pork recipe, I used thinly sliced pork which I has the butcher sliced at the time I purchased it. I marinated it in a mixture of pineapple juice, 7-up, soy sauce, brown sugar, finely chopped garlic, salt, and pepper. I also added a few drops of red food coloring to give it that nice reddish color which is typical of tocino. I marinated the pork slices for about 12 hours before cooking it in a little bit of water and oil. The 7-up, pineapple juice and sugar gives it a nice sweet flavor as well as gives it a nice caramelized sauce. I only made a small batch using 1 pound of pork but I think I will have to triple the recipe next time since 1 pound didn't really last me very long.

Ingredients:

1 lb. thinly sliced pork shoulder or butt (I chose a portion that has a little bit of fat because it just taste better :)
1 cup pineapple juice
1/4 cup soy sauce, less if you prefer
1/2 cup 7-up or sprite
3/4 cup packed brown sugar
sea salt and pepper, to taste
3 cloves garlic, finely chopped
red food coloring, optional.

1. In a container with tight fitting lid, combine pineapple juice, soy sauce, 7-up, sugar, and garlic. Season with salt and pepper according to taste. Add food coloring, if desired.
2. Stir to mix well and dissolve sugar.
3. Add slices of pork and marinate in the refrigerator for 12 hours.
4. When ready to cook, heat pan over medium heat. Add about 1/2 cup water then add the pork sliced with some of the marinade and simmer until pork is tender.
5. When pork is tender and almost all of the liquid has evaporated, add about 1 Tbsp of oil and cook until it caramelizes nicely.
6. Remove from heat, transfer to a serving platter and serve warm.

Sunday, October 16, 2011

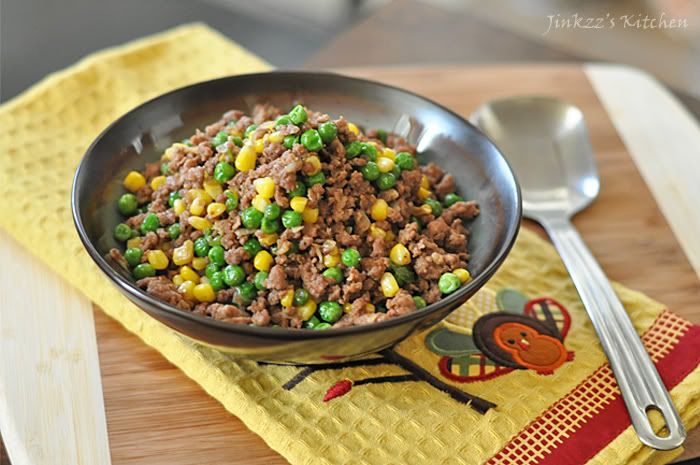
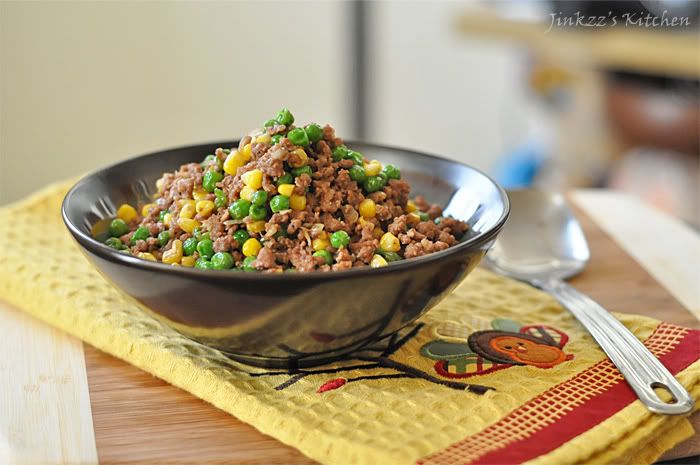
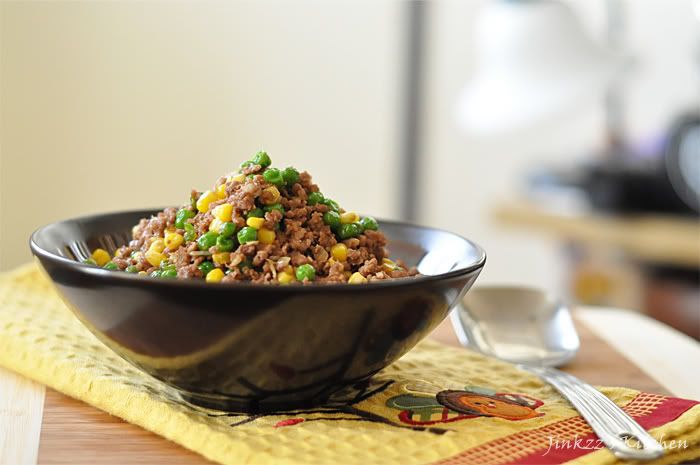
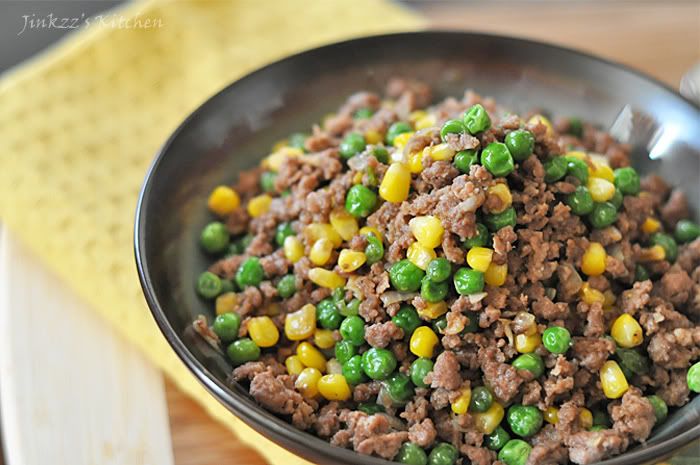
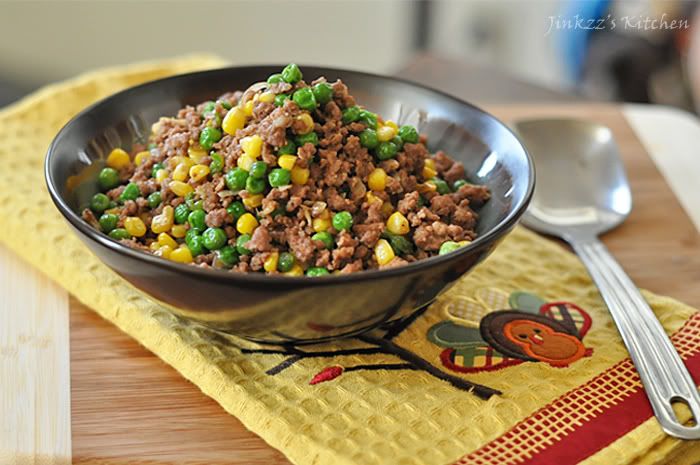
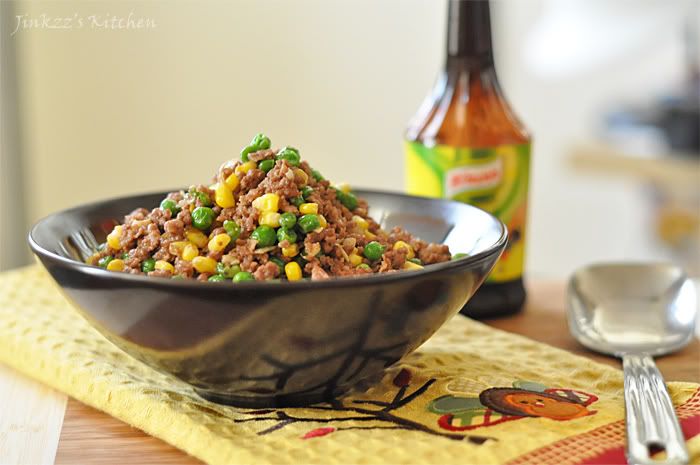
Sauteed Pork with Corn and Peas


Ughhh... I woke up with pain on my right shoulder this morning which means my old injury is acting up again. It is strange though because the weather is neither cold nor is it raining which are two of the reasons to cause my old injury to act up. This time though it seem really bad because I cannot move my neck towards any side of my shoulder. Arghh! I am no stranger to pain as I have had chronic pain for several years now as a result of work related injuries which I have undergone surgery for but I really hate it when my old injuries act up because it is usually worse than the last one. I had to take pain medicine for the pain which is not really a narcotic but it usually puts me to sleep. The problem is that it could not even make me go to sleep as the pain shoots up every single time I move in bed. I ended up sleeping on the floor which puts some pressure on the back thus keeping the pain level lower.

I was hungry though when I woke up this morning so I had to cook something before I went back to sleep again. it was a good thing that I ad ground pork defrosted in the refrigerator so I quickly sauteed it and added frozen peas and corn then season it some soy sauce, freshly ground pepper, and salt. The result was really good which made even tastier with a few drops of knorr liquid seasoning (commonly sold in Filipino stores). Here is the recipe of the dish I made today...

Ingredients:

1 lb ground pork (or ground beef, if you like)
3/4 cup frozen peas
3/4 cup frozen corn
3 cloves garlic, finely chopped
1 shallot, finely chopped
sea salt and freshly ground pepper, to taste
1 Tbsp soy sauce (you may use less if you prefer)
2 Tbsp oil for sauteing
Knorr liquid seasoning (optional)


1. Heat pan over medium heat then add oil and heat.
2. Add shallot and garlic and saute until fragrant and translucent.
3. Add ground pork and saute. Make sure you break up large piece.
4. Cook until brown and cooked well. Note: I did not add any water as the pork will produce its own liquid when sauteed which is usually enough to make it tender but feel free to dd water if it is not tender enough.
5. Cook until all of the liquid has been absorbed then add frozen peas and corn.
6. Cook until peas and corn has been heated through and defrosted then add soy sauce.
7. Season with salt and pepper according to taste.
8. Continue to saute until meat, peas, and corn is cooked well ( about 5 to 10 minutes.
9. Remove from heat and transfer to a serving platter. Serve warm.
10. Optional: may serve with knorr liquid seasoning by sprinkling a few drops according to taste.

Friday, October 7, 2011

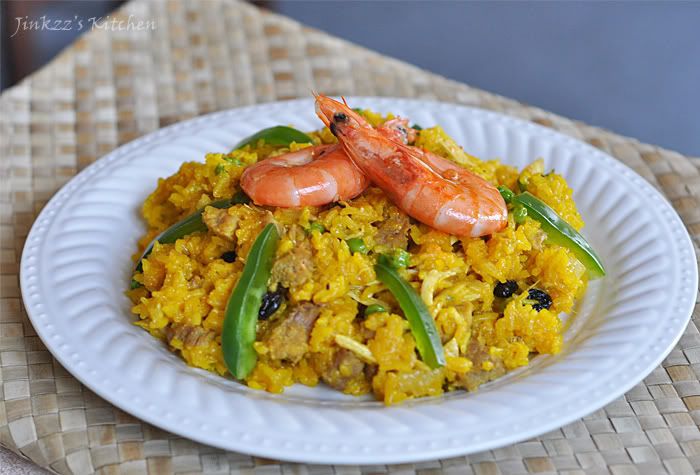
Easy Arroz Valenciana


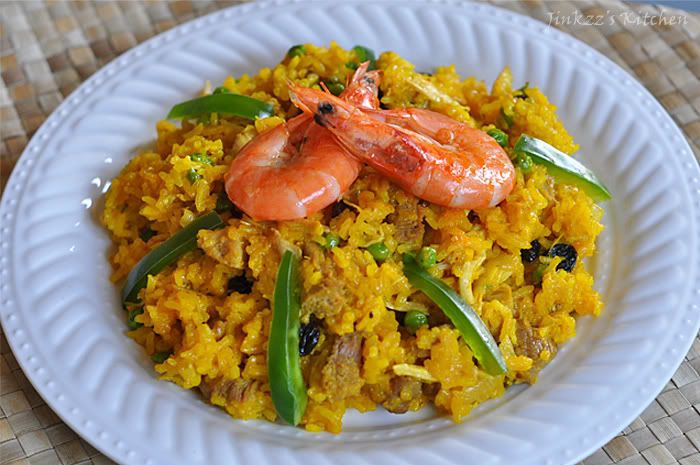
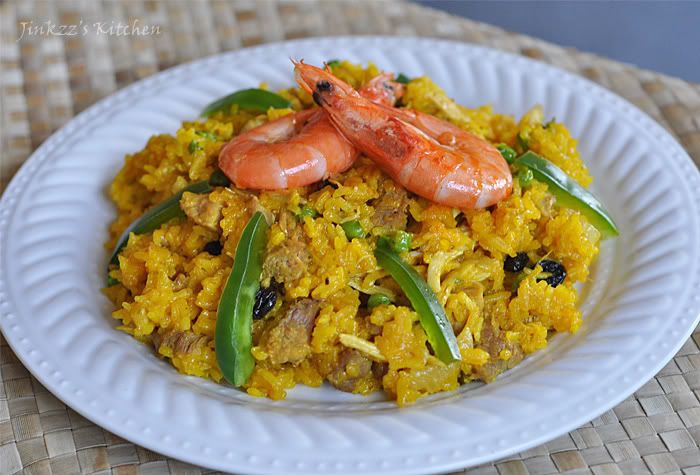
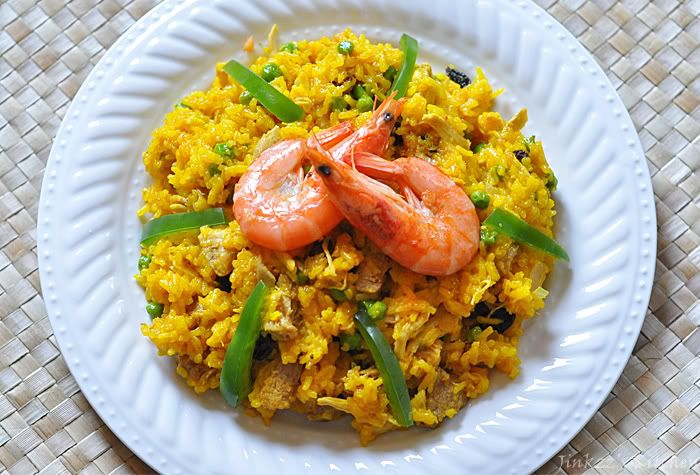
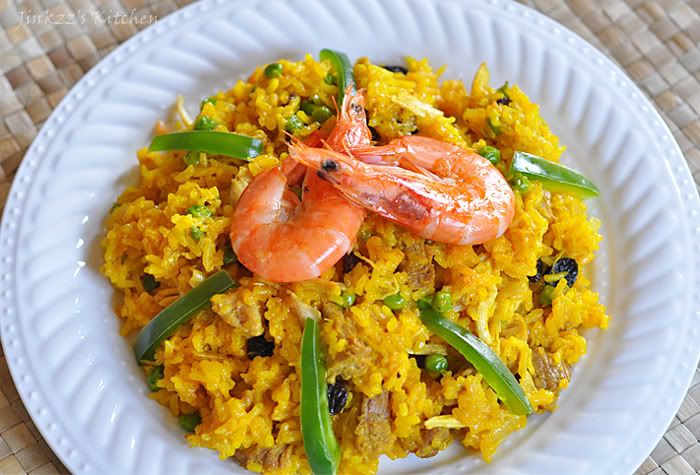
Arroz valenciana is one of the many dishes that is popular in the Philippines, particularly in Negros Occidental where my family is from. It is almost always present in gatherings. The dish uses glutinous or sweet rice, turmeric powder, pork, pork liver, chicken, peas, raisins, and bell pepper.


The process of cooking arroz valenciana can be intricate and laborious if you take the long way since you have to make sure that the rice is cooked well. This meant stirring it constantly to make sure that it is evenly cooked and to prevent the bottom from getting burned. That is just too much work for me so I used to stay away from making this dish. When I first came to the States (which was ages ago), I stayed with my aunt in New Jersey and that's where I learned how to make arroz valenciana the easy way. The first secret is cooking the rice in a rice cooker. The second is using chicken broth instead of water to cook the rice which eliminates having to season or making sure that the dish is evenly seasoned. The third is to boil the meat separate then slicing it. The last one can be done ahead of time and can be kept in the refrigerator until needed.


Ingredients:

3-4 cups glutinous (sweet) rice
chicken broth (enough to cook the rice and then some for cooking the rest of the ingredients)
1/4 lb pork, sliced
1/2 chicken breast, boiled and hand shredded
1/4 lb pork liver, sliced
1/4 lb shrimp, deveined and shelled
1/2 cup frozen peas
1/4 cup raisins
1 small onion, chopped
3 cloves garlic, chopped
1 small bell pepper, sliced thinly
sea salt and pepper, to taste
1 - 2 Tbsp oil for sauteeing
2 tsp turmeric powder
2 hard bolied eggs, sliced into wedges (optional)


1. Place rice and turmeric powder in a rice cooker. Add enough chicken broth to cook the rice. Stir half way through the cooking process to make sure that turmeric is incorporated into the rice evenly.
2. Boil chicken breast, pork, pork liver in a pan until tender. Let it cool and then slice/ shred.
3. Heat oil in a large pan. Addonion and garlic and cook until fragrant and translucent.
4. Add shrimp and saute until it turns orange. Add sliced/shredded meat and saute until heated through.
5. Add about 1 cup of chicken broth, peas, and raisin. Simmer until raisins has plumped up and peas is heated through. Don't worry if there is a little too much liquid because the rice will soak it up.
6. Add bell pepper and cooked rice mixture. Mix well.
7. Adjust seasoning as needed and according to taste.
8. Transfer to a serving platter and decorate with shrimps and/or hard boiled egg wedges. Serve warm.

NOTE: You can leave the shrimp shells on if you like. If you leave out the liver if you want.

Wednesday, October 5, 2011

Pork Spring Rolls (Lumpiang Shanghai)


Fried spring roll is a favorite and a staple in almost every Filipino household. The variation in fillings though is as varied as the many islands in the Philippines. Fillings include ground beef, ground pork, ground chicken, chopped shrimps and crab meats. Some add sprouted mung beans, bamboo shoots, tofu, and many others as meat extenders. There are also vegetarian versions which uses different veggies.


My mom's version though is composed of ground beef or pork with sprouted mung beans. They are delicious and easy to make. I have learned how to make this dish when I was little. The best part is wrapping the filling in lumpia (spring roll) wrappers. They are fun and easy once you get the hang of it.

I remembered that we used to buy lumpia wrappers atthe local wet market. They are sold by a bundle of 25 wrappers and each bundle is separated by a small piece of banana leaf sticking to the side. The wrappers are made by hand so they look a little rustic and sometimes uneven. They are also a little fragile and easily tear. When I was younger, those wrappers looked normal and I was used to handling them. When I moved here in the States, I got used to using factory-made wrappers which are evenly shaped and easy to handle. These are the only knid that is readily available in the supermarket. They are great because they don't stick to each other and are easily separated. A few years ago, on one of my many trips to the Philippines, I made some lumpia for a family gathering and bought all the supplies from the local wet market like my mom used to. Man, I had a rude awakening! The locally available spring roll wrappers were a lot harder to handle than I remembered them to be. Not only that, they also dried out quicker!!! I lost count of how many wrappers I tore and had to discard that day. Aigoo, I guess I have gotten used to the ones that are sold here in the States...hehehe

Ingredients:
1 lb ground pork
2/3 cup finely chopped carrots
1 onion, finely chopped
2 cloves garlic, finely chopped
sea salt and freshly ground black pepper, to taste
1 egg, slightly beaten
2 tsp soy sauce
spring roll wrappers
oil for frying

1. Combine pork, carrots, onion, garlic, egg, and soy sauce in a large bowl.
2. Seasom with salt and pepper. Mix all ingredients well.
3. Take a tablespoon of the filling and place in spring roll wrapper and wrap. For wrapping direction, click here
4. Repeat process until allof the filling has been used.
5. Heat pan over medium heat. Add oil.
6. When oil is hot, fry 3-4 lumpia at a time. NOTE: Make sure that the heat is not too high that the wrapper turned brown quickly before the filling is cooked through. Keep an eye so as not to burn the lumpia.
7. When cooked, transfer to a paper towel lined plate to drain excess oil.
8. Transfer to a serving platter and serve warm.
9. Can be served with sweet and sour sauce (recipe here), sweet and sour mango sauce (recipe here), or sweet-chili sauce (recipe here).

Monday, October 3, 2011

Lechon sa Hurno (Oven Roasted Pork) with Lechon Sauce (Roast Pork Sauce)


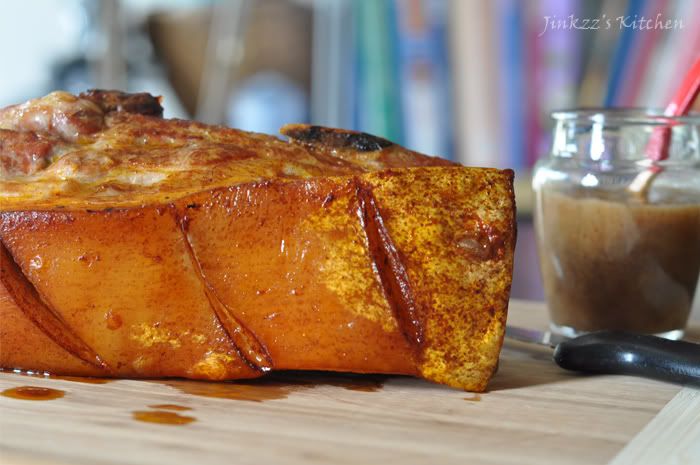
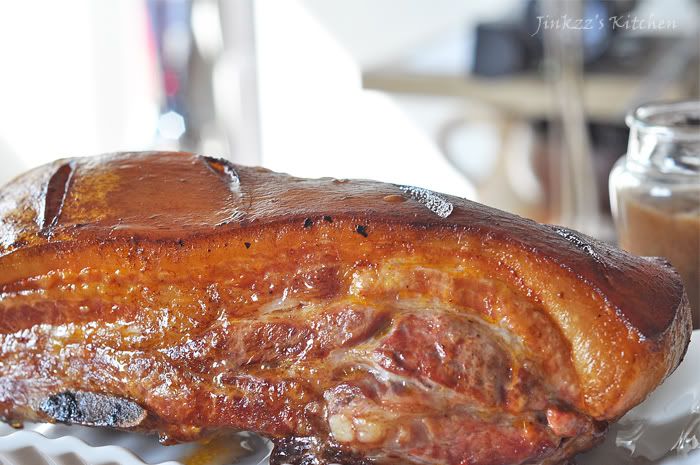
Lechon (whole roast pig) is a staple to any FIlipino gathering. Rarely can you find a huge gathering without this dish. A whole pig is usually "skewered" using a long, whole trunk of bamboo that is big and strong enough to hold an entire pig then roasted over open fire for hours while constantly turning the whole pig to ensure that it is cooked evenly and prevent overcooking/burning one side. The whole pig is roasted until the skin becomes crispy. Traditionally, the pig is stuffed with a mixture of lemon grass and tamarind leaves and the outside is basted with a mixture of oil and atsuete (annatto) to give it its golden color. This dish is served with lechon sauce and eaten with rice. Leftovers, if any, is then cooked in a dish called lechon paksiw (roast pork stewed in vinegar) which taste just as good as the lechon.

I remember back when I was young, lechon making is a whole-morning affair which starts in the wee hours - I'd say around 3 in the morning where butchers come and kill the pig. The pig is then cleaned, stuffed, skewered, and then roasted. This preparation is necessary so that the roast pork will be ready to serve by lunch time. The cooking process is a treat in itself because it is exciting to see a pale, whole pig turn into golden color. A nice lechon should have a nice balance between the fat content and meat. A lot of people actually prefer the crispy skin over the meat but I think the meat taste better. I can only eat a small amount of the skin whereas I can eat a whole lot of the meat (hehehe). The most popular parts are the ears and the tail because they are really crispy and crunchy...yummmmmyyy...


Since it is impossible to cook a whole pig in an oven, The next best thing is lechon sa hurno (Oven roasted pork). Actually, I take that back, it is possible to roast a whole piglet in the oven which is another Filipino delicacy known as lechon de leche but finding a whole piglet here in the States is near impossible. Anyways, in lechon sa hurno, pork (usually pork belly with ribs) is roasted in the oven for an hour or more depending on the size, basted with a mixture of annatto and oil until the skin turn golden and crispy. You also have to make sure that the flesh is cooked through. Generally, I would cook a 2 1/2 lb pork belly for an hour and a half at 350F then bump up the heat to 400 to 450F for 20 to 30 minutes until the skin is crispy.

Ingredients:

2 1/2 lbs pork belly with ribs
3 stalks of lemon grass
1 small onion, chopped
3 cloves garlic, chopped
sea salt, to taste

basting sauce:

1/2 oil
1 1/2 Tbsp annatto extract

1. Mix ingredients for basting sauce and set aside.
2. Make shallow diagonal cuts on the pork belly skin. Sprinkle salt all over the pork.
3. Line the bottom of your oven with aluminum foil. Note: This will save you the work of having to clean your oven when you are done cooking.
4. Cover a large baking pan with several layers of aluminum foil (Again, to save you from having to scrub it later) then add enough water so that it comes up halfway. Place onions, lemon grass, and garlic.
5. Place the baking pan at the aluminum foil-lined bottom of your oven.
6. Preheat oven to 350F for 15 minutes.
7. With the oven rack in the middle, place the slab of pork directly to it and over the baking pan. NOTE: The baking pan will catch any dripping and the water in the pan will help keep your pork moist while it is cooking. Be careful though not to burn yourself when placing the pork on the oven rack.
8. Baste pork with the oil-annatto mixture every 20-30 minutes. Cook pork for about 1 1/2 hours.
9. At teh end of the 1 1/2 hours, turn up the heat to 400F to 450F to help crisp up the skin. Cook for about 20-30 minutes or until skin is crispy.


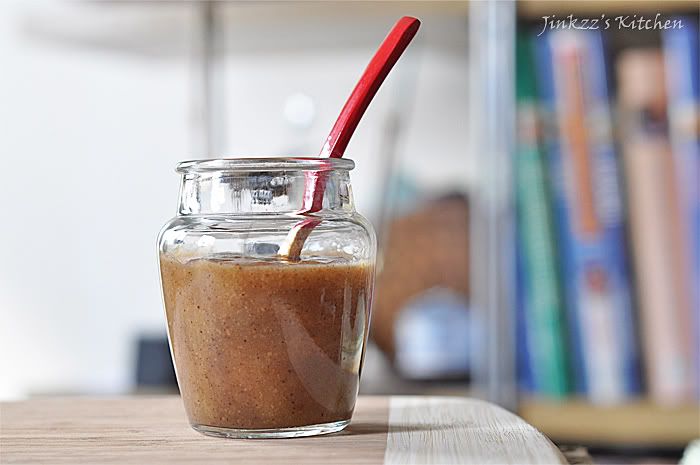
Lechon Sauce (Oven Roasted Pork Sauce)
adapted from The Philippine Cookbook by Reynaldo Aguinaldo

Ingredients:

1/2 pound pork liver
1/2 cup apple cider vinegar
1 cup bread crumbs
3 cloves garlic, finely minced
1 small onion, finely chopped
1 Tbsp oil
3 Tbsp brown sugar
salt and pepper, to taste

1. Puree liver in a blender or food processor.
2. Heat pot over medium heat, add oil then saute onion and garlic until transluscent and fragrant but be careful not to burn.
3. Add pureed liver and saute until it turn slightly brownish in color then add the rest of the ingredients.
4. Simmer mixture for about 15 to 20 minutes then transfer to a blender and blend until smooth. Let it cool before serving.


Alternatively, you can purchase a ready made lechon sauce which is often marketted as sarsa ng lechon (Lechon Sauce). The best brand, in my opinion and by far the most popular, is Sarsa ni Mang Tomas which is readily available at most Filipino markets.

Thursday, September 29, 2011

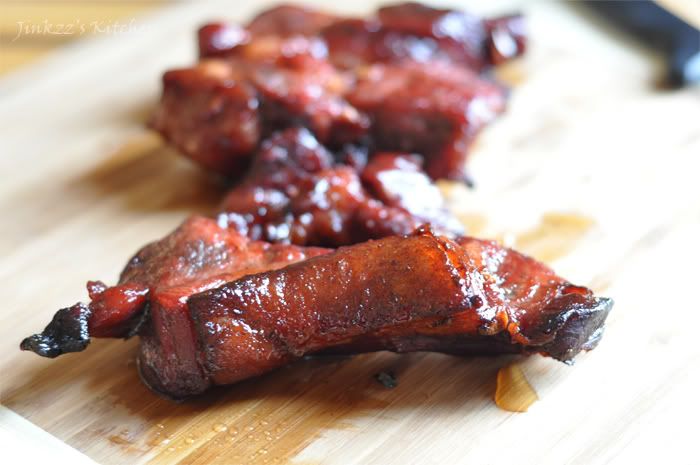
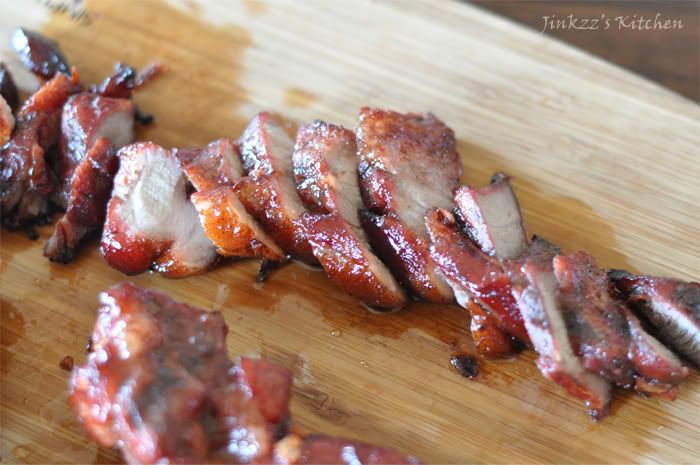
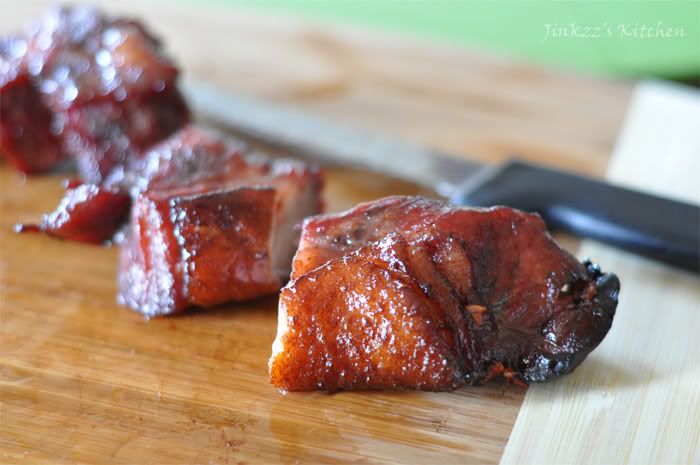
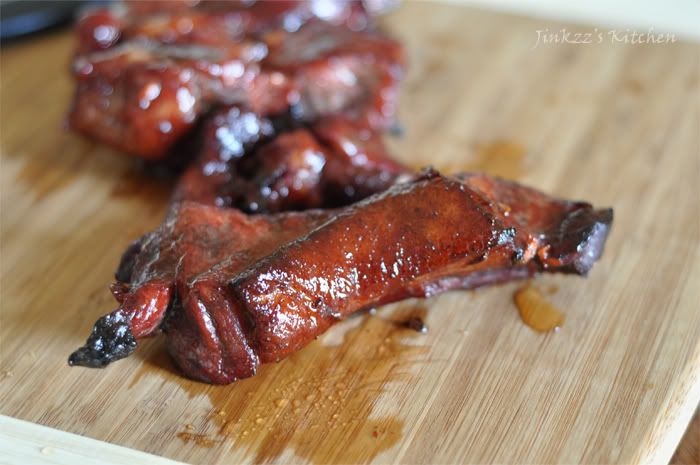
Char Siu (Chinese Pork BBQ)


I love char siu, also known as Chinese pork barbeque, but the problem is I can't seem to find good Chinese resto that sells a good one nearby. Most of the ones that are sold at the restaurants are either too dry or taste like cardboard, not good at all. Most of the time, I have to drive all the way to Chitown in order to get good ones but that is usally a major trip for me as I always get lost coming back from there so I try to avoid going to that place if I am driving by myself. Speaking of which, I once went there and had the hardest time trying to get out. It took me around 45 minutes or more to finally find my way out. Hahaha! I have been know to get confused with direction but 45 minutes is a little extreme even for me since LA Chitown isn't that big.


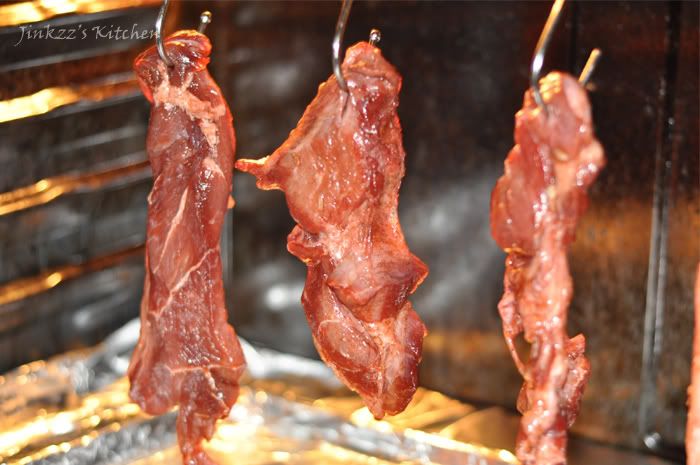
Anyways, I stumbled upon Bee's (of Rasa Malaysia) blog one day and found a char siu recipe. The recipe seem simple enough so I searched for similar recipes and was surprised that there was a bunch of them out there on the web. In one of those searches, I stumbled into another blog that has an interesting way of cooking char siu. The blog belongs to Jessica (of Su Good Eats). She hanged the meat inside the oven and cooked it that way. She called it ghetto Chinatown style which really cracked me up. I adapted my recipe from both Jaden's and Jessica's but adjusted it to my own liking. I have made this twice in two weeks already. This last one turned out better than the first one because I added less red food coloring. The first one, although it tasted really good, looked atrocious because of the all-too red appearance. Hahaha.


There are two ways which I was able to avoid meat from drying out, namely: Adding water "bath" at the bottom of the oven and basting half way through the roasting process. While it seems like an additional work but it will help keep your meat moist. If you have leftovers, you can wrap it in foil and place in the refrigerator. When you are ready to eat it, you can slice them and microwave for a minute or until warm. The meat stayed moist for me which was really great. You have to keep in mind though that the kind of meat that you use will also determine whether it will dry out once cooked. I try to buy meat that has a little bit of fat which is another great way to prevent the dish from drying out. If you choose a meat that's very lean, there is a great tendency that it will dry out while being roasted even if you baste and add the water "bath". One more thing, make sure that the end of the meat does not touch the water bath.

Ingredients:
2 Lbs pork butt (cut into 2 inch diameter X 4 inch length)

Marinade:
4 Tbsp honey
2 1/2 Tbsp hoisin sauce
2 1/2 Tbsp soy sauce
1 Tbsp sherry
1/4 tsp white pepper
few drops of red food coloring (optional)
1/2 tsp five spice
1/2 tsp sesame oil
3 cloves garlic, minced

To marinate:

1. Place pork in a non-metal container with lid.
2. Combine all ingredients for marinade and mix well to make sure that everything is incorporated.
3. Pour mixture over pork and make sure that all pieces are coated well.
4. Cover and place in the refrigerator to marinate for 5 or more hours turning meat half way through the marinating process.

To cook:

1. Place oven racks on the top most level.
2. Line bottom of the oven with aluminum foil. NOTE: this is such a lifesaver because it will catch any drippings that goes outside of the baking pan.
3. Line a large sheet pan with several layers of aluminum foil and place at the bottom of the oven. NOTE: lining it with several layers of aluminum foil will save you the hassle of having to scrub you sheet baking pans later.
4. Add about 2 to 3 cups of water to the sheet pan then preheat oven to 350F.
5. Meanwhile, make a hole on one end of each of the pork slices and attach either a drapery hook or meat hook to the end.
6. Once oven has reached the desired temperature, attach the hooks to the racks and roast meat by hanging it over the sheet pan. Reserve the marinade for basting. Roast for about 30 minutes.


7. Remove meat slices and baste with reserve marinade.
8. Return meat slices to oven and roast for another 30 minutes.
9. At the end of the second 30 minutes, remove from oven and brush each pieves with honey.
10. Return to oven and cook for another 5 minutes.
11. Remove from oven and let it cool a little bit before slicing and serving.


Monday, September 12, 2011

No Knead Pork Asado Buns (aka baked Siopao)

I have been wanting to make this since I learned how about no-knead dough but I kept forgeting to buy hoisin and oyster sauce ...that is, until today. I finally picked up both sauces when I went to the Korean market. The baked bun turned out really nice, if I should day so myself...hehehe.

This is a modern version of the old Filipino classic snack siopao which is actually Chinese in origin. Siopao has been a favorite of most Filipinos and are usually in bakeries. The are usually placed in this see-through steamer that looks like a small refrigerator only it is warn, not cold. Even this derivative of the siopao may have also been borrowed from the Chinese because it is so much like the sweet pork bun. Anyways, the filling is cooked first then cooled before they are wrapped in the dough. I have to tell you, this gem of a dough recipe is a lifesaver because it takes out the hard work from bread-making. I think I am going to expiriment next on pandesal and see how that fares using this no-knead method...we shall see...


Ingredients:

No-Knead dough (recipe here)

Egg wash:

1 egg yolk
1/2 tsp water

Beat egg yold and mix with water. Set aside

Honey wash:
1 Tbsp honey
1tsp water

Mix both ingredients and set aside
Pork Asado

2 lb pork, cut into small cubes about 1/2 inch in diameter
Oil for sauteeing
3 cloves garlic, minced
1 large onion, chopped
3 Tbsp soy sauce
4 Tbsp sugar
2 Tbsp oyster sauce
1 1/2 tsp hoisin sauce
1 Tbsp flour
1/4 cup water ( to dissolve flour)

1. In a small bowl, mix oyster sauce, soy sauce, sugar, and hoisin sauce. Mix well until sugar is dissolved then set aside.
2. Saute onions and garlic until translucent over medium heat.
3. Add pork and saute until brown.
4. Add the sauce mixture and about 1//2 cup water. Let it simmer until pork is tender and almost all of the liquid has evaporated.
5. Once pork is tender, add flour mixture. Make sure you add it by 1 Tbsp interval so as not to make the auce too thick.
6. Cook for a couple of minutes then remove from heat and let it cool


Assembly:

1. Take out the dough from the refrigerator while waiting for the asado to cook.
2. Place on a lightly floured work surface. Cut into two or three equal parts and wrap in plastic wrapp. Set aside for about 30 minutes.
3. When asado has cooled down, start working on your dough.
4. Divide dough into equal sizes, about a gold ball size each.
5. Flatten dough into about 6-8 inch circle.
6. Take about 1 Tbsp of filling and place it at the center of the dough.
7. To close, gather the edges to make a pouch with the filling inside. Pinch to seal then place on the baking dish seam side down.
NOTE: I coated the seam with a little bit of flour to prevent it from sticking in case my filling accidentally spills.
NOTE{ If your filled dough looks a little off round, cup it gently in your palm while it is on the floured working surface. Then gently move your hand in a circular motion. That should make the dough more even and circular.
8. Repeat the procedures until all your dough has been used.
9. Cover it loosely with plastic wrap then let it rest for an hour.

Baking


The piece of equipment pictured above is so handy. It makes cutting dough easier.


1. Preheat oven to 350 degres.
2. Before baking, brush the top of the dough with egg wash.
3. Bake for 20 minutes or until golden brown.
4. Carefully remove from the oven.
5. Loosen buns from the baking tray.
6. Brush with honey wash and let it cool on wire racks,