Showing posts with label baked goods. Show all posts

Sunday, June 10, 2012

Banana-Walnut Loaf


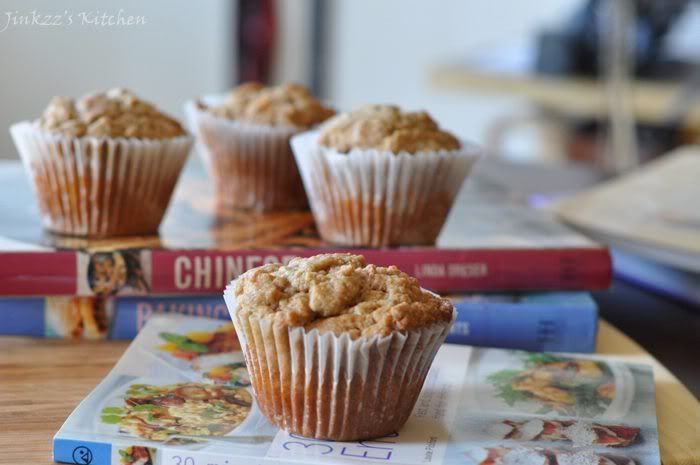
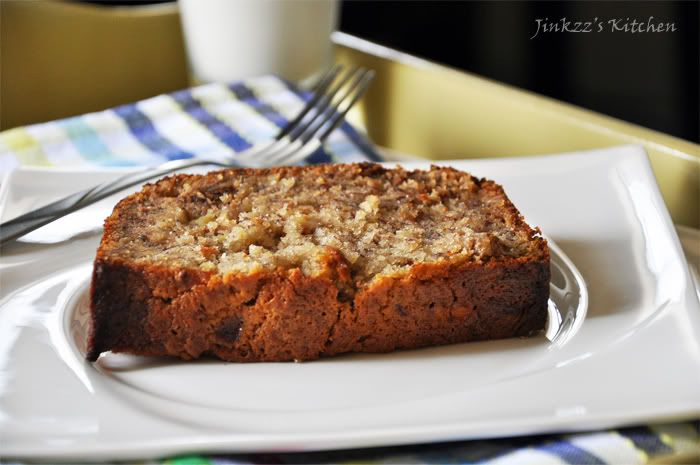
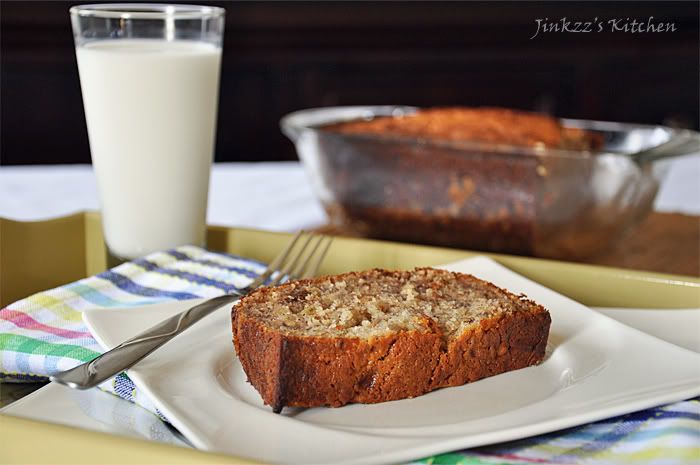
Aside from the fried/baked pork dish that I cooked, I also baked banana-walnut loaf.  There wasn't any special reason other than the fact that I had bananas that were getting too ripe for my liking.  I do not even know why I bought bananas in the first place since I am not much of banana eater.  Maybe I was thinking of making a shake or something but for some reason I got sidetracked and ended up with overripe ones...hehehe...no problem though as this dish save them.


Bananas. by the way, are great ingredients in making your smoothie a lot creamier without adding too much milk or dairy products.  It can even be used instead of the dairy products.  I slice them about an inch to a couple of inches in size and then wrap them in parchment paper and freezer bags.  Pop them in the freezer until they are frozen and use them instead of ice to make a smoother and creamier smoothie.  I believe I posted about this tip somewhere in the blog about a year ago.
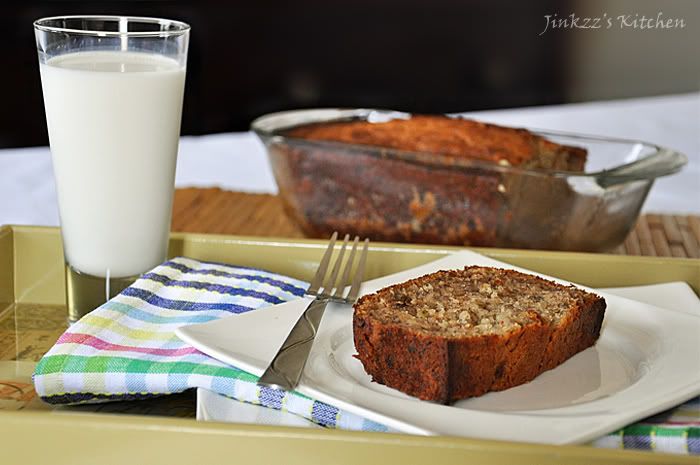


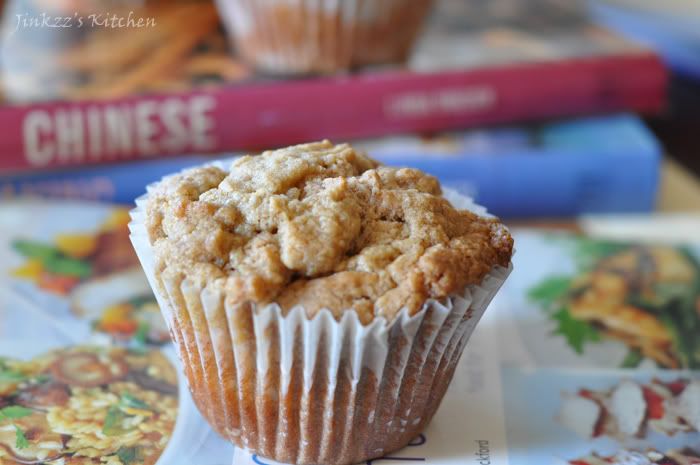
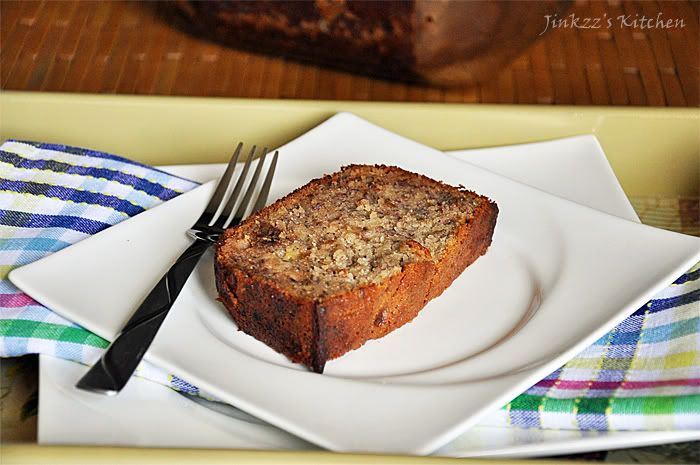
Anyways, I had some overripe bananas and free time so I baked these babies.  I used a little bit of olive oil along with the butter when I made these.  The result is a very moist and slightly dense banana cake that taste really good.  They taste even better the following day...even after they have been in the fridge overnight.  To make them soft and moist after being the fridge, I usually pop a slice in the microwave and heat for about 10-15 seconds but the time will be dependent on your microwave.
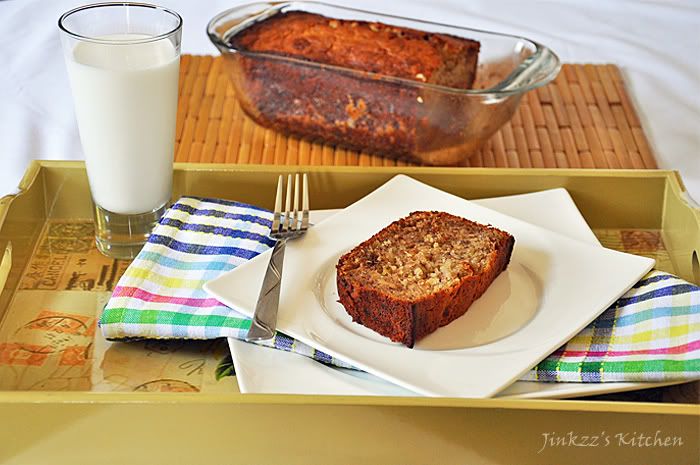


This morning I had a cup of coffee with a slice of banana walnut loaf  and a very hilarious episode of a Korean drama that is currently airing entitled "A Gentleman's Dignity"  It stars Jang Dong Gun and Kim Haneul along with a bunch of other korean actors/actresses.  Jang starred in an American movie entitled "A Warrio's Way" with Kate Bosworth in 2010.  I only watched the first part of that movie but it didn't pique my interest so I didn't finish the entire movie.  A Gentleman's Dignity though is different-it is hilarious, witty, sexy, crazy, heart-warming, and heart-wretching all at the same time.  The dialogue exchanges between Haneul and Dong-gun are really good. Right now, they have about six episodes out and I cannot wait for the next installment.  I didn't think I would say this but the writer (who is also the writer for Secret Garden which I did not like)  is doing a good job and hope she will continue to do so until the end....


Ingredients:

1/4 cup butter, softened

2 Tbsp olive oil

1/2 cup sugar

1/2 cup honey

2 eggs

4 large ripe bananas, mashed

1/2 tsp pure vanilla extract

1 1/2 cups all-purpose flour

a pinch of salt

1/2 tsp baking soda

1/3 cup walnuts, chopped

1. Preheat oven to 350F


2. Spray loaf baking pan with non-stick spray or coat evenly with oil.


3. In a bowl, sift together flour, baking soda, and salt.  Mix well and set aside


4. In another mixing bowl, add butter, olive oil, honey,and sugar.  Beat until light and fluffy.


5. Add eggs one at a time, beating well after each addition.


6. Stir in mashed banana and vanilla.  Mix well.


7. Add flour-baking soda mixture and mix into the batter.  Do not overmix .  


8. Stir in walnuts and transfer to a loaf baking pan and bake for 1 hour or until a knife inserted in the middle comes out clean.


9. Remove from the oven and let it cool slightly before slicing and serving.

Friday, October 21, 2011

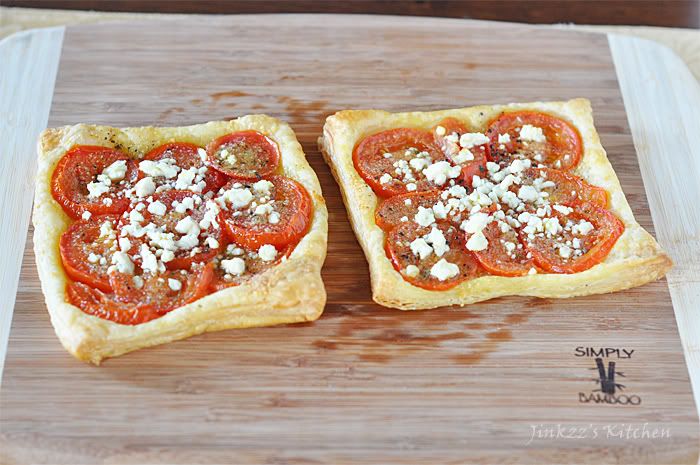
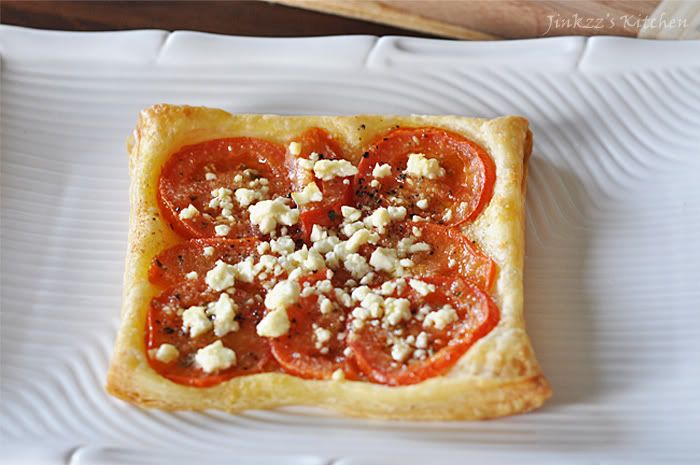
Easy Tomato Tart


Even avid cooks have their off days. Today is one of those days for me. I just did not want feel like slaving over the kitchen to make a meal as I have been feeling rather emotional these past few days. This recipe is perfect for days like today.

This is an easy to make tart which can be done in less than 30 minutes from start to finish. The secret is using store bought puff pastry as the tart shell which takes most of the work. The possibility for topping is dependent on the cook's imagination. You can basically top it with anything that you desire. I chose tomato because I really like them (that is kinda strange coming from me since I really hated eating tomato for the longest time. I also used two different kind of cheeses - parmigiano reggiano and feta. I baked them in the oven for about 20 minutes then they are ready to eat.

Ingredients:

1 sheet store bought puff pastry
roma tomatoes, cut into 1/4 inch thickness
feta cheese
grated parmigiano reggiano
2-3 Tbsp extra virgin olive oil
1 tsp powdered garlic
1/2 tsp dried parsley
salt and pepper to taste

1. Preheat oven to 375F.
2. NOTE: Make sure you thaw puff pastry in the refrigerator overnight. When puff pastry is ready, roll out in a floured surface are. Cut into 6 equal sized rectangle.
3. Using a rolling pin, flatten the rectangle puff pastry into about 1/4 to 1/8 inch thickness.
4. Using a fork, prick puff pastry all over. Make sure you leave a small border on the edges.
5. Using a pastry brush, brush puff pastry with olive oil.
6. Sprinkle parmesan cheese then arrange tomato slices on top.
7. Brush tomatoes with olive oil then sprikle powdered garlic, dried parsley, salt and pepper.
8. Top with feta cheese.
9. Bake in oven for 18 to 20 minutes or until edges turn golden in color. Remove from oven and serve.

Saturday, October 1, 2011

Cinnamon Apple Streusel Muffin


I dreamt last night that I made some muffin and surprisingly (or, not surprisingly), I woke up hungry. My sight was set on some piping hot muffins and tea so I baked up a bunch. I think I made a little too much (a dozen) so I gave my next-door neighbor half a dozen which. The muffins were good and easy to make that it can be made in less thanan hour including the preparation.

The mistake that a lot of people make when making muffins is that they overmix the ingredients which results in a dry and hard muffin. To make sure that it remains moist and not dry, you only need to mix it just enough to moisten the dry ingredients. Otherwise, you may have to dump that batch into the garbage. I know because I have made that same mistake in the past many times than I care to count on my fingers and toes.

Today I made cinnamon apple streusel muffins because I bought tons of apple from whenI went to the farmer's market the other day. I love gala apple so that's what I used for this recipe. I think gala is the best tasting apple there is and beats red delicious in the taste and appearance.


Ingredients:

Streusel topping:
1/2 cup packed brown sugar
1/2 cup all-purpose flour
1/2 stick of butter, softened

1. Mix all ingredients for streusel using a fork until it resembles a cornmeal consistency. Set aside.

Muffin:

2 cups all-purpose flour
1/2 cups + 2 Tbsp sugar
1 Tbsp baking powder
a pinch of salt
2 tsp vanilla extract
1 cup milk
1 large egg, slightly beaten
1/2 stick of butter, melted
1 cup peeled and diced apple
2 tsp powdered cinnamon

1. Preheat oven to 400F
2. In a small container, mix apple with 2 Tbsp sugar and 1/4 tsp cinnamon. Let it stand for 10-15 minutes.
3. Microwave butter until melted. Let it cool.
4. In a large bowl, sift together flour, baking powder, and salt.
5. In another large bowl, combine beaten egg, sugar, milk, cinnamon, and vanilla. Mix until incorporated.
6. Slowly drizzle butter and mix well.
7. Fold in the apple mixture and mix well.
8. Add liquid ingredients to dry ingredients and mix just enough to moisten the dry ingredients. Note: It will be visible lumpy but it is okay.
9. Pour into paper lined muffin pans, top with streusel mixture, and bake for 20 minutes or until a toothpick inserted in the center comes out clean.
10. Remove from oven, let it cool slightly and serve.

Sunday, September 18, 2011

Chocolate Lover's Cake

Who can resist chocolate? There would not be too many I am sure. There is something about it that makes people smile and happy. I think it is its theobromine and phenethylamine components which produces a physiological effect on the body as well as its ability to stimulate the production of serotonin in the brain. I would say though that it can be considered as one of the pleasures in life that I really enjoy and love. All the other reasons (physiology mambo-jambo) are insignificant...hehehe. Chocolate is thought to have originated from Central and South America where cacao has been cultivated for at least three centuries.

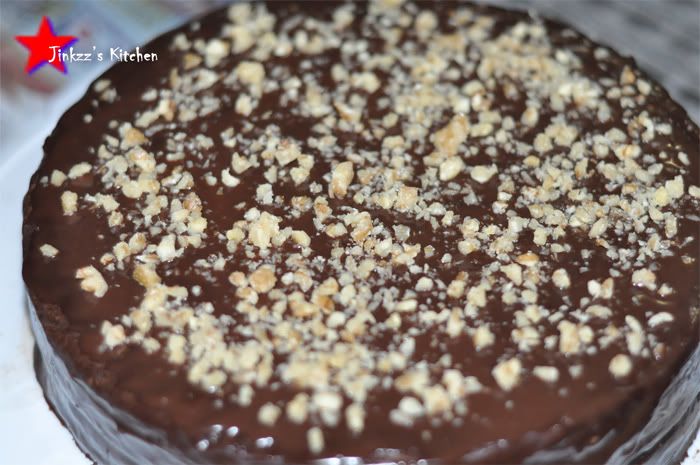
This is a very rich, chocolate-y cake that is sure to make any chocolate lovers smile from ear to ear. This is a cake that I made for hubby's birthday. It has a chocolate cake base, a nutella filling, topped with chocolate ganache and sprinkled with nuts. Hahaha. I told you it will be chocolate-y. I have to confess though, I love chocolate but only in small doses as it gives me a headache and I break out into the tiniest rashes (?) on my face but that doesn't deter me from enjoying them. The cake though is so rich that I could only partake a very small slice lest I want to have a full-blown migraine as a result of eating too much chocolate in one sitting...hehehe...As a bonus, I was even able to make chocolate truffles, the recipe of which I posted here as well.


Chocolate cake base:
adpated from Hershey's Kitchen

Ingredients
2 cups sugar
1-3/4 cups all-purpose flour
3/4 cup good quality Cocoa
1-1/2 teaspoons baking powder
1-1/2 teaspoons baking soda
1 teaspoon salt 2 eggs 1 cup milk
1/2 cup vegetable oil
2 teaspoons vanilla extract
1 cup boiling water

Filling :
Nutella (Chocolate Hazelut Spread)

Frosting;Chocolate Ganache

Ingredients:
1 cup chocolate chips, semi-sweet
3/4 cup heavy cream


Directions for Cake:
1 Heat oven to 350°F. Grease and flour two 9-inch round baking pans.


2 Stir together sugar, flour, cocoa, baking powder, baking soda and salt in large bowl. Add eggs, milk, oil and vanilla; beat on medium speed of mixer 2 minutes. Stir in boiling water (batter will be thin). Pour batter into prepared pans.


3 Bake 30 to 35 minutes or until wooden pick inserted in center comes out clean. Cool 10 minutes; remove from pans to wire racks. Cool completely.

Direction for ganache:

1. Using a double boiler or heat proof bowl over a pan with water, place the crean on the bowl and heat gently until warm.
2. Add chocolate chips and stir until mixture is smooth and glossy.
3. Remove from heat and cool a little bit before using it to frost your cake.

To Assemble:

1.Take 1 of the cake and place it on yur cake server.
2. Trim to the top to make it flat. Do the same with the other cake (NOTE: You can save thatportion and use it to make chocolate cake truffles.)
3. Spread nutella on the top area and spread evenly.
4. Take the second cake, invert it and place it on top of the other layer.
5. Apply frosting and then refrigerate for an hour or more until ganache somewhat hardens.

Monday, September 12, 2011

No Knead Pork Asado Buns (aka baked Siopao)

I have been wanting to make this since I learned how about no-knead dough but I kept forgeting to buy hoisin and oyster sauce ...that is, until today. I finally picked up both sauces when I went to the Korean market. The baked bun turned out really nice, if I should day so myself...hehehe.

This is a modern version of the old Filipino classic snack siopao which is actually Chinese in origin. Siopao has been a favorite of most Filipinos and are usually in bakeries. The are usually placed in this see-through steamer that looks like a small refrigerator only it is warn, not cold. Even this derivative of the siopao may have also been borrowed from the Chinese because it is so much like the sweet pork bun. Anyways, the filling is cooked first then cooled before they are wrapped in the dough. I have to tell you, this gem of a dough recipe is a lifesaver because it takes out the hard work from bread-making. I think I am going to expiriment next on pandesal and see how that fares using this no-knead method...we shall see...


Ingredients:

No-Knead dough (recipe here)

Egg wash:

1 egg yolk
1/2 tsp water

Beat egg yold and mix with water. Set aside

Honey wash:
1 Tbsp honey
1tsp water

Mix both ingredients and set aside
Pork Asado

2 lb pork, cut into small cubes about 1/2 inch in diameter
Oil for sauteeing
3 cloves garlic, minced
1 large onion, chopped
3 Tbsp soy sauce
4 Tbsp sugar
2 Tbsp oyster sauce
1 1/2 tsp hoisin sauce
1 Tbsp flour
1/4 cup water ( to dissolve flour)

1. In a small bowl, mix oyster sauce, soy sauce, sugar, and hoisin sauce. Mix well until sugar is dissolved then set aside.
2. Saute onions and garlic until translucent over medium heat.
3. Add pork and saute until brown.
4. Add the sauce mixture and about 1//2 cup water. Let it simmer until pork is tender and almost all of the liquid has evaporated.
5. Once pork is tender, add flour mixture. Make sure you add it by 1 Tbsp interval so as not to make the auce too thick.
6. Cook for a couple of minutes then remove from heat and let it cool


Assembly:

1. Take out the dough from the refrigerator while waiting for the asado to cook.
2. Place on a lightly floured work surface. Cut into two or three equal parts and wrap in plastic wrapp. Set aside for about 30 minutes.
3. When asado has cooled down, start working on your dough.
4. Divide dough into equal sizes, about a gold ball size each.
5. Flatten dough into about 6-8 inch circle.
6. Take about 1 Tbsp of filling and place it at the center of the dough.
7. To close, gather the edges to make a pouch with the filling inside. Pinch to seal then place on the baking dish seam side down.
NOTE: I coated the seam with a little bit of flour to prevent it from sticking in case my filling accidentally spills.
NOTE{ If your filled dough looks a little off round, cup it gently in your palm while it is on the floured working surface. Then gently move your hand in a circular motion. That should make the dough more even and circular.
8. Repeat the procedures until all your dough has been used.
9. Cover it loosely with plastic wrap then let it rest for an hour.

Baking


The piece of equipment pictured above is so handy. It makes cutting dough easier.


1. Preheat oven to 350 degres.
2. Before baking, brush the top of the dough with egg wash.
3. Bake for 20 minutes or until golden brown.
4. Carefully remove from the oven.
5. Loosen buns from the baking tray.
6. Brush with honey wash and let it cool on wire racks,

Saturday, September 10, 2011

No Knead Pita Bread

I went to the store yesterday with the original intention of buying pita bread since I am making hummus today. But, of course, I would not be me if I did not forget the very thing I went to the store toget. In short, I forgot to buy pita bread. I made a list before I headed out but left the list on the table so I had to make a mental list on my way to Ralph's. When I got there, I just had to stop at Ross to check out their stocks of plates, bowls, etc...like I really need anymore of these things...hehehe...I went and got a few pieces (of course!) but they are really cheap since their items are mostly overruns, past season, and surplus from the department stores. BY the time I got to Ralph's my mental list has long been forgotten so I had to go from one aisle to another trying to remember what I needed. Hahaha...that was a joke because before I knew it, stuff kept piling on my cart. When I was in the fruit section, I remembered that I needed to pick up pita bread which was located on the other end of the store. I walked all the way there but for the life of me I could not remember what I went there for...lol...old age? dementia? huh!! I was in the garage parking the car when I remembered that I forgot to pick up PITA BREAD!!! Well, I wasn't about to turn around and go back to the store. Instead,I decided tomake my own.

Pita bread recipe is very simple. YOu just need a few ingredients which you will mix then leave to let it do its thing overnight. When morning comes, your dough will be ready. Pita bread belongs to the flat bread category with its signature pocket. It is common in the middle eastern countries. Pita is used to scoop dips such as hummus and used to wrap falafel, kebabs or gyrus. It is usually baked at a high temperature to make the rbead puff up and create the pockets.

NOTE: I used the same principles used by the authors of the book Artisan Breads in 5 Minutes a Day


Ingredients

3 cups fliur
1 1/4 to 1 1/2 cups water, room temperature
1 1/2 tsp salt
2 tsp yeast
1 Tbsp sugar
2 Tbsp extra virgin olive oil

1. Mix yeast, salt, sugar, water, and olive oil in a mixing bowl.
2. Add flour and mix thoroughly
3. Cover loosely with plastic wrap and let it rest on room temp for 1-2 hours.
4. Refrigerate overnight.
6. Take out the dough after resting in the efrigerator overnignt.
7. Place in a lightly floured surface. Four you hand well also.
8. Take the dough and fold it over itself twice or three time. Cover with plastci wrap and let it rest for 30 minutes to 1 hour.
9. Once dough has cooled down, shape it into a log and divide into 8 equal sizes.
10.Roll each into a ball and cover with plastic wrap and rest for 20 minutes.
11. Preheat your oven to 475 t0 500 degrees with the rack at the lowest position. Preheat you baking dish for about 30 minutes to 1 hour.
12. Once oven and baking dish has been preheated, take a piece of the dough, flatten then roll out into a 8 inch flat round.
13. Take your baking dish ut of the oven and placed you pita bread. (NOTE: be careful as the baking pan will be extremely hot) Bake two at a time.
14. Bake for 3-4 minutes. By the end of the four minutes, the dough would have puffed up.
15. Turn the bread over and bake the other side for another 3-4 minutes or until light golden brown in color.
16. Take out of the oven and serve with hummus.


Monday, September 5, 2011

Roasted Almond Roll with Whipped Honey Butter

I made some roasted almond butter sometime last week and I think I made too much of it so I thought of some idea on how to use it besides using it as a spread. I kinda toss the idea around of making a bread using it but wasn't really sure if it would work. Darn, I woke up early morning today dreaming of making these rolls...hahaha...Aigoo, talk about obssession, huh? Or, is it compulsion? The same thing happened when I was thinking of making mango panna cotta...I actually dreamed of making it the night before...

My plan was derailed since my sister called early this morning and asked if I could babysit my niece while my she and my brother in law take the other two kids to the ER for colds and sore throat. Babysitting was fun...my niece and I went to The Grove and walked around a little bit. We were going to eat at Cheesecake Factory but my sister called just before we stepped into the resto and said they are finished with the ER visit and ready to leave. she said we'll eat at Chinatown instead. I'd take dimsum over Amrican food anytime so off we went for lunch at Ocean Seafood Resto... Man the place was packed since today is labor day which is a holiday.

Anyways, back to my roasted almond roll...I finally got around to thawing the dough around threeish in the afternoon. I let it sit out on the counter covered with plastic wrap while I went to purchase some grocery from the store. By the time I came back, which was about an hour later, my dough was soft and ready...


Homemade Roasted Almond Butter
*** I forgot to take pictures but I promise to do it next time I make it again.

Ingredients:

1 cup almond
2 Tbsp olive oil

1. Preheat oven to 350F.
2. Spread almond evenly on the pan.
3. Bake for about 12 minutes. Stir once or twice to prevent it from burning.
4. Remove form the oven and let it cool completely before grinding.
5. Place cooled almond in a food processor and grind. Scrape sides of the bowl
as needed and continue to process uts. Stream olive oil a little at a time until the desired creaminess is reached. Remove from bowl and place in a container.


Roasted Almond Roll with Whipped Honey Butter:

Ingredients:

Roasted Almond Roll

1 cantaloupe size No-Knead Dough (recipe here)
1/4 cup Homemade roasted almond butter
extra flour for dusting

Egg wash:
1 egg yolk, slightly beaten
1 tsp water

Honey wash:
1 tsp honey
1/2 tsp water

1. Pinch a cantaloupe sized dough and set on a lightly floured surface.
2. Fold it twice then cover with lightly floured plastic wrap. Let it come to room temp (aorund 30 minutes)
3. Take the dough out of the plastic wrap, flatten then spread a litlle.
4. Place the almond butter in the middle then fold over twice or three time to make sure that almond butter is covered by the dough completely.
5. Either knead by hand or like me, use the dough hook attachment of my KitchenAid mixer to let it do the work. Knead until the almond butter is completely incorporated into the dough. By now, the dough will be soft and pliable.
6. Cover the dough with saran wrap again and leave it until it doubles in size.
7. Once the size has doubled, unwrap, flatten then divide into 8 equal parts. shape into a ball and place on the baking sheet with the seam down.
8. Let it rest for an hour.
9. 15 minutes before the resting period is up, preheat oven to 350F.
10. Brush top of the rolls with egg wash and bake for about 17-20 minutes or until the top turns golden brown.
11. Remove from heat and brush honey wask over the cooked rolls.

Roasted Almond Roll with Whipped Honey Butter:

Ingredients:

1/2 cup slightly softened butter (not melted)
1 Tbsp honey

1. Place butter and heney in a bowl and whip using a mixer.
2. Scrape some of the butter from the beaters and continue whipping until you have reached the desired consistency.
3. transfer to container and serve with the rolls.

Saturday, September 3, 2011

Baklava

Baklava is a rich and sweet Greek dessert made of buttery sheets of phyllo dough and nuts drizzled with syrup or honey. It is sometimes flavored with cinnamon and cloves. Its origin is unknown but some think that it originated from Turkey.

For those who has never worked with phyllo dough, this can be a little daunting since they easily dry out and tear. The key is to make sure you cover the dough in damp (not soaking wet) towel while you assemble. If the dough is frozen, make sure to thaw it completely. I usually thaw mine in the refrigerator for a day before I use them. It just makes it easier to handle since they easily separate from one another. When you brush the butter, just apply a light coating instead of drowning the sheet.


Ingredients:

16 oz. package of phyllo dough
3/4 cup melted butter

Filling:

1 cup pecans, coarsely chopped
1 cup walnuts, coarsely chopped

Syrup:

1 cinnamon stick, broken into half
1 cup water
1 cup sugar
1 tsp vanilla extract
1/2 cup honey
3 strips of lemon rind (about 2-3 inches long each)

To make the syrup:

1. Using a begetable peeler, peel the outer skin of the lemon. Make sure you are only taking the yellow portion and not the pith (white part)

2. Heat sauce pan over medium. Add water and sugar. Heat while stirring occassionally until sugar is dissolved.
3. Add cinnamon stick, lemon peel, vanilla, and honey
4. Continue to simmer for about 10-20 minutes.
5. Remove from heat and strain to remove cinnamon stick and lemon peel.
6. Let it cool completely before using.

To assemble Baklave:

1. Mix pecans and walnuts in a bowl and set aside.
2. Preheat oven to 350F.
3. Butter the bottom and side of a 9X13 baking dish.
4. Place a layer of phyllo dough at the bottom of the baking dish then lightly butter. Add another layer and butter the top again. Continue to do this until you have around 6-8 layers of buttered phyllo dough.


5. Sprinkle mixture of walnut and pecans over the top of the phyllo dough stack and pour about 2-3 Tbsp of cooled syrup.

6. Place another later of phyllo dough over the nuts layer and brush with butter. Repeat this 3 times then add a layer of mixed nuts and syrup.
7. Stack another 3 layers of buttered phyllo dough then a layer of nut mixture and syrup. By now you have 3 nut layers.
8. For the top layer, stack 6-8 layers of buttered phyllo dough.
9. Cover with plastic wrap and refrigerate for about 10-15 minutes. NOTE: This solidifies butter thus making it easier to cut.
10. Cut the uncooked Baklava into 2X2 inch squares (or, diamond if you prefer).

11. Bake for about 30-40 minutes or until the top turned golden brown.
12. Remove from the oven and drizzle syrup all over the hot baklava. NOTE:You don't have to use all of the syrup is you don't want it to be too sweet.


13. Let it cool for about 1-2 hours(preferrably longer to allow the baklava to soak up all of the syrup) before removing from tray and serving. Do not cover while you are letting it cool.


Wednesday, August 31, 2011

Corned Beef Rolls

I have been on the roll(ha ha ha...pun intended) with baking these past few days. This is all thanks to the No-Knead Dough which allows me to make freshly baked breads without all the hard work. This time I filled the dough with sauteed corned beef and then bake it. Ah, I love the smell that permeates the whole house when the bread was done.


Ingredients:

No-Knead Dough (recipe here)
Egg Wash :
Egg yolk mixed with 1/2 tsp water

Filling:
1 can corned beef
1 small onion, finely diced
oil for sauteeing

1. Take out the prepared dough from the refrigerator and place on a lightly floured work surface. Cover with plastic wrap and let it rest for about 20-30 minutes.

2. Heat pan to medium heat. Add Oil and then sauteed the onion until transluscent. Add corned beef and sautee for about 3-4 minutes. Remove from hear and let it cool.

3. To assemble, pinch a golf ball sized dough and flatten to about an inch thick oblong shape. Place about 1 Tbsp of filling and roll. Make sure you seal the sedges to prevent your filling from oozing out.


4. After you have finished filling the dough, cover it with plastic wrap. Let it rest for an hour. By the end of 1 hour, the size should have doubled.

5. 20 minutes before baking, preheat oven to 350F.

6. Brush the top of the crescents with egg wash prior to baking.

7. Bake for about 20 minutes or until it turns golden brown. Remove and let it cool on the wire rack.