Showing posts with label vegetable. Show all posts

Sunday, September 18, 2011

Sauteed swiss Chard

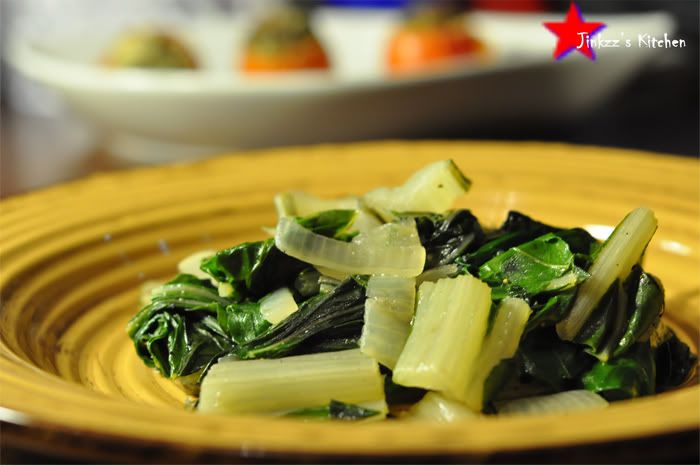
This is a nice accompaniment to any main dish which is ot only delicious but also healthy. Swiss chard, in my opinion, taste best when it is simple and not piled up with a lot of seasonings. I just simply sautee it with onions and garlic then season with salt and pepper. Very straightforward yet packs some really yummy punch.

Swiss chard is a leafy vegetable that are cultivated for its leaves which are consumed either raw (young leaves) or cooked (mature leaves and stalks). When eaten raw, it can have a slightly bitter taste to it but that mellows down once it is cooked. It is known to be high in Vitamins A, C, and K. To me, sauteed swiss chard's taste is almost the same as sauteed bok choy but a little tastier. I served this sautedd swiss chard as a bed for my walnut crusted tuna. Together they both tasted amazing.

Ingredients:

1 bunch of swiss chard, washed thoroughly
extra virgin olive oil
sea salt and freshly ground pepper
1 small onion, sliced
3 cloves garlic, chopped finely
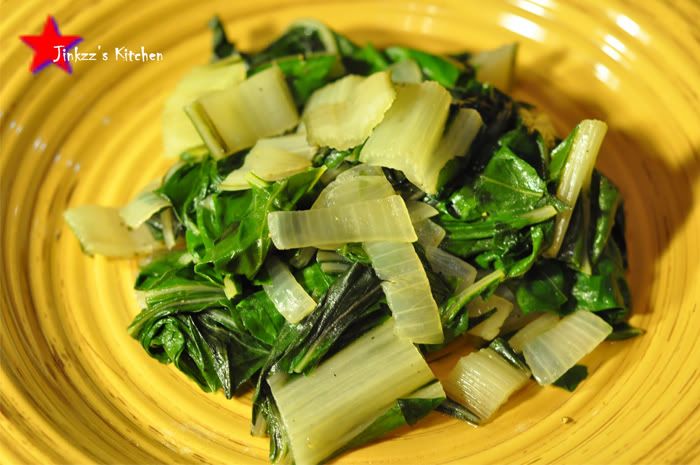

1. Slice stalk from the leafy portion of the chard. Trim the stalks of the chard, discard any hard portions then slice into 1 inch sizes. Take a bunch of the leafy portion, roll into a log-like shape and cut into 1 inch strips. Set aside. NOTE: Make sure that you keep the stalk separated from the leaves because their cooking time varies.
2. Heat pan over nedium heat and add oil.
3. Saute onion and garlic until fragrant and translucent
4. Add chard stalks and saute for about 5-6 minutes. NOTE: do not add water, it will produce its own juice while you are sauteeing it
5. When stalks are slightly tender, add the leafy portion and mix a little bit. Lower the heat to medium low and cover pan. Cook until leaves are tender; mixing and stirring occassionally during the cooking process.
6. Season with salt and pepper according to taste.
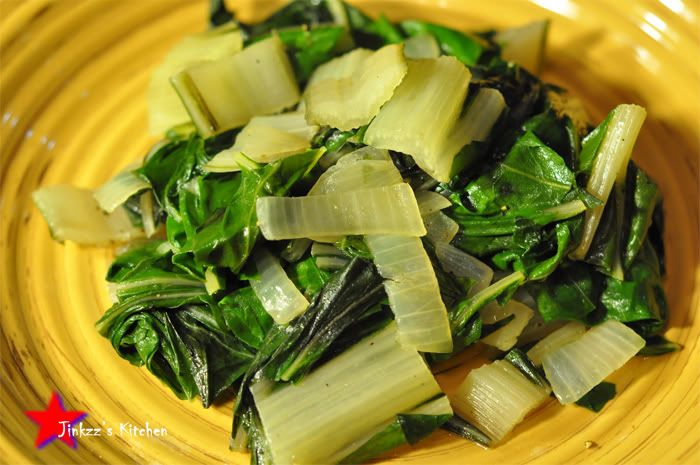
7. Remove from heat and transfer to serving platter or plates.
Saturday, September 10, 2011

Kinilaw na Pusit (Marinated Squid)

This dish is traditionally eaten as a "pulutan" or accompaniments for alcoholic beverages but I like to eat it with rice. It can also be considered as an appetizer. This is a simple and straightforwar dish which needs fresh ingredients in order for it totaste yummy. I love spicy food so I added Thai chili pepper. The only cooking that is involved in this dish is blanching the squid then the rest just involve slicing, dicing, and mixing. I used jumbo squid for this recipe but it can easily be substituted with regular ones. I was originally thinking of grilling this jumbo squid but changed my mind at the last minute because it was too darn hot outside...grilled squid will have to wait another day, I guess.

NOTE: To prepare the squid in this recipe, you need to remove all the insides out then clean the squid well, take out the outer skin surface and the backbone. To clean the tentacles, cut and discard everything from the eyes down, You also need to cut one side of the tube so you are able to lay it flat on the cutting board then score it lightly and diagonally.


Ingredients:

1 jumbo squid or 1 lb regular squid, cleaned (see note above)
2 medium vine-ripened tomato, diced
1 shallot, thinly sliced
2-3 inch sized ginger, peeled and sliced thinly
3-4 Thai chili pepper, sliced diagonally
NOTE: If you don't want it too spicy, remove and discard seed from chili pepper
2 Tbsp freshly squeezed lemon juice
1 Tbsp freshly squeezed lime juice
1 key lime, sliced thinly
1/3 cup vinegar
2-3 cloves garlic, chopped finely
sea salt and freshly ground black pepper, to taste

1. Prepare a bowl with cold water and ice cubes, set aside.
2. Boil water in a pan. Once it starts boiling, drop the squid and cook for about 1 minute then turn heat off, drain water and submerge the squid in cold water with ice for 2 -3 minutes. Drain and slice thinly (about 1/2 x 2 inches).
3. Place sliced squid in a bowl.
4. Add sliced tomato, onions, ginger, garlic, and Thai pepper.
5. Add lime juice, lemon juice, and vinegar. Mix well.
6. Season with sea salt and freshly ground black pepper according to taste.
7. Marinate in the refrigerator for about 20-30 minutes or until ready to eat.

Friday, September 9, 2011

Blackened Salmon Topped with Orange-Tomato Salsa and a side of Buttered Corn and Peas

I cannot believe that this dish is my very first real meal of the day and it isalready 1145 pm. I have been very busy doing my research on a project for my current class that I have only been snacking on raosted almond roll (leftover from two days ago) in between research. Whew and I am not even done yet. I still have one more topic to go but couldn't seem to find the right information and organize my thoughts. Oh well, that will have to wait until tomorrow. Anyway, it is not due until Monday at 1159 pm so I have plenty of time.

This is such a nice and easy dish. And the best part? it only took me less than 30 minutes to prepapre from start to finish. That is including the salsa and side of corn and peas. The blackened salmon looked and tasted really good as well as the rest of the food. The salmon though came out really well because it blackened to perfection. The only thing's that is missing is desser. I totally forgot to make any...Oh well... I think I ate too much anyway because now I am feeling lazy. Ughhh... I cannot even rest and enjoy my favorite Korean show because I have to do the dishes after this...hehehe...the good news is I think I only washed 2 loads of dishes because I have not had time to do my usual recipe experiments :)


Orange-Tomato Salsa:

Ingredients:

1 orange, peeled and pith removed; sliced and segmented
1 vine-riped tomato, cubed
1 shallot, thinly sliced
3 Thai chili pepper
1 - 2 Tbsp freshly squeezed lemon juice
sea salt and pepper, to taste
small bunch of parsley, de-stemmed then roughly chopped
small bunch of cilantro, de-stemmed and roughly chopped

Coombine all ingredients then set aside.


Blackened Salmon

Ingredients:
Salmon fillets
1 Tbsp (or more) jerk seasoning
extra virgin olive oil

1. Preheat oven to 325F
2. Wash salmon fillet and then dry using a paper towel
3. Apply extra virgin olive oil all over the salmon.
4. Coat Salmon with jerk seasoning
5. Heat a heavy cast iron pan over medium heat.
6. Pour a little olive oil then fry salmon skin side down for about 4-5 minutes
7. Turn salmon over and cook for another 3 minutes.
8. Transfer pan with salmon to the oven and bake for about 5 minutes.
9. Remove from oven, transfer to a platter, top with orange-mango salsa then serve.


Buttered Corn and Peas

Ingredients:

1 cup frozen corn
1 cup frozen peas
2 Tbsp butter
salt and pepper, to taste

1. Melt butter over low medium heat.
2. Add corn and peas and sautee until warm and water has evaporated.

Friday, September 2, 2011

Ginisang Ampalaya (Sauteed Bitter Melon)

Ampalaya or Bitter melon is a vien that is widely cultivated in Africa, Asia, and the Caribbeans for its edible fruit. There are several different varieties that differ in shape, size, and degree of bitterness.It is usually consumed when it is unripe and green in color. As the fruit ripen, its bitterness intesifies which renders it inedible. The ripe fruit also becomes tougher and yellow in color. Unripened fruit has white pith shich neds to be removed before cooking In the Philippines, ampalaya is often sauteed with pork and eggs or as an ingredient in another Filipino dish, Pinakbet.

Ampalaya is often valued for its medicinal uses and have been widely used as an herbal medicine in the Philippines, China, and Japan. It is thought to be good remedy for conditions such as intestinal parasites, malaria, viral infection, diabetes,fever, burns, scabies, and colic. It has been endorsed by the Philippine department of health as an herbal alternative to cure the aforementioned illnesses. As part of the movement to promote its use, several products that uses ampalaya as a base have come out including tea, bread, and pill supplements. Don't ask me how effective they are because I honestly have no clue nor have I tried them :)

Ampalaya is not a fruit for everyone as it an acquired taste. If you wantto cut down on its bitterness, you can sprinkle about 1/2 to 1 tsp of salt on ampalaya after it has been sliced thinly. Let it stand for a few minutesor until you begin to see it sweat (becomes watery). You can squeeze the fluid out before sauteeing. As for e, I love the bitter and distict taste that ampalaya has so I skip this method. I used to hate eating this when I was grouwing up but once I lived on my own, I began to crave for this dish every once in a while. I guess I do miss home and my mom's home cooking more that I care to admit sometimes...hehehe.


Ingreddient:

2 bitter melon, pith and seeds removed then sliced thinly
1 onion, sliced thinly
1 tomato, cut into small cubes
2 cloved garlic, chopped finely
1/2 lb pork, cubed
2 eggs, beaten slightly
salt and pepper to taste
oil


1. Heat pan over medium. Add garlic and onions and saute until translucent.
2. Add tomato and continue cooking until soft.
3. Add pork and saute until all the liquid has evaporated and pork has turned brown.
4. Add Add about 1 cup of water and let it boil until pork is tender. Add water as needed until pork is cooked.
5. Continue to simmer until almost all of the fluids has evaporated
6. Add bitter melon. You can add about 1/4 cup of water but I generally dont since the bitter melon will sweat out some liquid. Cook until alost all of the fluid has evaporated.
7. Add beaten egg and cook until it is done. Remove from heat and transfer into serving platter.


Sunday, August 28, 2011

Papaya atchara (Green Papaya Pickle)


INGR:

2 cups grated green papaya

1 inch ginger , slice thinly

1 bell pepper, slice thinly

1 onion, chopped finely

3 cloves garlic, chopped finely

1/2 carrot, sliced thinly

1/2 cup pineapple tidbits

1/3 cup sugar

1/2 cup vinegar

salt to taste

1 small ampalaya (bitter melon), thinly sliced


NOTE: I used a mandolin slicer to grate the papaya

1. Place grated papaya in a bowl, add about 1-2 tsp of salt and let it stand for 15 mins.Squeeze dry either by hand or using a cheese cloth

2. mix vinegar, sugar, ginger, garlic, onion.put in stove and let it boil.

3.in a separate bowl, mix papaya, bell pepper, carrots, ampalaya, and pineapple.

4. pour vinegar mixture on papaya. let it cool and then put on jar and seal thightly.

5. chill, if desired.


edit:
Originally posted on 02/21/10 at 1031 pm

Friday, August 26, 2011

Kinilaw nga Rabanos ( Radish Salad)

Kinilaw nga Rabanos is a side dish that my mom used to make. This goes well with fish or grilled pork ribs. We used to have this a lot when I was growing up in the Philippines and one of the few veggies that I eat. I learned making this dish while watching my mom make it as I was growing up. I remember the process to be very tedious as it requires a lot of patience to slice the radish very thinly. I opted to julienne the radish though instead of slicing thinly using my mandolin slicer. The mandolin can also slice it thinly but it wasnt as thin as I'd like it to be.


Ingredients:

1 radish, peeled and julienned or slice thinly
1 shallot, sliced thinly
1 tomato, diced finely
2 cloves garlic, finely chopped
1/2 cup cane vinegar
salt and coarsely ground black pepper
a pinch of crushed red pepper flakes

1. Place julienned radish in a bowl and sprinkle about 1 tsp of salt, mix well and set aside for about 15 minutes.
NOTE: The salt will draw the water out from the radish.

2. Using a cheesecloth, squeeze all of the water from the radish. Discard the liquid.

3. Addtomato, onions, garlic, pepper flakes, and vinegar to the radish and mix well.

4. Let it stand for about 30 minutes to marinate and then serve with meal.

Saturday, August 20, 2011

Pear and Gorgonzola Flatbread with Baby Arugula and Shaved Parmesan

This recipe is also from Steamy Kitchen. I have to say that mine turned out great and the dough is fantastic. One dough portion made a huge flatbread though so I am going to use maybe a smaller portion next time so it will just be enough for me.


1 lb fresh pizza dough
2 pears, sliced thinly
1/2 cup gorgonzola cheese
a nice chunk of good quality Parmigiano Reggiano, shaved with vegetable peeler
1 cup baby arugula leaves
¼ cup extra virgin olive oil
flour, for dusting


1. Dust surface of dough with flour. Divide dough into 4 equal pieces. Stretch surface of dough on each side and tuck under, creating a round, ball with a taut surface. Flatten dough ball a little. Keep the dough covered until ready to use. If using cold, refrigerated No Knead Olive Oil dough (recipe here), let the dough balls relax and warm up for 30 minutes on the counter before trying to roll or stretch out (it’s hard to stretch cold dough.) If using room-temp pizza dough, you may proceed to next step.


2. You’ll bake 2 at a time. Dust surface of dough and work surface with flour. with your hands, carefully stretch into a long, thin, oval shape, about 16″x 6″. The thinner you can get the dough without tearing, the better. You can use rolling pin (esp if your dough is still a little cold). If dough is difficult to stretch or roll, let it sit and relax for 10 minutes. Repeat with remaining. Cover loosely with towel.


MY NOTE: I left my dough out for about an hour and a half then folded it 2-3 times. It made it so pliable, easy to work with and shape. I didn't even need my rolling pin to stretch it out.

3. 20 minutes before you want to bake you’ll want to preheat your oven and your baking sheet. Crank up your oven to its highest setting (usually most ovens go up to 500F) and insert an inverted baking sheet.

MY NOTE: I turned the oven temperature up to 500F and used baking sheet covered with aluminun foil.

4. Remove the hot baking sheet from oven and set your flatbreads on top, side by side. Work quickly and carefully. Brush surface with olive oil and layer pears and gorgonzola on top. Bake in oven for 7-10 minutes (keep your eye on the flatbread!) until top and bottom of flatbread is golden brown. Remove and repeat for remaining 2 flatbreads. Top with baby arugula and shaved parmesan.


MY NOTE: I baked mine for about 17 minutes which was the time it turned golden brown in color. The flatbread came off easily from the baking pan, no sticking problem.