Showing posts with label baked. Show all posts

Sunday, June 10, 2012

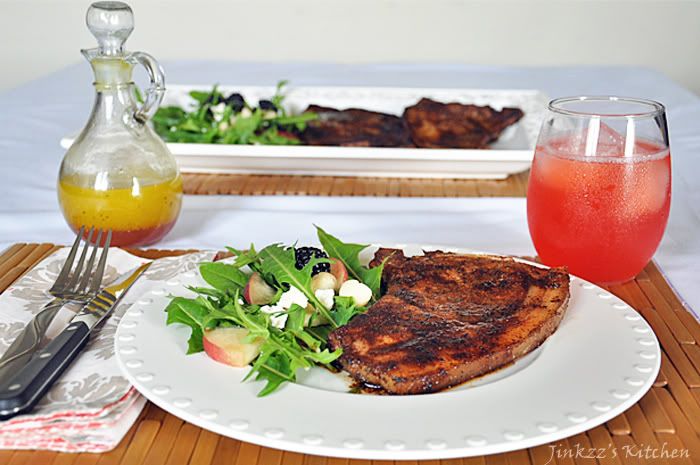
Pork Chops with Spices and Cocoa Powder


Ughhh...woke up tired and sleepy this morning after only 4 hours of sleep . I came home a little past eleven last night after going to the valley to watch Pacquiao-Bradley fight...Bradley won which was a little mind-boggling considering that Pacquiao, to many, dominated the fight...but, Oh well...doesn't really affect me much since I am neither a boxing fan nor watch Pacquiao fights on a regular basis. I took a little detour last night coming home since I missed my freeway exit (I-170) and continued on to I-5. Ha! I guess my sense of direction isn't all that bad since I was able to get home without the aid of a GPS...iPhone GPS is good but only if you have a passenger who is navigating but when you're driving alone, it is not a nifty device since it is way too small to read while driving (especially at night). Nonetheless, I made it home without any problem....hehehe...After I got home, I spent the next five hours proofreading and revising s group paper for school. Aigoo, that wasn't fun especially when all I really wanted was to go to sleep. At least that is out of the way and submitted to the professor.
 
Okay, enough rambling and on to the business at hand...hehehe.

This recipe is from a Good Housekeeping cookbook from the Philippines that my sister-in-law gave me on their recent visit.  I have to say that this cookbook has a lot of great recipes which I cannot wait to try.  When I quickly browsed through the cookbook, it looks like some were adapted to the Filipino palate but maybe I was reading it all wrong...will have to go back and read it in detail when I have a chance.

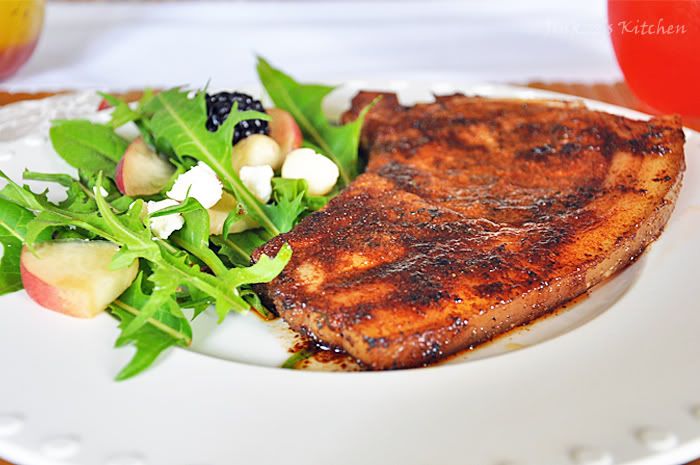
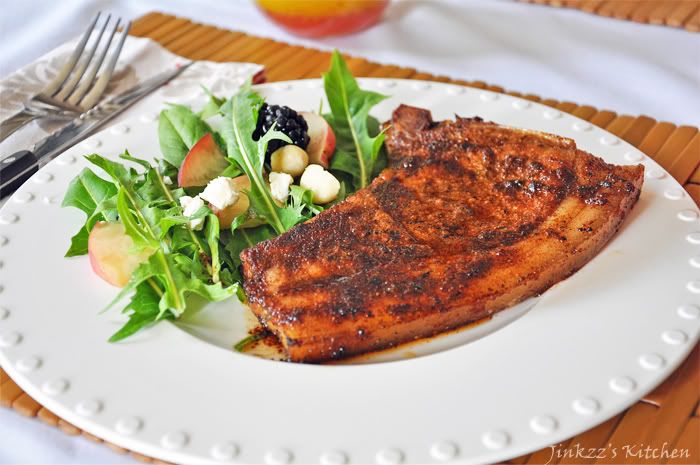
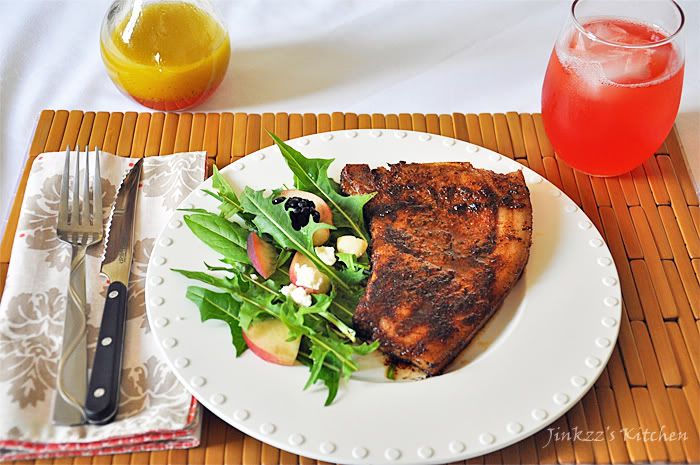
This particular dish is a delight.  Due to the addition of a lot of spices, the resulting dish tasted like a flavor explosion in my mouth.  It is spicy, sweet, savory, and smoky all at the same time.  Don't the not-so-pretty appearance fool you because it taste better than it looks.  The preparation is a breeze as well.  It is a combination of quick-frying and baking.  assembling and mixing the spices and rubbing will probably take you less than 10 minutes (only because there is so much measurement involved) them quick fry for 2-3 minutes each side and then bake for 10 minutes.  All-in-all, it might take you less than 30 minutes from start to finish.
 

Ingredients:

4 pieces pork chops (bone in)
cooking oil

Spice rub:

2 Tbsp brown sugar
1 Tbsp Italian seasoning
2 tsp onion powder
1 1/2 tsp cocoa powder (unsweetened)
1 1/2 tsp garlic powder
1 tsp paprika
1/2 tsp chili powder
1/2 ground cumin
1/2 tsp sea salt
1/2 freshly ground black pepper

1. Preheat oven to 305F

2. Combine spice rub mixture in a bowl.  Mix well

3. Coat the pork chops (on both sides) with the spice rub mixture.

4. Heat non-stick pan over medium heat.  Add oil and pan-fry pork chops for 3-5 minutes on each side.

5. Transfer pork chops to a baking dish and bake for 10 minutes or until cooked through.

6. Serve immediately.

Monday, May 14, 2012

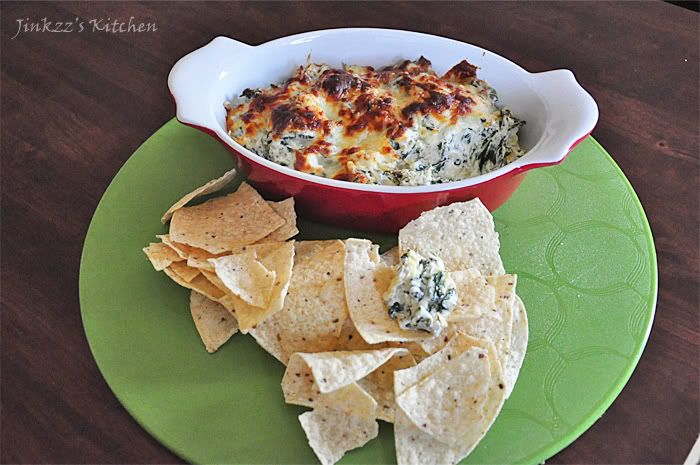
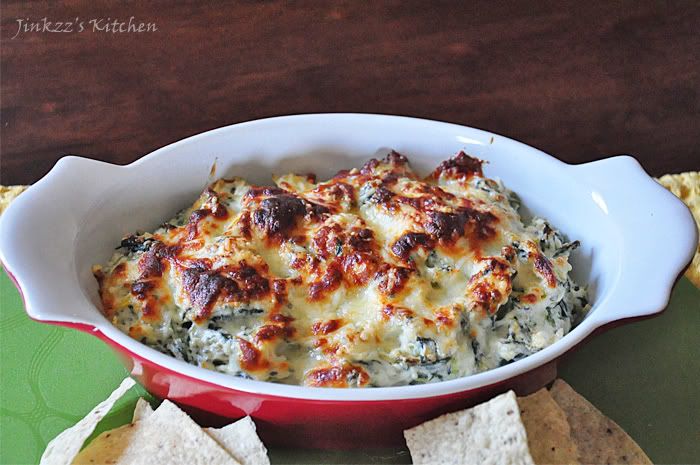
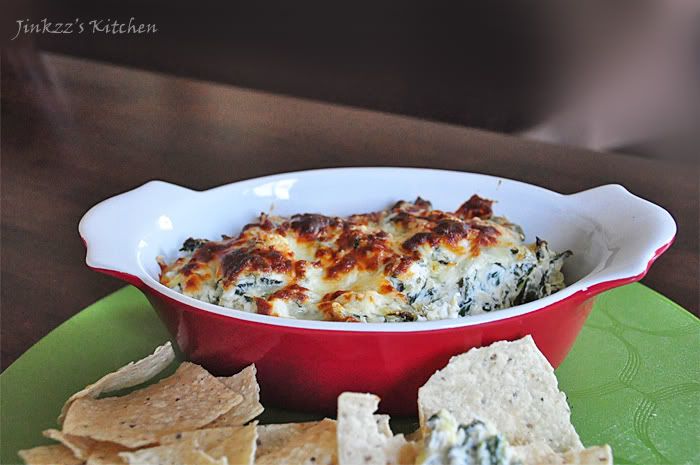
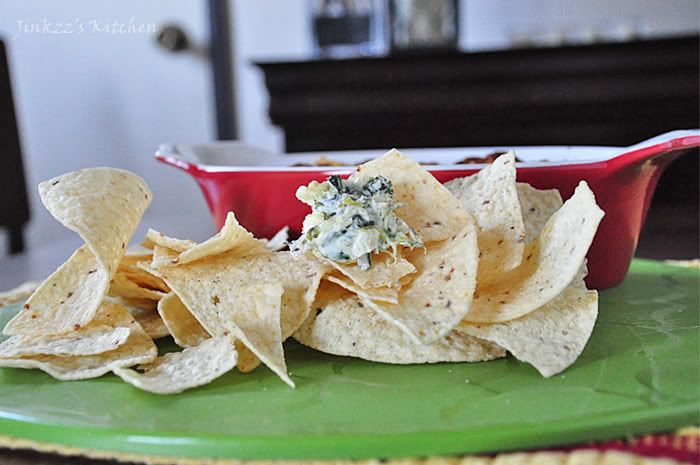
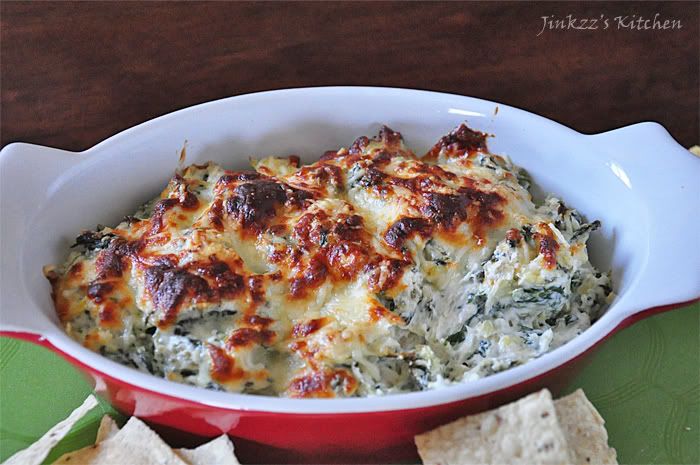
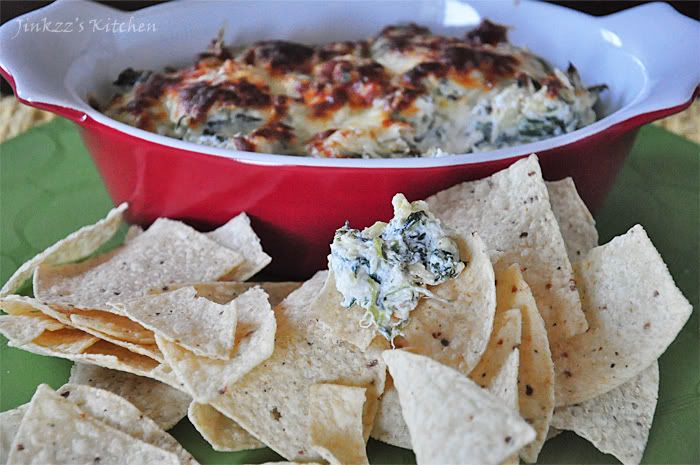
Spinach-Artichoke Dip

Aigoo... my three-month hiatus from school has finally ended which meant that I am back to having tons of paper works, research, deadlines, and typing. The last three months has been a nice break from all the responsibilities. I totally enjoyed not having to use my brain so much which was great since I was in so much pain after the surgery that I probably wouldn't be able to concentrate anyway. Now that I am back in school, memories and stress that goes along with it came flooding back that I am at times feeling overwhelmed. So while I was staring blankly at the computer and waiting for some inspiration/enlightenment to come in order to finish my paper, I felt I needed a distraction and something to relax my mind so I can better concentrate.... plus I was a little hungry but too lazy to cook a full meal. I turned my attention to cooking something that I am very familiar with so it requires less use of brain power. Spinach artichoke dip!


Ahhh...spinach artichoke dip. It is something that I have been making for over 10 years and I still like it as much asI have the first time that I tasted it. This is such a crowd-leaser and always a hit at any gathering. The preparation is quite simple as it only involves mixing the ingredients then popping it in the oven to warm it up and brown the top/melt the cheese. I have been lazy lately as using the oven usually constitutes having to empty the entire contents then having to return them back once I have finished baking. My solution is to use my toaster over which works well for baking small portions but can hold up to about a quart size baking dish. Taking the dish is a little tricky though as there is not much space to maneuver so being burnt by the hot surface is more likely then when you use the oven so be extra careful. I usually use silicone oven mitts which are great at withstanding high temperature plus great at protecting the hands...hehehe


Ingredients:
1 package chopped frozen spinach, thawed
1 can artichoke hearts, finely chopped
2 (6 oz. each) cream cheese, softened
1/4 cup sour cream
1/4 cup mayonnaise
1/3 cup grated parmigiano reggiano
1/3 cup grated romano cheese
1/4 cup gratedmozzarella cheese
salt and pepper to taste


Directions:
1. Preheat oven to 350 degrees
2. Squeeze and discard liquid from thawed frozen spinach.
3. In a mixing bowl, combine softened cream cheese, sour cream,and mayonnaise.  Mix well.
4. Add half of the grated parmigiano reggiano, half of mozzarella, thawed spinach, and artichoke hearts.  Mix well.
5. Season with salt and pepper according to taste.
6. Transfer to oven-proof baking dish and top with remaining mozzarella and parmigiano reggiao.
7. Bake until cheese melts and turns slightly brown (about 10-15 minutes).
8, Remove from heat and serve warm.


Friday, May 11, 2012

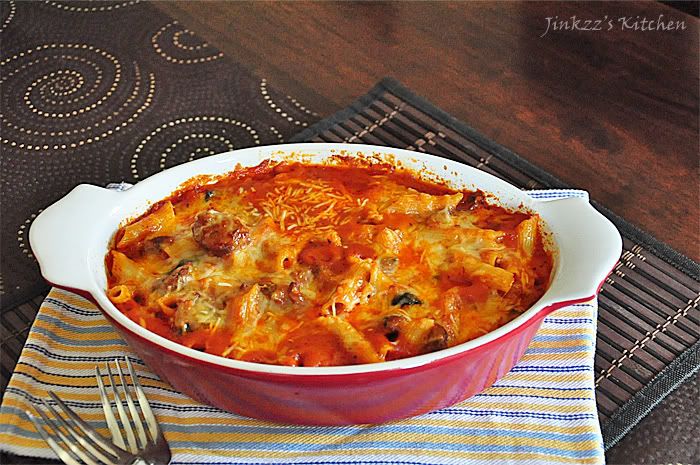
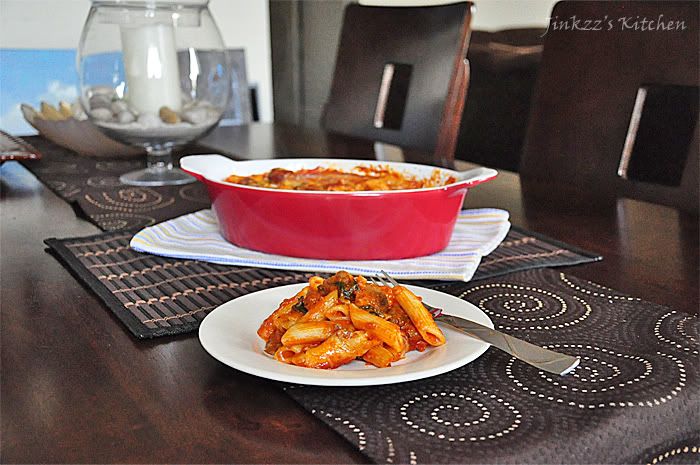
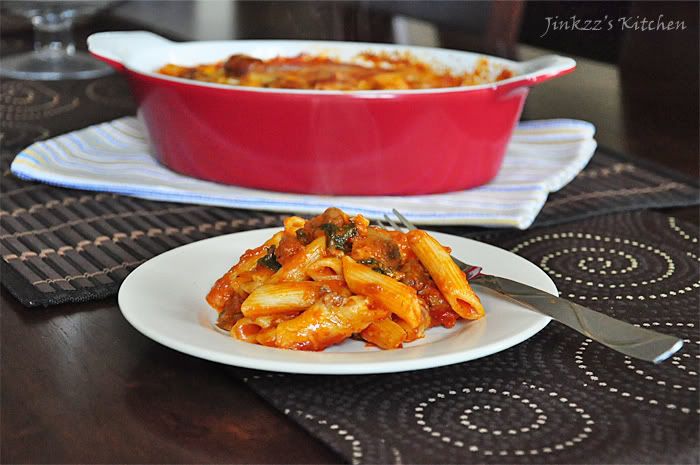
Three Cheese Baked Penne Rigate with Spinach

I was exploring google play on my Logitech Revue and found an app for Kraft foods. After I downloaded the app, I found out that it contained a lot of videos of recipes and cooking demo. In one of the video, I found a recipe for three cheese baked penne which got my attention so I played it and found myself drawn to how tasty the dish looked and how easy its preparation was. Before long, I was on my way to the grocery store buying the things I need for the dish. I modified it though to fit my taste and preference. I used Italian sausage instead of chicken as I am not really too fond of eating it. I also added a little sugar to sweeten it a little. What can I say? blame it on my Filipino palate that is more used to easing a sweeter version of Spaghetti as opposed to the original Italian version :) Nonetheless, you can skip adding the sugar if you wish.


The preparation was a breeze as well as the cooking and baking process. And soon I was able to taste it - my verdict: It's a keeper for me. An easy to prepare dish which can be easily multiplied to serve for an impromptu get-together or unplanned entertaining. By using store bought spaghetti sauce, you save a lot of cooking time. Of course, you are also free to make your own from scratch. Personally, I do prefer to make my own spaghetti sauce according to my preference but this time around I used the store bought variety.


Ingredients:

 2 cups Penne Rigate
 24 oz bottle of Spaghetti Sauce
 1/2 Lb Italian sausage, boiled and sliced thinly
 1 1/2 cups fresh baby spinach leaves
 1 small onion, chopped
 1/2 cup evaporated milk sugar to taste (optional)
 1/2 cup sliced portabello mushroom, sliced thinly
 1/2 cup grated cheddar cheese
 1 cup grated mozzarella cheese
 1/4 cup parmigiano reggiano


1. Boil penne according to manufacturer's instruction. Once penne is cooked, add spinach and cook until the spinach welt slightly then drain. Discard liquid.

 2. In a sauce pan, saute onions and italian sausage. Saute until onion is translucent then add mushroom. Saute for a couple of minutes.

 3. Add spaghetti sauce and simmer until mushroom is cooked.

 4. Mix in milk, cheddar cheese, and sugar (to taste). Simmer for 2-3 minutes then add the drained pasta. Mix well

 5. Add half of the mozzarella and mix thoroughly.

 6. Transfer to an oven-proof dish and cover with aluminum foil that has been sprayed with non-stick spray.

 7. Bake in a preheated 350 degree oven for about 15 minutes then remove the cover and bake for another 5-10 minuted until top browns slightly.

 8. Remove from heat and let it cool a little bit before serving.

Thursday, November 24, 2011

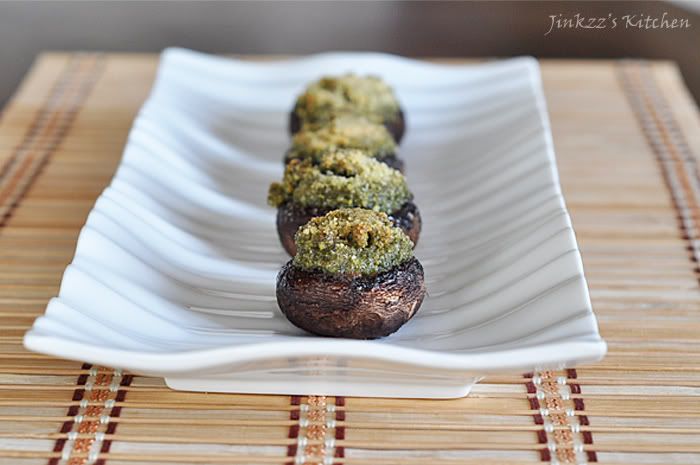
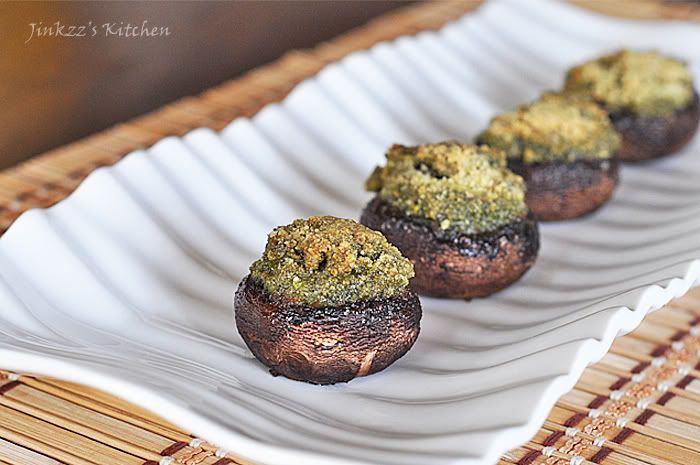
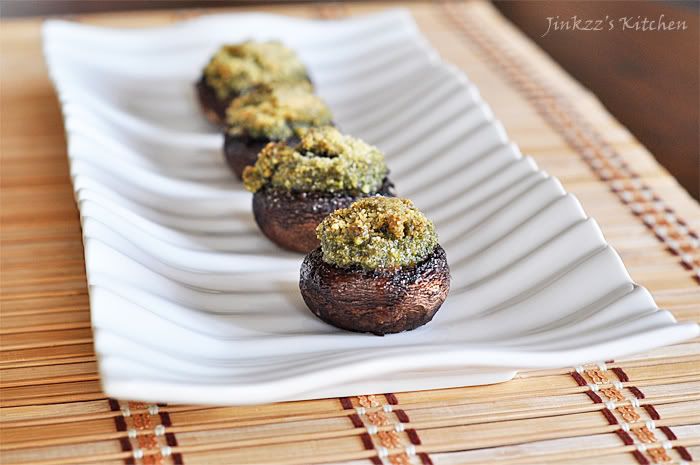
Pesto and Breadcrumbs Stuffed Baby Portabello Mushrooms


I love portabello mushroom and I love pesto which makes this dish a perfect combination of the ingredients that I really like. This is part of the Thanksgiving meal which I cooked this year. The recipe is quite simple, fast and easy to make especially since I have ready made pesto which I made earlier this week so basically all I did was mix, stuff, and bake these babies. The pesto that I used is the arugula-walnut pesto (recipe here).

To stuff the portabello mushroom, just remove the stems from the caps and then using a teaspoon, scrape some of the mushroom cap off to create a bigger surface area for the stuffing. By the way, save those portabello stems for another recipe such as soup. Combine all the ingredients for stuffing in a small bowl and spoon on the mushroom caps. Bake for about 5-10 minutes and viola! you're are done.

Ingredients:

10-12 baby portabello mushrooms

Stuffing:

1/2 cup prepared arugula pesto sauce (recipe here)
1//4 cup (+ extra for topping) breadcrumbs
3 Tbsp freshly grated parmigiano reggiano
2 cloves garlic, finely chopped
non-stick spray

1. Preheat oven to 350F.
2. Spray some non-stick spray to your baking pan or lightly grease the pan using olive oil or just plain vegetable oil
3. Remove stems from portabello caps then using a teaspoon, scrape some of the mushroom cap off to make the opening bigger. Set Aside.
4. In a small bowl, combine pesto, breadcrumbs, and garlic. Mix well.
5. Spoon the stuffing into the mushroom caps, top with parmesan cheese and a little breadcrumbs.
6. Bake for 5-10 minutes or until heated through. Transfer to a serving platter and serve warm.

Friday, October 21, 2011

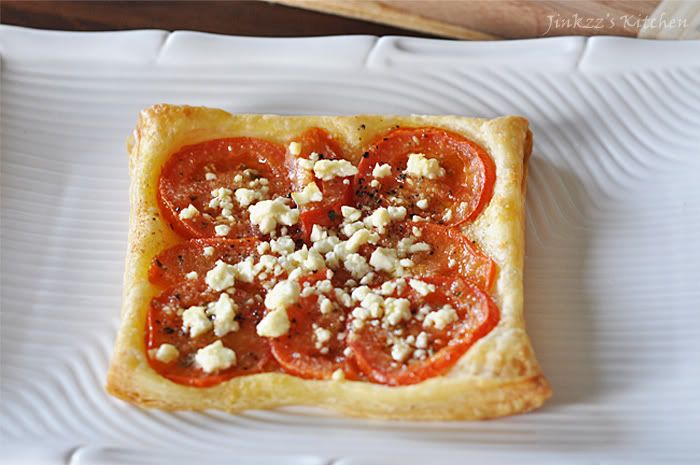
Easy Tomato Tart


Even avid cooks have their off days. Today is one of those days for me. I just did not want feel like slaving over the kitchen to make a meal as I have been feeling rather emotional these past few days. This recipe is perfect for days like today.

This is an easy to make tart which can be done in less than 30 minutes from start to finish. The secret is using store bought puff pastry as the tart shell which takes most of the work. The possibility for topping is dependent on the cook's imagination. You can basically top it with anything that you desire. I chose tomato because I really like them (that is kinda strange coming from me since I really hated eating tomato for the longest time. I also used two different kind of cheeses - parmigiano reggiano and feta. I baked them in the oven for about 20 minutes then they are ready to eat.

Ingredients:

1 sheet store bought puff pastry
roma tomatoes, cut into 1/4 inch thickness
feta cheese
grated parmigiano reggiano
2-3 Tbsp extra virgin olive oil
1 tsp powdered garlic
1/2 tsp dried parsley
salt and pepper to taste

1. Preheat oven to 375F.
2. NOTE: Make sure you thaw puff pastry in the refrigerator overnight. When puff pastry is ready, roll out in a floured surface are. Cut into 6 equal sized rectangle.
3. Using a rolling pin, flatten the rectangle puff pastry into about 1/4 to 1/8 inch thickness.
4. Using a fork, prick puff pastry all over. Make sure you leave a small border on the edges.
5. Using a pastry brush, brush puff pastry with olive oil.
6. Sprinkle parmesan cheese then arrange tomato slices on top.
7. Brush tomatoes with olive oil then sprikle powdered garlic, dried parsley, salt and pepper.
8. Top with feta cheese.
9. Bake in oven for 18 to 20 minutes or until edges turn golden in color. Remove from oven and serve.

Monday, October 3, 2011

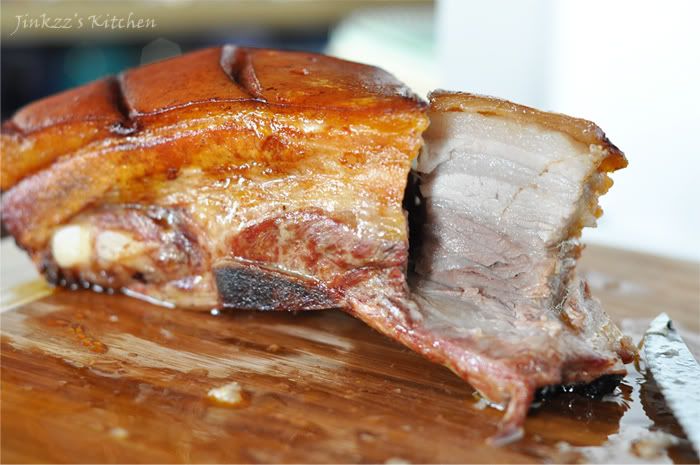
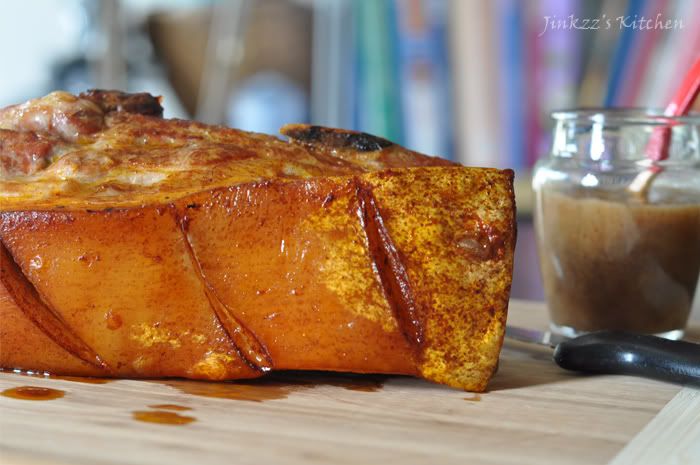
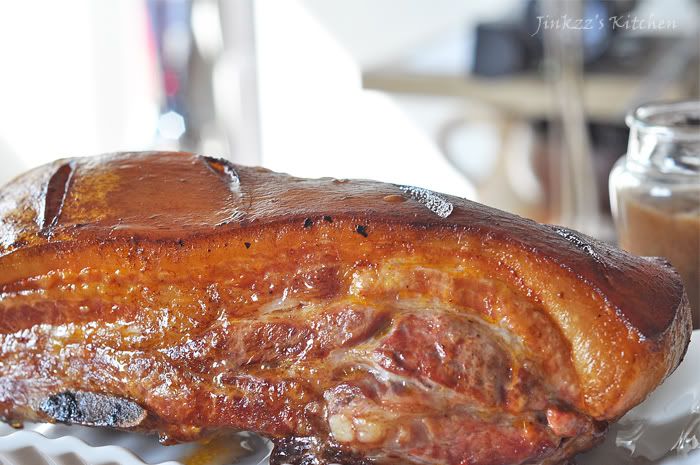
Lechon sa Hurno (Oven Roasted Pork) with Lechon Sauce (Roast Pork Sauce)


Lechon (whole roast pig) is a staple to any FIlipino gathering. Rarely can you find a huge gathering without this dish. A whole pig is usually "skewered" using a long, whole trunk of bamboo that is big and strong enough to hold an entire pig then roasted over open fire for hours while constantly turning the whole pig to ensure that it is cooked evenly and prevent overcooking/burning one side. The whole pig is roasted until the skin becomes crispy. Traditionally, the pig is stuffed with a mixture of lemon grass and tamarind leaves and the outside is basted with a mixture of oil and atsuete (annatto) to give it its golden color. This dish is served with lechon sauce and eaten with rice. Leftovers, if any, is then cooked in a dish called lechon paksiw (roast pork stewed in vinegar) which taste just as good as the lechon.

I remember back when I was young, lechon making is a whole-morning affair which starts in the wee hours - I'd say around 3 in the morning where butchers come and kill the pig. The pig is then cleaned, stuffed, skewered, and then roasted. This preparation is necessary so that the roast pork will be ready to serve by lunch time. The cooking process is a treat in itself because it is exciting to see a pale, whole pig turn into golden color. A nice lechon should have a nice balance between the fat content and meat. A lot of people actually prefer the crispy skin over the meat but I think the meat taste better. I can only eat a small amount of the skin whereas I can eat a whole lot of the meat (hehehe). The most popular parts are the ears and the tail because they are really crispy and crunchy...yummmmmyyy...


Since it is impossible to cook a whole pig in an oven, The next best thing is lechon sa hurno (Oven roasted pork). Actually, I take that back, it is possible to roast a whole piglet in the oven which is another Filipino delicacy known as lechon de leche but finding a whole piglet here in the States is near impossible. Anyways, in lechon sa hurno, pork (usually pork belly with ribs) is roasted in the oven for an hour or more depending on the size, basted with a mixture of annatto and oil until the skin turn golden and crispy. You also have to make sure that the flesh is cooked through. Generally, I would cook a 2 1/2 lb pork belly for an hour and a half at 350F then bump up the heat to 400 to 450F for 20 to 30 minutes until the skin is crispy.

Ingredients:

2 1/2 lbs pork belly with ribs
3 stalks of lemon grass
1 small onion, chopped
3 cloves garlic, chopped
sea salt, to taste

basting sauce:

1/2 oil
1 1/2 Tbsp annatto extract

1. Mix ingredients for basting sauce and set aside.
2. Make shallow diagonal cuts on the pork belly skin. Sprinkle salt all over the pork.
3. Line the bottom of your oven with aluminum foil. Note: This will save you the work of having to clean your oven when you are done cooking.
4. Cover a large baking pan with several layers of aluminum foil (Again, to save you from having to scrub it later) then add enough water so that it comes up halfway. Place onions, lemon grass, and garlic.
5. Place the baking pan at the aluminum foil-lined bottom of your oven.
6. Preheat oven to 350F for 15 minutes.
7. With the oven rack in the middle, place the slab of pork directly to it and over the baking pan. NOTE: The baking pan will catch any dripping and the water in the pan will help keep your pork moist while it is cooking. Be careful though not to burn yourself when placing the pork on the oven rack.
8. Baste pork with the oil-annatto mixture every 20-30 minutes. Cook pork for about 1 1/2 hours.
9. At teh end of the 1 1/2 hours, turn up the heat to 400F to 450F to help crisp up the skin. Cook for about 20-30 minutes or until skin is crispy.


Lechon Sauce (Oven Roasted Pork Sauce)
adapted from The Philippine Cookbook by Reynaldo Aguinaldo

Ingredients:

1/2 pound pork liver
1/2 cup apple cider vinegar
1 cup bread crumbs
3 cloves garlic, finely minced
1 small onion, finely chopped
1 Tbsp oil
3 Tbsp brown sugar
salt and pepper, to taste

1. Puree liver in a blender or food processor.
2. Heat pot over medium heat, add oil then saute onion and garlic until transluscent and fragrant but be careful not to burn.
3. Add pureed liver and saute until it turn slightly brownish in color then add the rest of the ingredients.
4. Simmer mixture for about 15 to 20 minutes then transfer to a blender and blend until smooth. Let it cool before serving.


Alternatively, you can purchase a ready made lechon sauce which is often marketted as sarsa ng lechon (Lechon Sauce). The best brand, in my opinion and by far the most popular, is Sarsa ni Mang Tomas which is readily available at most Filipino markets.

Saturday, October 1, 2011

Cinnamon Apple Streusel Muffin


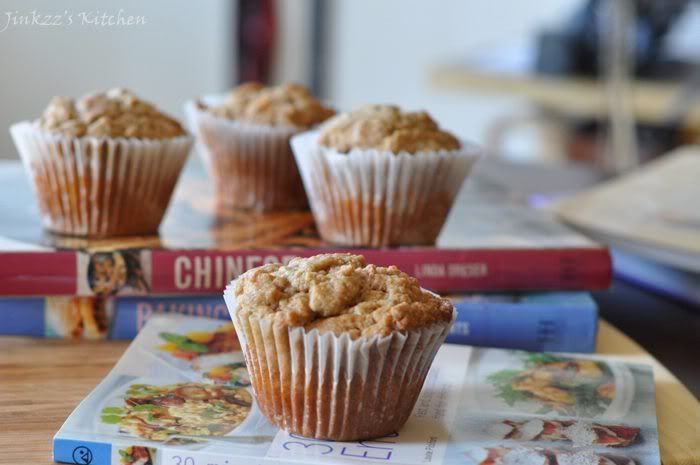
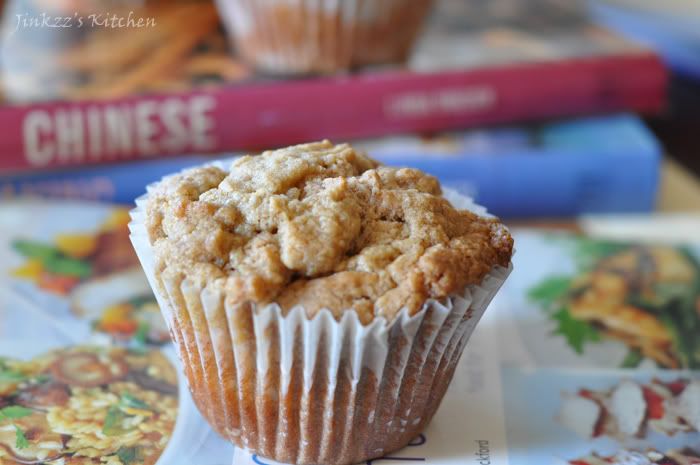
I dreamt last night that I made some muffin and surprisingly (or, not surprisingly), I woke up hungry. My sight was set on some piping hot muffins and tea so I baked up a bunch. I think I made a little too much (a dozen) so I gave my next-door neighbor half a dozen which. The muffins were good and easy to make that it can be made in less thanan hour including the preparation.

The mistake that a lot of people make when making muffins is that they overmix the ingredients which results in a dry and hard muffin. To make sure that it remains moist and not dry, you only need to mix it just enough to moisten the dry ingredients. Otherwise, you may have to dump that batch into the garbage. I know because I have made that same mistake in the past many times than I care to count on my fingers and toes.

Today I made cinnamon apple streusel muffins because I bought tons of apple from whenI went to the farmer's market the other day. I love gala apple so that's what I used for this recipe. I think gala is the best tasting apple there is and beats red delicious in the taste and appearance.


Ingredients:

Streusel topping:
1/2 cup packed brown sugar
1/2 cup all-purpose flour
1/2 stick of butter, softened

1. Mix all ingredients for streusel using a fork until it resembles a cornmeal consistency. Set aside.

Muffin:

2 cups all-purpose flour
1/2 cups + 2 Tbsp sugar
1 Tbsp baking powder
a pinch of salt
2 tsp vanilla extract
1 cup milk
1 large egg, slightly beaten
1/2 stick of butter, melted
1 cup peeled and diced apple
2 tsp powdered cinnamon

1. Preheat oven to 400F
2. In a small container, mix apple with 2 Tbsp sugar and 1/4 tsp cinnamon. Let it stand for 10-15 minutes.
3. Microwave butter until melted. Let it cool.
4. In a large bowl, sift together flour, baking powder, and salt.
5. In another large bowl, combine beaten egg, sugar, milk, cinnamon, and vanilla. Mix until incorporated.
6. Slowly drizzle butter and mix well.
7. Fold in the apple mixture and mix well.
8. Add liquid ingredients to dry ingredients and mix just enough to moisten the dry ingredients. Note: It will be visible lumpy but it is okay.
9. Pour into paper lined muffin pans, top with streusel mixture, and bake for 20 minutes or until a toothpick inserted in the center comes out clean.
10. Remove from oven, let it cool slightly and serve.

Monday, September 19, 2011

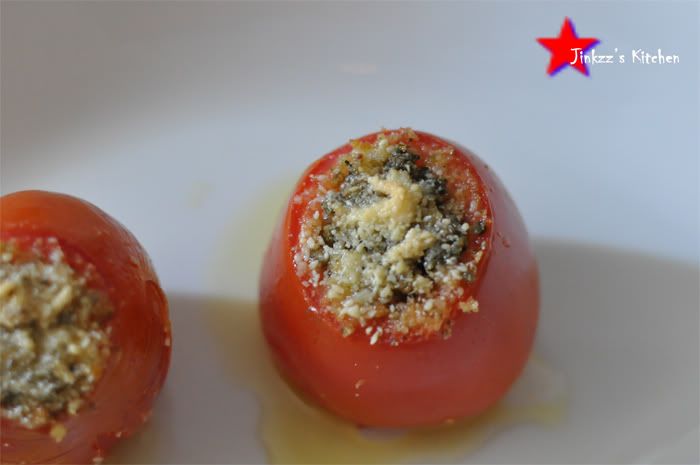
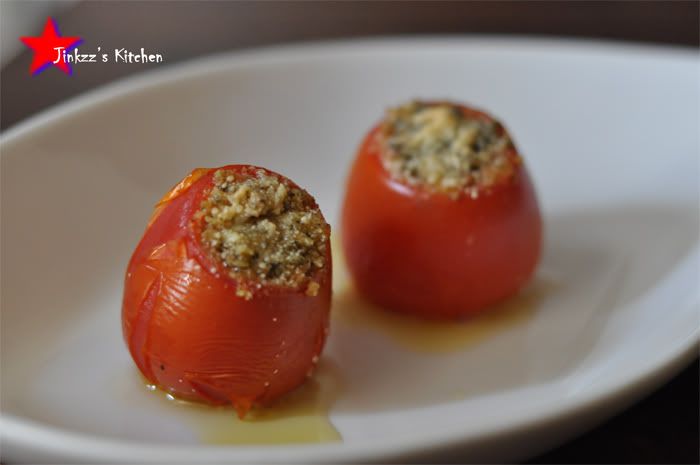
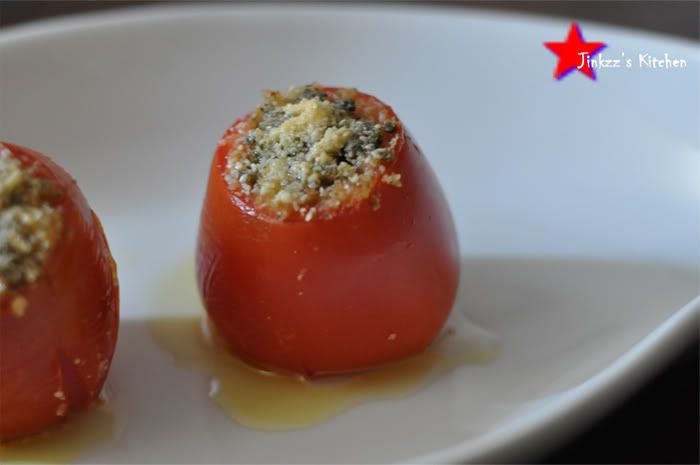
Pesto-stuffed Baked Tomatoes


I have come to love tomatoes. My love affair with tomato was slow to developed though. I really hated the taste when I was younger but have come to love and enjoy its taste over the years. I can even eat it raw with just a slight sprinkling of salt. How's that for a huge change?

This dish is simple enough to make as I have some leftover homemade pesto. It just takes a little time and cooking is a breeze. I think the only hard part in the process is trying to hollow out the tomato cavities without cause much damage. Thankfully,I have these tiniest of spoons (they like 1/4 of a teaspoon in size) which I do not know what they are called nor do I know what their usage is. I think I have twelve of them which came from a set of silverwares that my husband inherited when their old house was demolized. Anyways, the flatware has been sitting in the silverware chest awaiting its use but I am afraid to use them as I have the tendency to lose silverwares. Don't ask me how but I have gone through several sets in the past and always end up losing most of them that I finally gave up buying expensive brands and just go with the cheapest that I could find...hehehe.

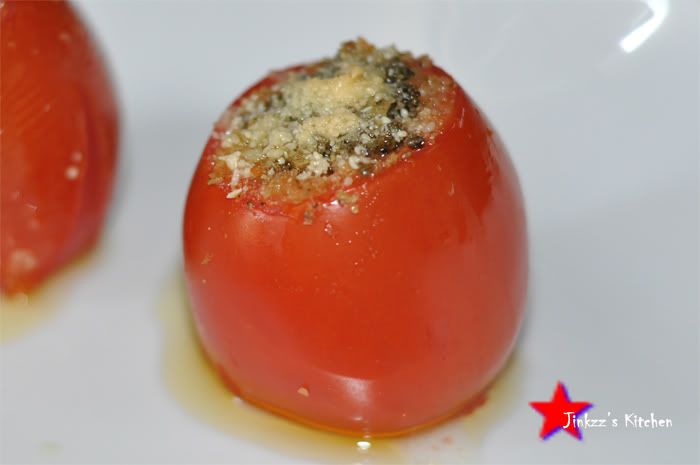
Anyways, I hallowed out the tomato cavities then stuffed it with pesto,breadcrumbs, and garlic mixture then topped with grated parmigiano reggiano. Popped it in the oven for 15-20 minute or until the top brown a bit then serve. The result is a really tasty appetizer which I could probably turn into a meal by eating several...hehehe.


adapted from here

Ingredients:

4 roma tomatoes, washed and dried them tops sliced
1/4 cup breadcrumbs
1/4 cup homemade pesto (recipe here)
1 clove garlic, chopped finely
2 tsp extra virgin olive oil
salt and pepper, to taste
1 Tbsp freshly grated parmigiano reggiano

1. Preheat oven to 350 degrees.
2. In a bowl, mix bread crumbs, pesto sauce, and garlic. Season with salt and pepper to taste then set aside.
3. Stuff hollowed out tomatoes with the filling mixture.
4. Top with grated parmesan cheese then drizzle olive oil on top
5. Place on oven safe pan and bake for 15-20 minutes or until top turns light golden brown.
6. Remove from oven and serve warm.NOTE: be careful when removing from the oven as it will be very hot.

Sunday, September 18, 2011

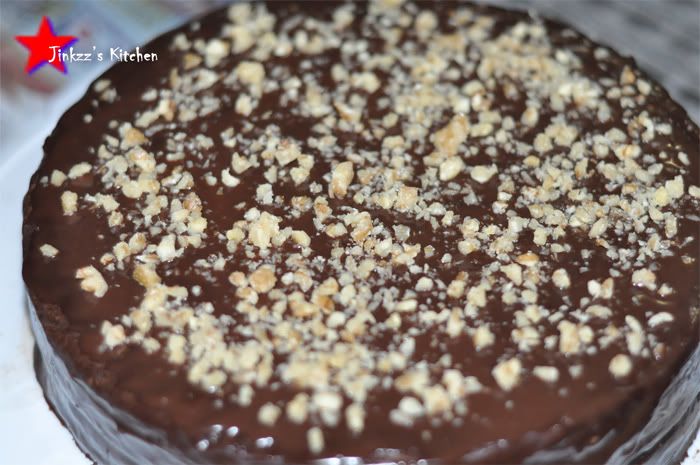
Chocolate Lover's Cake

Who can resist chocolate? There would not be too many I am sure. There is something about it that makes people smile and happy. I think it is its theobromine and phenethylamine components which produces a physiological effect on the body as well as its ability to stimulate the production of serotonin in the brain. I would say though that it can be considered as one of the pleasures in life that I really enjoy and love. All the other reasons (physiology mambo-jambo) are insignificant...hehehe. Chocolate is thought to have originated from Central and South America where cacao has been cultivated for at least three centuries.

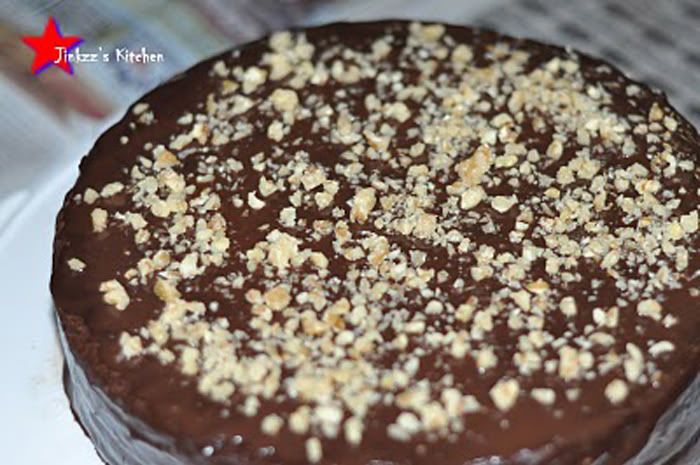
This is a very rich, chocolate-y cake that is sure to make any chocolate lovers smile from ear to ear. This is a cake that I made for hubby's birthday. It has a chocolate cake base, a nutella filling, topped with chocolate ganache and sprinkled with nuts. Hahaha. I told you it will be chocolate-y. I have to confess though, I love chocolate but only in small doses as it gives me a headache and I break out into the tiniest rashes (?) on my face but that doesn't deter me from enjoying them. The cake though is so rich that I could only partake a very small slice lest I want to have a full-blown migraine as a result of eating too much chocolate in one sitting...hehehe...As a bonus, I was even able to make chocolate truffles, the recipe of which I posted here as well.


Chocolate cake base:
adpated from Hershey's Kitchen

Ingredients
2 cups sugar
1-3/4 cups all-purpose flour
3/4 cup good quality Cocoa
1-1/2 teaspoons baking powder
1-1/2 teaspoons baking soda
1 teaspoon salt 2 eggs 1 cup milk
1/2 cup vegetable oil
2 teaspoons vanilla extract
1 cup boiling water

Filling :
Nutella (Chocolate Hazelut Spread)

Frosting;Chocolate Ganache

Ingredients:
1 cup chocolate chips, semi-sweet
3/4 cup heavy cream


Directions for Cake:
1 Heat oven to 350°F. Grease and flour two 9-inch round baking pans.


2 Stir together sugar, flour, cocoa, baking powder, baking soda and salt in large bowl. Add eggs, milk, oil and vanilla; beat on medium speed of mixer 2 minutes. Stir in boiling water (batter will be thin). Pour batter into prepared pans.


3 Bake 30 to 35 minutes or until wooden pick inserted in center comes out clean. Cool 10 minutes; remove from pans to wire racks. Cool completely.

Direction for ganache:

1. Using a double boiler or heat proof bowl over a pan with water, place the crean on the bowl and heat gently until warm.
2. Add chocolate chips and stir until mixture is smooth and glossy.
3. Remove from heat and cool a little bit before using it to frost your cake.

To Assemble:

1.Take 1 of the cake and place it on yur cake server.
2. Trim to the top to make it flat. Do the same with the other cake (NOTE: You can save thatportion and use it to make chocolate cake truffles.)
3. Spread nutella on the top area and spread evenly.
4. Take the second cake, invert it and place it on top of the other layer.
5. Apply frosting and then refrigerate for an hour or more until ganache somewhat hardens.

Saturday, September 10, 2011

No Knead Pita Bread

I went to the store yesterday with the original intention of buying pita bread since I am making hummus today. But, of course, I would not be me if I did not forget the very thing I went to the store toget. In short, I forgot to buy pita bread. I made a list before I headed out but left the list on the table so I had to make a mental list on my way to Ralph's. When I got there, I just had to stop at Ross to check out their stocks of plates, bowls, etc...like I really need anymore of these things...hehehe...I went and got a few pieces (of course!) but they are really cheap since their items are mostly overruns, past season, and surplus from the department stores. BY the time I got to Ralph's my mental list has long been forgotten so I had to go from one aisle to another trying to remember what I needed. Hahaha...that was a joke because before I knew it, stuff kept piling on my cart. When I was in the fruit section, I remembered that I needed to pick up pita bread which was located on the other end of the store. I walked all the way there but for the life of me I could not remember what I went there for...lol...old age? dementia? huh!! I was in the garage parking the car when I remembered that I forgot to pick up PITA BREAD!!! Well, I wasn't about to turn around and go back to the store. Instead,I decided tomake my own.

Pita bread recipe is very simple. YOu just need a few ingredients which you will mix then leave to let it do its thing overnight. When morning comes, your dough will be ready. Pita bread belongs to the flat bread category with its signature pocket. It is common in the middle eastern countries. Pita is used to scoop dips such as hummus and used to wrap falafel, kebabs or gyrus. It is usually baked at a high temperature to make the rbead puff up and create the pockets.

NOTE: I used the same principles used by the authors of the book Artisan Breads in 5 Minutes a Day


Ingredients

3 cups fliur
1 1/4 to 1 1/2 cups water, room temperature
1 1/2 tsp salt
2 tsp yeast
1 Tbsp sugar
2 Tbsp extra virgin olive oil

1. Mix yeast, salt, sugar, water, and olive oil in a mixing bowl.
2. Add flour and mix thoroughly
3. Cover loosely with plastic wrap and let it rest on room temp for 1-2 hours.
4. Refrigerate overnight.
6. Take out the dough after resting in the efrigerator overnignt.
7. Place in a lightly floured surface. Four you hand well also.
8. Take the dough and fold it over itself twice or three time. Cover with plastci wrap and let it rest for 30 minutes to 1 hour.
9. Once dough has cooled down, shape it into a log and divide into 8 equal sizes.
10.Roll each into a ball and cover with plastic wrap and rest for 20 minutes.
11. Preheat your oven to 475 t0 500 degrees with the rack at the lowest position. Preheat you baking dish for about 30 minutes to 1 hour.
12. Once oven and baking dish has been preheated, take a piece of the dough, flatten then roll out into a 8 inch flat round.
13. Take your baking dish ut of the oven and placed you pita bread. (NOTE: be careful as the baking pan will be extremely hot) Bake two at a time.
14. Bake for 3-4 minutes. By the end of the four minutes, the dough would have puffed up.
15. Turn the bread over and bake the other side for another 3-4 minutes or until light golden brown in color.
16. Take out of the oven and serve with hummus.


Thursday, September 8, 2011

Baked Sinigang-flavored Porkchops

I was going through my pantry to find ingredients that I can use for my thawed porkchop and came across a package of sinigang mix. This mix is usually used for sinigang which is a sour Filipino soup made of tamarind, meat, and veggies. I usually crave this soup when I have colds as they are good in opening the sinuses. But that is not what I want to make today since I do not have the veggies that are needed for the soup. The sinigang mix triggered my memory of a porkchop recipe which used sinigang mix as sort of a rub but I cannot remember how it was made since I saw that from a Filipino cooking show about 4 or 5 years ago. I just decided to improvise and see what happens. I needed something to help the mix adhere to the porkchop so I used oil, sprinkled the mix all over the meat then bake it. The result is a very tasty, slightly sour dish which I really enjoyed. I served it along with an easy mango salsa. The sweetness from the mango was a good contrast to the sourness of the porkchop dish.


Ingredients

2 porkchop
2 tsp oil
1 1/2 Tbsp Sinigang Mix

1. Preheat oven to 350F
2.Rub oil all over the porkchop then sprinkle sinigang mix. Make sure that the porkchop is covered with the mix.


3. Place porkchop in a foil lined baking dish and bake for 25 to 30 minutes or until cooked and light golden brown in color.
4. Remove from the over and serve warm.

Tuesday, September 6, 2011

Bacon Wrapped Dates with Goat Cheese Stuffing

I bought some dried dates the other day when I went grocery shopping. I also bought bacon since prosciutto wasn't available (or maybe I did not look hard enough...lol). They are both perfect for the dish I was thinking. I had these a while back but haven't made it since because I was having a hard time finding date. Funny that I found some when I wasn't even looking for them.

This dish is really good. so good, in fact, that you won't be able to stop at your first piece and will keep reaching for them over and over. The taste is a combination between sweet (dates) and salty (bacon). when you bite into them, the taste explodes in your mouth...really yummy

Dates came from date palm which is cultivated for the sweet fruit that it produces. They grow mostly in the middle eastern countries such as United Arab Emirates, Saudi Arabia, Algeria, Pakistan, Sudan, Oman and Libya.


Ingredients:

20 dried dates
goat cheese
10 bacons, cut in half


1. Preheat oven to 350 degrees.
2. Take a date and make a long slit on one side to make it easier to stuff.
3. Stuff date with goat cheese then wrap in bacon and secure with toothpick. Do the same with the rest until you're done.


4. Bake for about 10 minutes or until golden brown then turn over and bake the other side for another 7-10 miutes or until golden brown. Make sure you keep an eye on it and check frequently to prevent burning.
5. Remove form the oven and place in paper towel-lined platter to drain excess fat.
6. Transfer to a serving platter and serve. NOTE: Be careful when you handle and eat them as they may be too hot.