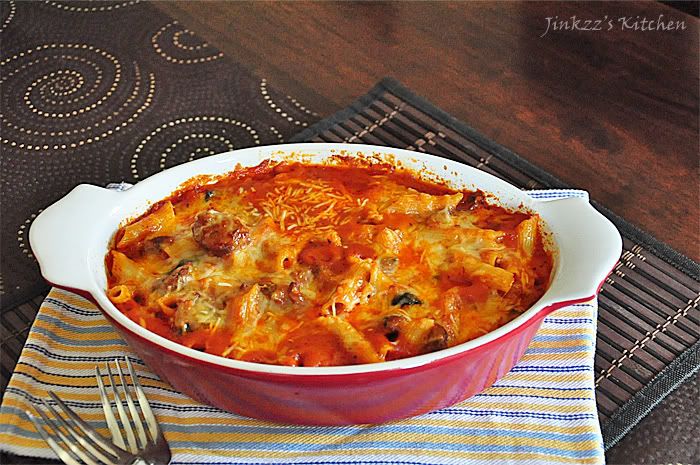
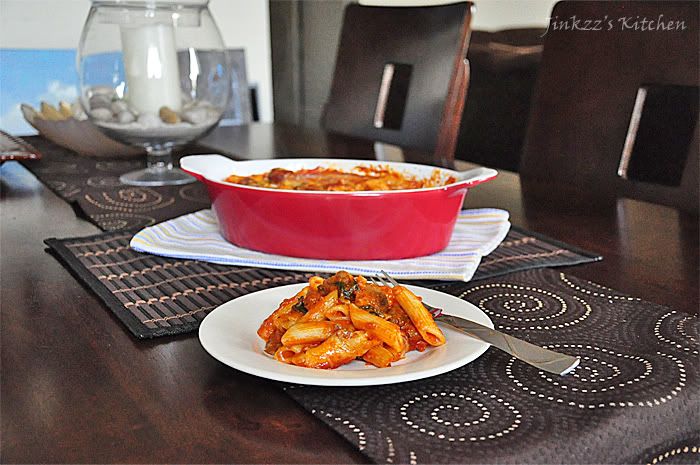
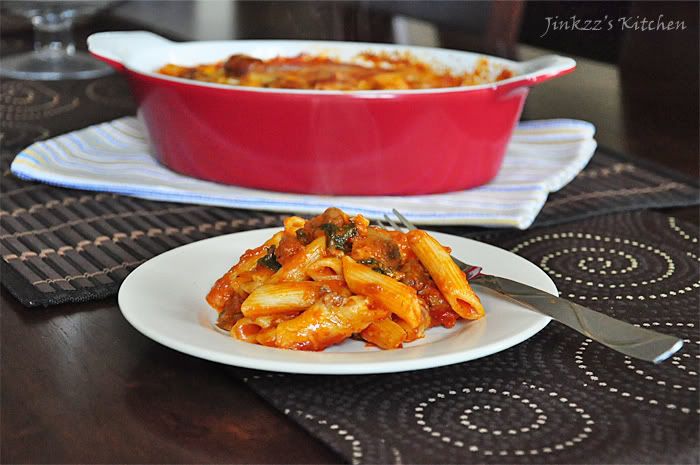
I was exploring google play on my Logitech Revue and found an app for Kraft foods. After I downloaded the app, I found out that it contained a lot of videos of recipes and cooking demo. In one of the video, I found a recipe for three cheese baked penne which got my attention so I played it and found myself drawn to how tasty the dish looked and how easy its preparation was. Before long, I was on my way to the grocery store buying the things I need for the dish. I modified it though to fit my taste and preference. I used Italian sausage instead of chicken as I am not really too fond of eating it. I also added a little sugar to sweeten it a little. What can I say? blame it on my Filipino palate that is more used to easing a sweeter version of Spaghetti as opposed to the original Italian version :) Nonetheless, you can skip adding the sugar if you wish.
The preparation was a breeze as well as the cooking and baking process. And soon I was able to taste it - my verdict: It's a keeper for me. An easy to prepare dish which can be easily multiplied to serve for an impromptu get-together or unplanned entertaining. By using store bought spaghetti sauce, you save a lot of cooking time. Of course, you are also free to make your own from scratch. Personally, I do prefer to make my own spaghetti sauce according to my preference but this time around I used the store bought variety.
Ingredients:
2 cups Penne Rigate
24 oz bottle of Spaghetti Sauce
1/2 Lb Italian sausage, boiled and sliced thinly
1 1/2 cups fresh baby spinach leaves
1 small onion, chopped
1/2 cup evaporated milk
sugar to taste (optional)
1/2 cup sliced portabello mushroom, sliced thinly
1/2 cup grated cheddar cheese
1 cup grated mozzarella cheese
1/4 cup parmigiano reggiano
1. Boil penne according to manufacturer's instruction. Once penne is cooked, add spinach and cook until the spinach welt slightly then drain. Discard liquid.
2. In a sauce pan, saute onions and italian sausage. Saute until onion is translucent then add mushroom. Saute for a couple of minutes.
3. Add spaghetti sauce and simmer until mushroom is cooked.
4. Mix in milk, cheddar cheese, and sugar (to taste). Simmer for 2-3 minutes then add the drained pasta. Mix well
5. Add half of the mozzarella and mix thoroughly.
6. Transfer to an oven-proof dish and cover with aluminum foil that has been sprayed with non-stick spray.
7. Bake in a preheated 350 degree oven for about 15 minutes then remove the cover and bake for another 5-10 minuted until top browns slightly.
8. Remove from heat and let it cool a little bit before serving.
Showing posts with label Italian. Show all posts
Friday, May 11, 2012
Sunday, September 25, 2011
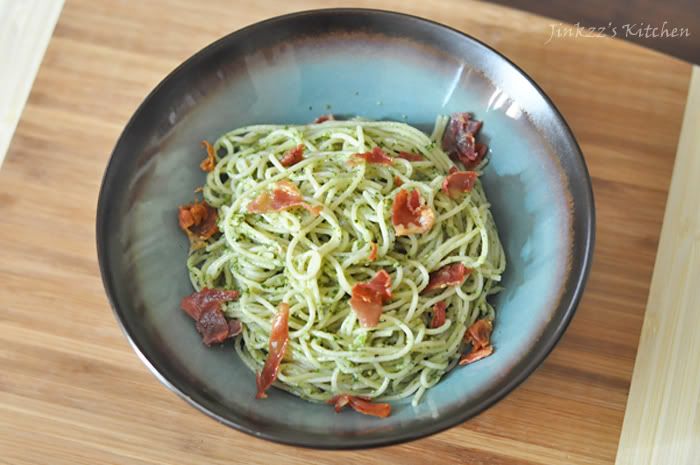
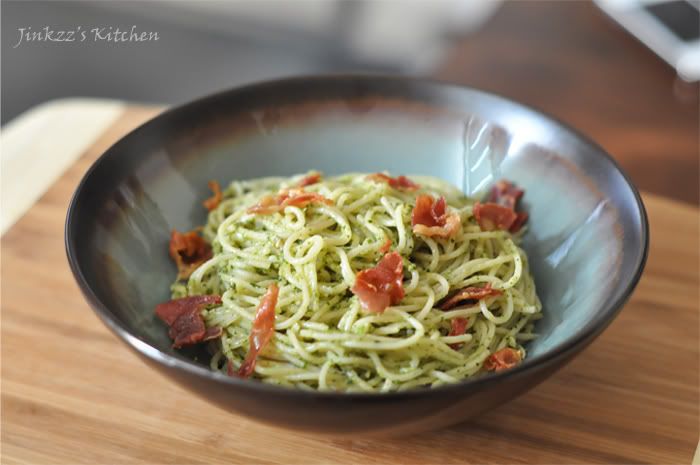
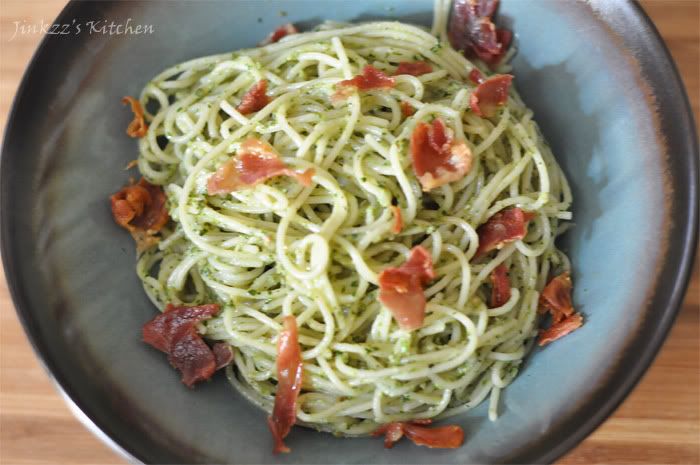
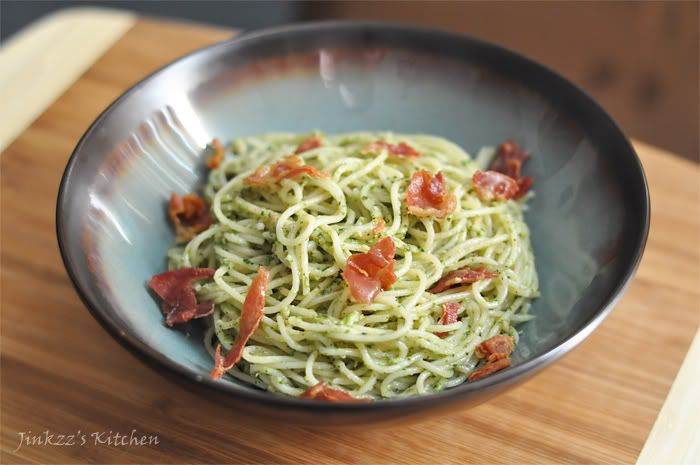
Linguine Fini in Creamy Arugula-Walnut Pesto Sauce with Crispy Prosciutto
I went grocery shopping yesterday, the second time for the week, and bought prosciutto di parma, arugula, walnuts and other basic ingredients. I could not wait to get home as I already have something in mind that I wanted to eat. Went home and started making arugula-walnut pesto which is a variation on the original pesto sauce with the substitution of arugula and walnuts in place of basil and pine nuts. It is a less pricey alternative to the expensive pine nuts and basil (darn, I need to grown my own as these babies are getting pricier each time I shop for them)and pine nuts but taste just as good. Arugula usually has a rich, peppery taste but surprisingly mellows when placed in combination with the other ingredients in pesto sauce.

After I finished making the pesto sauce, I proceeded to making a creamy pesto pasta with crispy prosciutto. Uhhmmm...yummy good. Nothing can beat a crispy piece of pork, right? Prosciutto di parma is a little bit pricey at $20+++ per pound but so worth it. I usually like to wrap it in around melon slices and eat as an appetizer...ahhh, that one taste heavenly...hehehe. Prosciuttio is Italian for ham. Some of the most famous places where prosciutto are made includes Parma and San Daniele. It makes one think what is up with these Italians and food, right? Hahaha, they must have been blessed by the food gods or something. Anyways, the creamy pesto is quite easy to make and didn't take me long to finish the dish.


Ingredients:
Arugula Pesto Sauce:
2 cups fresh arugula leaves, stems removed
1/3 cup freshly grated parmigiano reggiano
1/2 cup good quality extra virgin olive oil
1/3 cup walnuts
2 cloves of garlic, chopped
salt and pepper to taste
1. Place walnuts andarugula in food processor.
2. Process until it is grinded. Scrape the sides with spatula.
3. Add olive oil in steady stream while continuing to process using a food processor.
4. Add garlic and grated parmigiano reggiano. Blend until well incorporated.
5. Add salt and pepper to taste.
6. Transfer to a container then set aside
Pasta:
1/2 lb linguine fini
1. Bring a pan of water to a boil. Add salt and oil before adding pasta.
2. Cook according to direction.
3. Save some of the pasta water before draining water from pasta using a colander.
4. Set aside.
Creamy Pesto Sauce with Crispy Prosciutto:
3-4 pieces of prosciutto
1 Tbsp extra virgin olive oil
1/3 cup arugula walnut pesto sauce
2/3 cup heavy cream
1. Heat pan over medium low and add olive oil. Fry prosciutto until crispy then remove from heat and transfer to paper towel lined plate.
2. Discard all but 1 Tbsp of the oil from the same pan where you fried prosciutto.
3. Add pesto sauce and heat gently.
4. When pesto sauce has warmed thoroughly, add cream. Mix well to make sure that pesto is incorporated well into the cream.
5. Simmer for 2 minutes before tossing pasta in. Coat pasta with the sauce.
6. Remove from heat and transfer to a serving dish.
7. Top with crispy prosciutto.

After I finished making the pesto sauce, I proceeded to making a creamy pesto pasta with crispy prosciutto. Uhhmmm...yummy good. Nothing can beat a crispy piece of pork, right? Prosciutto di parma is a little bit pricey at $20+++ per pound but so worth it. I usually like to wrap it in around melon slices and eat as an appetizer...ahhh, that one taste heavenly...hehehe. Prosciuttio is Italian for ham. Some of the most famous places where prosciutto are made includes Parma and San Daniele. It makes one think what is up with these Italians and food, right? Hahaha, they must have been blessed by the food gods or something. Anyways, the creamy pesto is quite easy to make and didn't take me long to finish the dish.
Ingredients:
Arugula Pesto Sauce:
2 cups fresh arugula leaves, stems removed
1/3 cup freshly grated parmigiano reggiano
1/2 cup good quality extra virgin olive oil
1/3 cup walnuts
2 cloves of garlic, chopped
salt and pepper to taste
1. Place walnuts andarugula in food processor.
2. Process until it is grinded. Scrape the sides with spatula.
3. Add olive oil in steady stream while continuing to process using a food processor.
4. Add garlic and grated parmigiano reggiano. Blend until well incorporated.
5. Add salt and pepper to taste.
6. Transfer to a container then set aside
Pasta:
1/2 lb linguine fini
1. Bring a pan of water to a boil. Add salt and oil before adding pasta.
2. Cook according to direction.
3. Save some of the pasta water before draining water from pasta using a colander.
4. Set aside.
Creamy Pesto Sauce with Crispy Prosciutto:
3-4 pieces of prosciutto
1 Tbsp extra virgin olive oil
1/3 cup arugula walnut pesto sauce
2/3 cup heavy cream
1. Heat pan over medium low and add olive oil. Fry prosciutto until crispy then remove from heat and transfer to paper towel lined plate.
2. Discard all but 1 Tbsp of the oil from the same pan where you fried prosciutto.
3. Add pesto sauce and heat gently.
4. When pesto sauce has warmed thoroughly, add cream. Mix well to make sure that pesto is incorporated well into the cream.
5. Simmer for 2 minutes before tossing pasta in. Coat pasta with the sauce.
6. Remove from heat and transfer to a serving dish.
7. Top with crispy prosciutto.
Tuesday, September 13, 2011
Linguine al Nero di Seppia (Squid Ink Linguine)
This my tribute to the recently concluded Korean drama entitled "Scent of a Woman". The main characters met in Japan and had this pasta. I really wanted to make the one with the squid ink sauce but couldn't find any prepared ones. Short of having to collect the squid ink myself, this is a better alternative...hehehe. I may have to order some online though so I could make risotto al nero di seppia (Squid ink risotto) or arroz negro (black rice). The good thing is that I found this newly opened(or so I was told) place at the Farmer's Market in Third and Fairfax that sells squid ink pasta and the guy whom I talked to said that the company who makes the pasta might be releasing a new product, squid ink gnocchi, soon. Oh, that sounds really nice...can't wait for them to carry it.
Ah, the walk through the farmer's market was really nice. I found fresh lemon grass which I could use for another squid recipe that i have in mind. There were also passion fruits which, at $1.98 a piece, was a little too much in my opinion. But then again, that was the first time that I have seen passion fruit in a long time. Maybe I should have gotten some...
In Filipno cuisine, we really don't use squid ink other than leaving the ink sacs when we cook squid adobo. Squid ink is very popular in Italy where they use it in risotto and as ingredient to make squid ink pasta as well as pasta sauces. It is also very popular in Spain particularly Valencia where they use squid ink as an ingredient for arroz negro or black rice. As I have previously stated, this dish uses squid ink pasta instead of using squid ink in the sauce. One advantage of squid ink pasta over the squid ink sauce is not having to deal with blackened teeth as a result of eating the dish...hehehe...not a good food for date night. Although I have to say squid ink pasta is a lot milder than using the ink for the sauce.


Ingredients:
4 oz squid ink linguine
1/2 tsp dried red chili flakes
1 shallot, chopped
3 cloves garlic, chopped
1 medium vine-ripened tomato, cubed 1/2 inch size
a handful of parsley, chopped roughly
10 large shrimps, shelled and deveined with the tail left on
1/2 cup white wine
1 tbsp butter
sea salt and freshly ground black pepper, to taste


1. Cook pasta according to direction. Add salt and oil to the pasta water. Reserve some of the pasta water before draining pasta using a colander.
2. Heat pan over medium heat.
3. Add onion and garlic and saute until fragrant and translucent.
4. Add shrimp and saute until it changes into orange color.
5. Add tomato and mix well(NOTE: the reason I am adding the tomato a little later is because I did not want it to cook too long and breakdown)
6. Add wine and simmer for a couple of minutes.
7. Add salt and pepper, to taste
8. Add pasta and parsley, mix well.
9. Taste and adjust seasoning, if needed. YOu may also add some pasta water if it is too dry.
10. Remove from heat and serve warm.


Ah, the walk through the farmer's market was really nice. I found fresh lemon grass which I could use for another squid recipe that i have in mind. There were also passion fruits which, at $1.98 a piece, was a little too much in my opinion. But then again, that was the first time that I have seen passion fruit in a long time. Maybe I should have gotten some...
In Filipno cuisine, we really don't use squid ink other than leaving the ink sacs when we cook squid adobo. Squid ink is very popular in Italy where they use it in risotto and as ingredient to make squid ink pasta as well as pasta sauces. It is also very popular in Spain particularly Valencia where they use squid ink as an ingredient for arroz negro or black rice. As I have previously stated, this dish uses squid ink pasta instead of using squid ink in the sauce. One advantage of squid ink pasta over the squid ink sauce is not having to deal with blackened teeth as a result of eating the dish...hehehe...not a good food for date night. Although I have to say squid ink pasta is a lot milder than using the ink for the sauce.


Ingredients:
4 oz squid ink linguine
1/2 tsp dried red chili flakes
1 shallot, chopped
3 cloves garlic, chopped
1 medium vine-ripened tomato, cubed 1/2 inch size
a handful of parsley, chopped roughly
10 large shrimps, shelled and deveined with the tail left on
1/2 cup white wine
1 tbsp butter
sea salt and freshly ground black pepper, to taste


1. Cook pasta according to direction. Add salt and oil to the pasta water. Reserve some of the pasta water before draining pasta using a colander.
2. Heat pan over medium heat.
3. Add onion and garlic and saute until fragrant and translucent.
4. Add shrimp and saute until it changes into orange color.
5. Add tomato and mix well(NOTE: the reason I am adding the tomato a little later is because I did not want it to cook too long and breakdown)
6. Add wine and simmer for a couple of minutes.
7. Add salt and pepper, to taste
8. Add pasta and parsley, mix well.
9. Taste and adjust seasoning, if needed. YOu may also add some pasta water if it is too dry.
10. Remove from heat and serve warm.


Wednesday, August 31, 2011
Pandan Panna Cotta with Coconut-Pandan Sauce
Pandan is a widely used flavoring in Asian cooking particularly in Malaysia, Thailand, Indonesia, and the Philippines. It is used as a flavoring for cakes, ice scream, desserts, rice, and even chicken dishes. It has a distinct aroma which makes the dishes fragrant. Typically, one would boil the leaves to extract the flavor and aroma but since it is not readily available in the United States, pandan extract, which is sold in Asian markets, is the next best thing. I got mine from the Thai market nearby. Just one of the many advantages of living in a highly diversified metropolitan area- easy access to ethnic stores and ingredients...hehehe.
The flavor of pandan goes so well with the rich, creamy texture of panna cotta, and the aroma is heavenly. The recipe used in this dish is almost the same as the vanilla panna cotta (with macerated strawberries) except that I substituted vanilla with pandan flavoring. Oh, in case you're curious what that concentrated pandan flavoring taste like, don't attempt to taste it...hehehe...I did it already, blah...it tasted really bitter. Ah, my curiousity sometimes gets me into trouble...
Ingredients:
Panna Cotta:
3/4 cup heavy cream
3/4 cup milk
2 tsp unflavored gelatin
1/4 cup sugar
1/2 tsp pandan extract
few drops of green food coloring
Coconut-Pandan Sauce:
1 cup coconut milk
1/4 cup sugar (or less if you want it less sweet)
1/4 to 1/2 tsp pandan extract
1-2 drops of green food coloring
1. Sprinkle gelatin over milk to soften. Let it stand for about 10-15 minutes.
2. Heat pan over low medium heat. Add Cream and sugar and simmer until sugar is melted. Stir occassionally.
3. Remove cream-sugar mixture from heat. Add gelatin mixture and stir until gelatin is dissolved.
4. Strain mixture uing a fine mesh strainer. Add pandan extract and stir to mix well.
5. Add 2 drops of green food coloring. Mix to see if the color is right. If not, add 1 drop of food coloring at a time until you reached your desired color.
6. Pour into molds or container and let it cool before covering with plastic cover.
7. Refrigerate for at least 4-6 hours or overnight before serving.
The flavor of pandan goes so well with the rich, creamy texture of panna cotta, and the aroma is heavenly. The recipe used in this dish is almost the same as the vanilla panna cotta (with macerated strawberries) except that I substituted vanilla with pandan flavoring. Oh, in case you're curious what that concentrated pandan flavoring taste like, don't attempt to taste it...hehehe...I did it already, blah...it tasted really bitter. Ah, my curiousity sometimes gets me into trouble...
Ingredients:
Panna Cotta:
3/4 cup heavy cream
3/4 cup milk
2 tsp unflavored gelatin
1/4 cup sugar
1/2 tsp pandan extract
few drops of green food coloring
Coconut-Pandan Sauce:
1 cup coconut milk
1/4 cup sugar (or less if you want it less sweet)
1/4 to 1/2 tsp pandan extract
1-2 drops of green food coloring
1. Sprinkle gelatin over milk to soften. Let it stand for about 10-15 minutes.
2. Heat pan over low medium heat. Add Cream and sugar and simmer until sugar is melted. Stir occassionally.
3. Remove cream-sugar mixture from heat. Add gelatin mixture and stir until gelatin is dissolved.
4. Strain mixture uing a fine mesh strainer. Add pandan extract and stir to mix well.
5. Add 2 drops of green food coloring. Mix to see if the color is right. If not, add 1 drop of food coloring at a time until you reached your desired color.
6. Pour into molds or container and let it cool before covering with plastic cover.
7. Refrigerate for at least 4-6 hours or overnight before serving.
Panna Cotta with Macerated Strawberries
I love panna cotta. They're rich, creamy and oh-so-yummy. I have forgotten about this dessert until yesterday when I opened my refrigerator and found a box of whipping cream. Hmmm, what to make,I thought to myself. I was thinking of making cathedral windows but that's too much work because I had to make several batches of gelatin squares using different colors. Then I thought of panna cotta which is easy enough to make but really delish...
Panna cotta is Italian in origin. This dessert is made by mixing sugar, cream, milk, and unflavored gelatin which is allowed to cool until it is set. It can be topped with berries and different sauces (chocolate, wines, fruits) or flavored with different flavorings such as vanilla and cinnamon. In my opinion, the possibility for panna cotta flavors is endless and one is only limited by one's imagination.
Ingredients:
Panna Cottta:
2 tsp unflavored gelatin
1/2 cup milk
1 cup heavy cream
1/4 cup sugar
1 tsp vanilla extract
Topping:
1/2 cup thinly sliced strawberry
1 Tbssp sugar
1. Sprinkle gelatin over milk and let it soften for about 10 minutes
2. Heat a pan over medium low heat. Add cream and sugar. Simmer (do not boil) until sugar is dissolved, stirring occassionally.
3. Remove from heat and stir in vanilla and gelatin mixture. Mix until gelatin is dissolved completely.
4. Strain the panna cotta mixture and pour into ramekins. Let it cool before covering ramekins with plastic wrap.
5. Refrigerate for at least 4 hours, preferably overnight.
6. Topping: slice strawberries thinly and sprinkle sugar on top. Mix well and refrigerate for 30 minutes.
7. To umold: place ramekins in warm water bath for about 30 secons to 1 minute. Remove from water bath and wipe the outside of ramekins dry. Invert into a serving dish. Top with macerated strawberries and serve.
NOTE: If you are having a hard time unmolding after placing ramekins in warm bath, run a thin knife on the insides of the ramekins to loosen panna cotta. You can also shake the ramekins a little bit while unmolding.
Labels:
dessert,
fruits,
Italian,
panna cotta,
strawberries
Friday, August 26, 2011
Tomato and Goat Cheese Calzone
Calzone is basically a pastry that is made out of pizza dough with the topping placed inside and shaped into half moons. They are really handy to take when you are eating on the go for convenience as well as they are filling and delicious. I got the idea of making this when I found the recipes for no knead pizza doung fron Steamy kitchen's blog. These babies are really easy to make and you can fill it with any of you favorite pizza topping and sauce.
Ingredients:
1 baseball size No-Knead Pizza Dough (recipe here)
8 oz. canned diced tomatoes, drained
a handful of Italian parsley
goat cheese
olive oil for brushing on top of calzone
1. Pinch a baseball sized No-Knead Pizza Dough. In a lightly floured surface, roll the dough into a ball and covere with plastic wrap. Let it come to room temperature for about 20-30 minutes.
2. 20 minutes before baking, preheat oven and baking pan to 400F.
3. After the dough has softened a little bit, divide it in half and roll out into approximately 8 inch circle.
3. On one side of the dough, arrange your filling: tomato, parsley, goat cheese.
4. fold the other half over and seal well. You may use water to moisten the edge and make it stick better. Or, you can use a fork to seal edges.
5. Place calzone on the hot baking pan. Paint top with olive oil and bake for about 20 minutes or until golden brown.
NOTE: Be careful when taking the hot baking pan from the oven.
6. After it has finished cooking, take it out of the oven, paint with more olive oil and serve immediately.
WARNING: be careful not to burn your mouth as the filling will be very hot.
Ingredients:
1 baseball size No-Knead Pizza Dough (recipe here)
8 oz. canned diced tomatoes, drained
a handful of Italian parsley
goat cheese
olive oil for brushing on top of calzone
1. Pinch a baseball sized No-Knead Pizza Dough. In a lightly floured surface, roll the dough into a ball and covere with plastic wrap. Let it come to room temperature for about 20-30 minutes.
2. 20 minutes before baking, preheat oven and baking pan to 400F.
3. After the dough has softened a little bit, divide it in half and roll out into approximately 8 inch circle.
3. On one side of the dough, arrange your filling: tomato, parsley, goat cheese.
4. fold the other half over and seal well. You may use water to moisten the edge and make it stick better. Or, you can use a fork to seal edges.
5. Place calzone on the hot baking pan. Paint top with olive oil and bake for about 20 minutes or until golden brown.
NOTE: Be careful when taking the hot baking pan from the oven.
6. After it has finished cooking, take it out of the oven, paint with more olive oil and serve immediately.
WARNING: be careful not to burn your mouth as the filling will be very hot.
Labels:
baked goods,
calzone,
cheese,
Italian,
rustic pizza,
tomato
Wednesday, August 17, 2011
Pasta With Sardines, Bread Crumbs and Capers
I bought 2 cans of sardines in oil when I went grocery shopping for my tuyo pasta recipe which I meant to substitute for tuyo in case I couldn't find one. But, as luck would have it, I found a bottle from another Filipino store that I went to. Now, I have this sardine cans but no idea what to make it into so I searched the net for recipes and found one that interested me. This recipe is based from New York Times website recipe which I changed a little bit. I used Moroccan spiced sardines in olive oil instead of sardines in extra virgin olive oil.
Ingredients:
1/4 cup extra virgin olive oil
1/2 cup bread crumbs
1 onion, chopped
Freshly ground black pepper and salt, to taste
1 lb linguine fini
1 teaspoon grated lemon zest
2 tablespoons drained capers
2 cans moroccan spiced sardines
1/2 cup chopped fresh flat leaf (Italian) parsley, plus more for garnish.
1. Bring a large pot of water to a boil and salt it. Cook pasta according to direction. Save some of the pasta water. Drain and set aside.
2. Put 2 tablespoons of olive oil in a medium skillet over medium heat. When it’s hot, add the bread crumbs and cook, stirring frequently, until golden and fragrant. Transfer to a bowl and set aside.
3. Add the remaining oil and the onion to the pan, sprinkle with salt and pepper. Cook until onion is translucent.
4. Turn the heat to medium-high and add the lemon zest, capers and sardines. Cook until heated through.
5. Add the pasta to the sardine mixture and toss to combine.
6. Add the parsley and most of the bread crumbs. Mix well.
7. Taste and adjust seasoning. Transfer to a serving dish. Garnish with parsley and the remaining bread crumbs.
Yield: 4 to 6 servings.
Ingredients:
1/4 cup extra virgin olive oil
1/2 cup bread crumbs
1 onion, chopped
Freshly ground black pepper and salt, to taste
1 lb linguine fini
1 teaspoon grated lemon zest
2 tablespoons drained capers
2 cans moroccan spiced sardines
1/2 cup chopped fresh flat leaf (Italian) parsley, plus more for garnish.
1. Bring a large pot of water to a boil and salt it. Cook pasta according to direction. Save some of the pasta water. Drain and set aside.
2. Put 2 tablespoons of olive oil in a medium skillet over medium heat. When it’s hot, add the bread crumbs and cook, stirring frequently, until golden and fragrant. Transfer to a bowl and set aside.
3. Add the remaining oil and the onion to the pan, sprinkle with salt and pepper. Cook until onion is translucent.
4. Turn the heat to medium-high and add the lemon zest, capers and sardines. Cook until heated through.
5. Add the pasta to the sardine mixture and toss to combine.
6. Add the parsley and most of the bread crumbs. Mix well.
7. Taste and adjust seasoning. Transfer to a serving dish. Garnish with parsley and the remaining bread crumbs.
Yield: 4 to 6 servings.
Subscribe to:
Posts (Atom)